
Mediafly allows users to collaborate when working on items and workspaces allowing users to have shared access and permissions in an item or workspace. This allows teams to constantly update items and workspaces where in each member can make their own contributions to the item or workspaces.
If an item or workspace is being collaborated, all users have access to the item and any changes applied by any user to the item is changed. Since items in the "My Items" folder are outside of the content permission hierarchy set up by admin, collaborating automatically grants permission to items in a user's 'My Items' folder so you don't have to change permissions any time you wish to collaborate.
Jump to:
Creating an Item Collaboration
Working with Collaborated Items
Creating a Workspace Collaboration
Creating an Item Collaboration
Creating a collaboration on an item can be done in two ways. Users may set it through Viewer, or through Airship.
Through Viewer
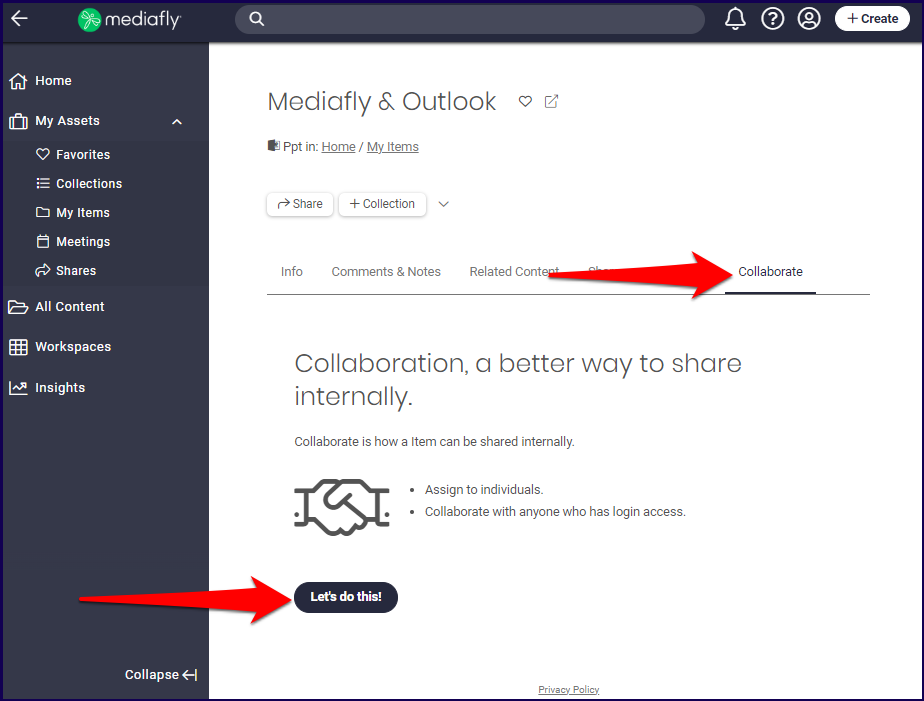
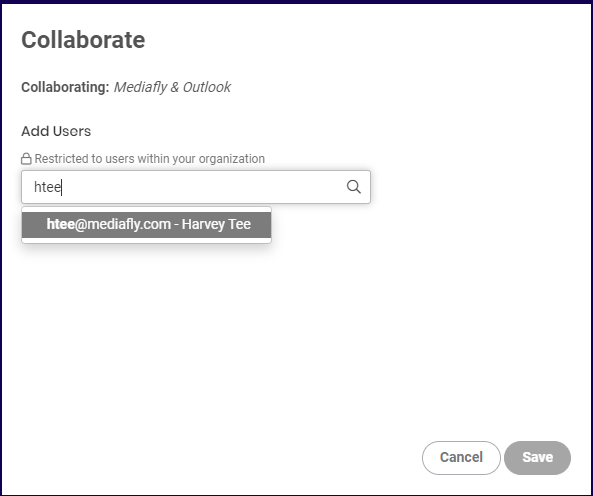
1. Access the item that you want to create a collaboration on. In the item details page, click on the Collaborate tab. Select the Let's do this! button.
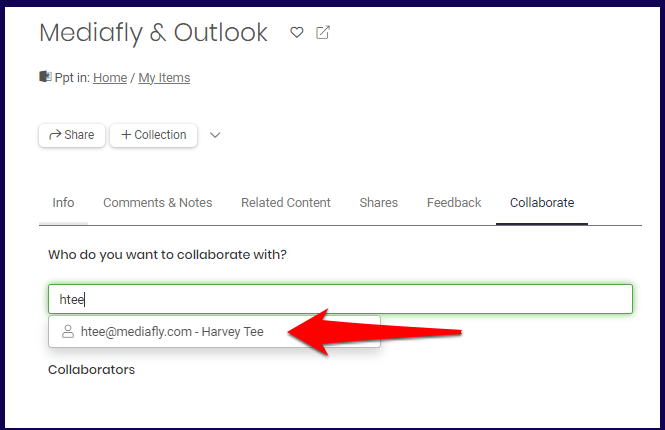
2. Enter the email of the user or users with whom you want to collaborate.
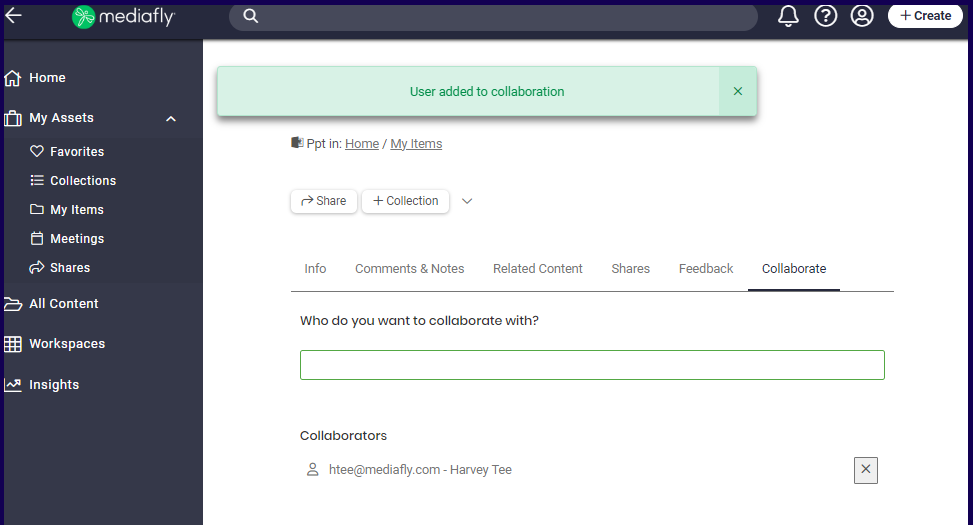
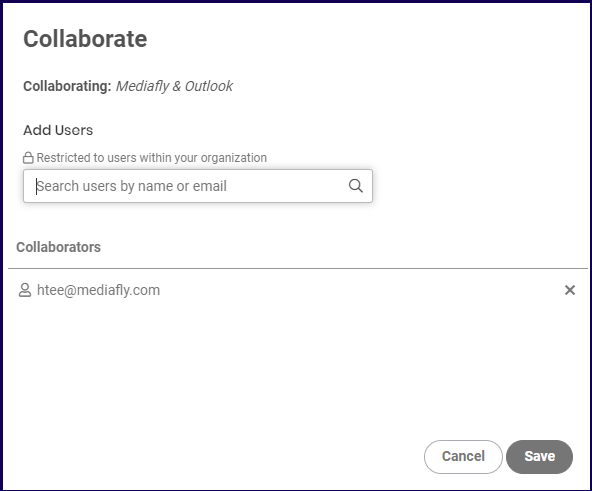
3. Once selected, the user(s) are added on the list, you can add as many collaborators as needed. To remove a user from the list, click on the x button next to their information.
Through Airship
Setting up a collaboration may also be done through the Content Manager.
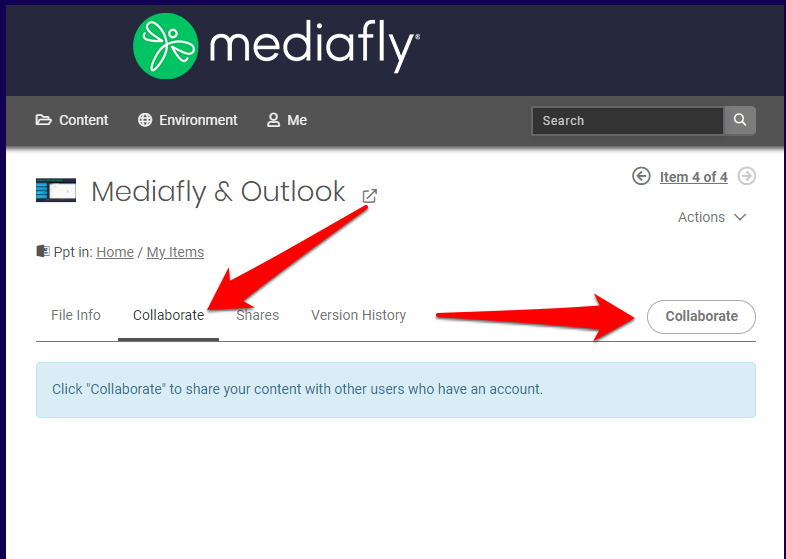
1. Access the item that you want to create a collaboration on. In the item details page, click on the Collaborate tab. Select the Collaborate button.
2. Enter the email of the user or users with whom you want to collaborate, then click save.
3. Once selected, the user(s) are added on the list, you can add as many collaborators as needed. To remove a user from the list, click on the x button next to their information.
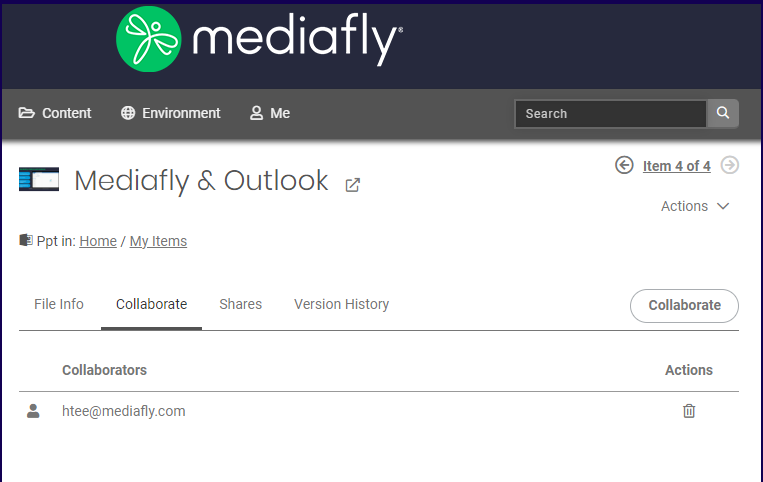
Note: You can remove a from the list in the Collaborate tab as well by clicking on the Trash button next to their information.
Working with Collaborated Items
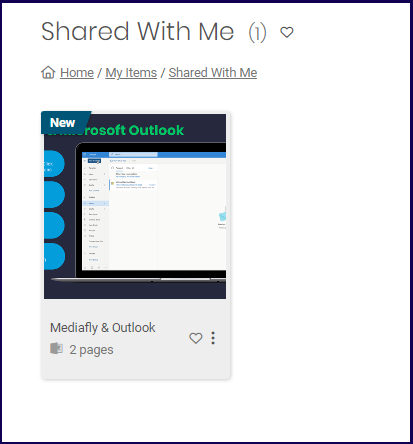
Once an item is shared, the user will see the items in the Shared With Me folder in My Items. Any changes into these items, either by the original creator, or those who have been added for collaboration will be applied to the item for everyone with which this item has been shared.
Note:
- If any user deletes the file, the item is deleted for all users.
- Once the file has been shared, collaborators may choose to move the item out of the "Shared with Me" folder. Any changes made to the item after moving out is still applied.
Creating a Workspace Collaboration
Collaboration can also be used when creating and maintaining a Workspace.
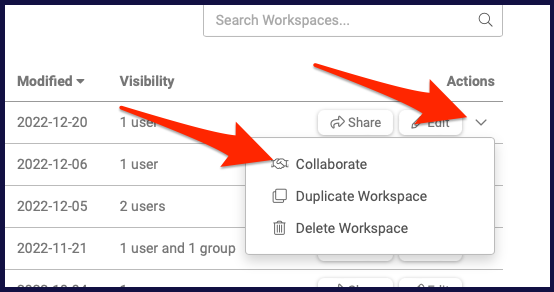
1. In the workspace list, click the actions dropdown button next to your desired workspace and select Collaborate.
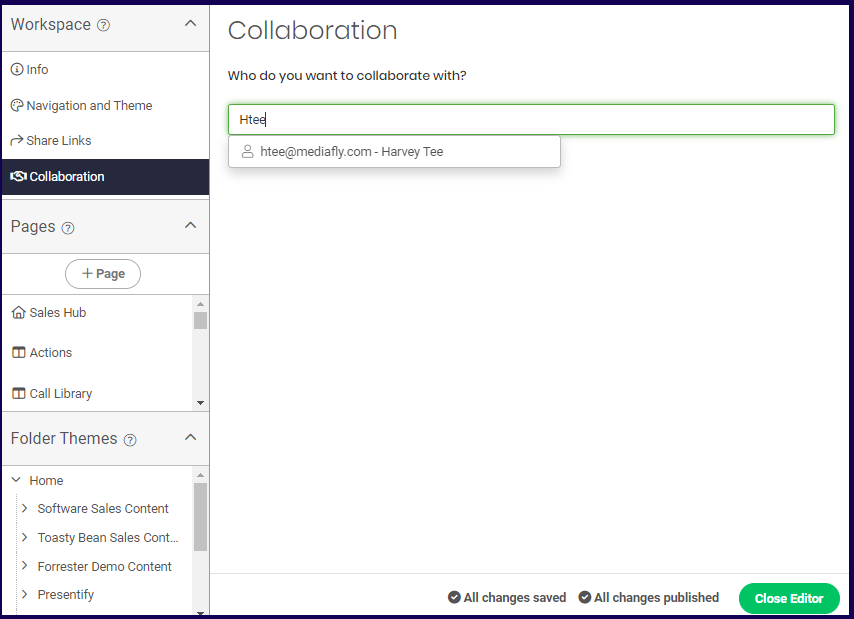
2. Enter the email of the user or users with whom you want to collaborate.
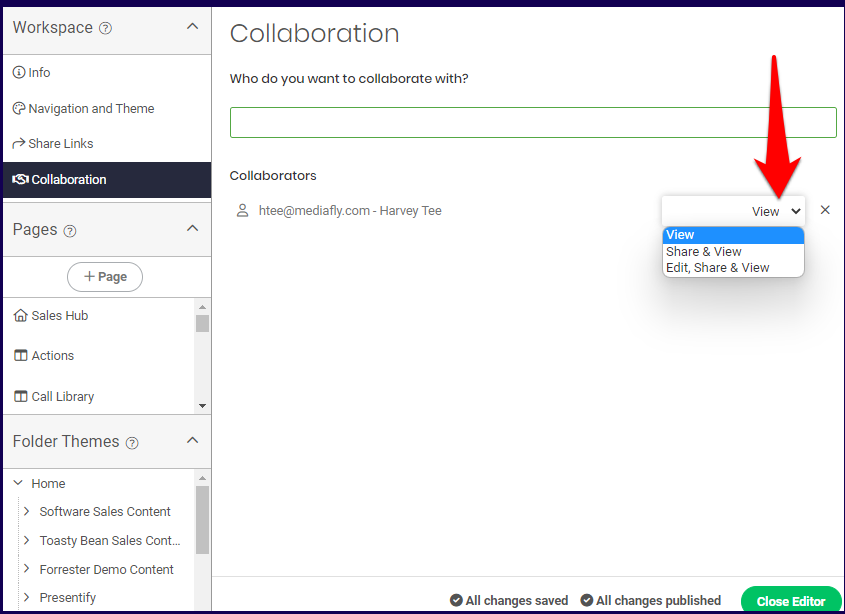
3. Each collaborators can be assigned specific permissions on their access. Collaborators can be assigned the following permission:
- View- Collaborators can view the workspace
- Share & View- Collaborators can view and share the workspace
- Edit, Share, & View- Collaborators can view , share and are given full editing permissions on the workspace.
4. You may also set groups as part of the Collaboration team. All users in the group is added into the collaboration and will have the permissions assigned to them.

Replies have been locked on this page!