
Workspaces allow you to add banners that appeal to your content and brand. Creating a banner offers you the opportunity to establish a viewer's first impression and customize it fit your content.
Creating a Banner
-
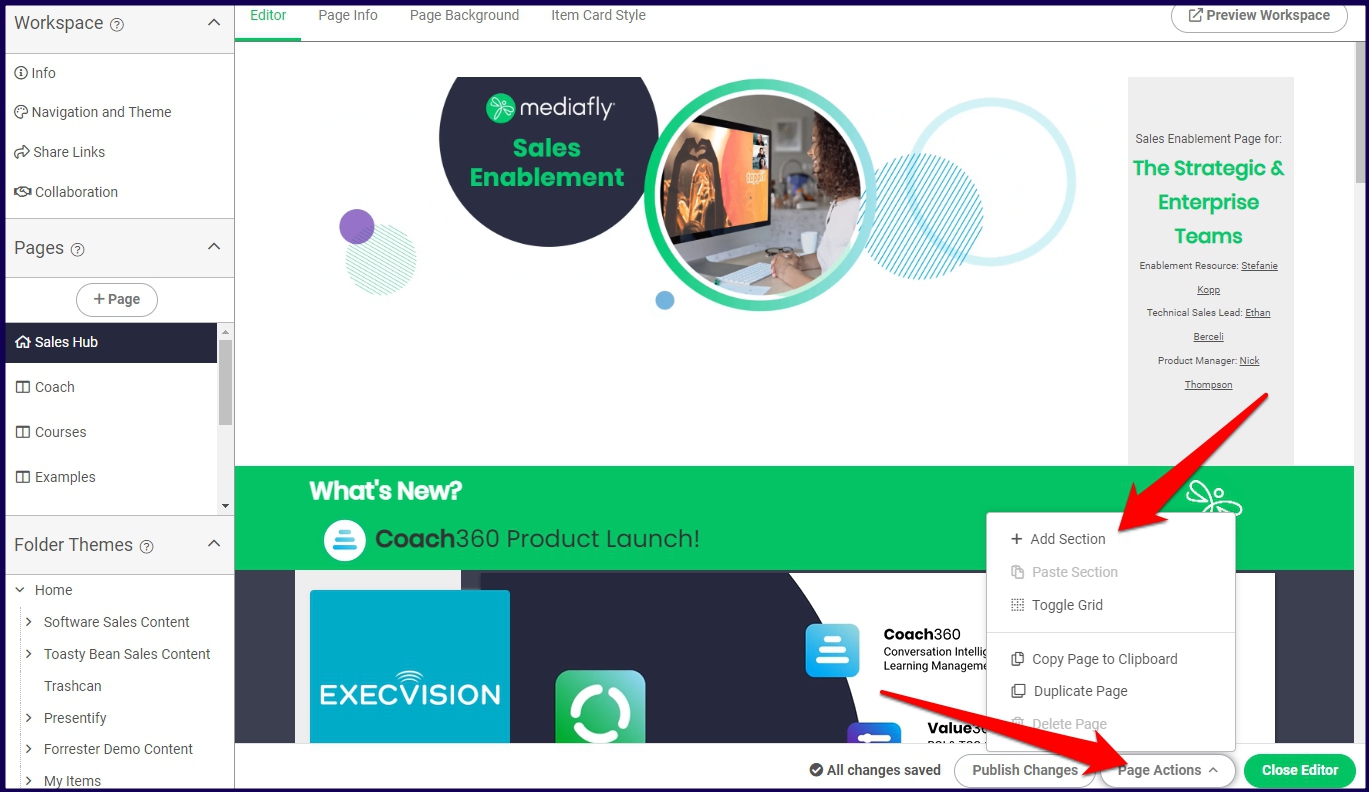
In the workspace editor, click on the Page Actions button and select Add section.
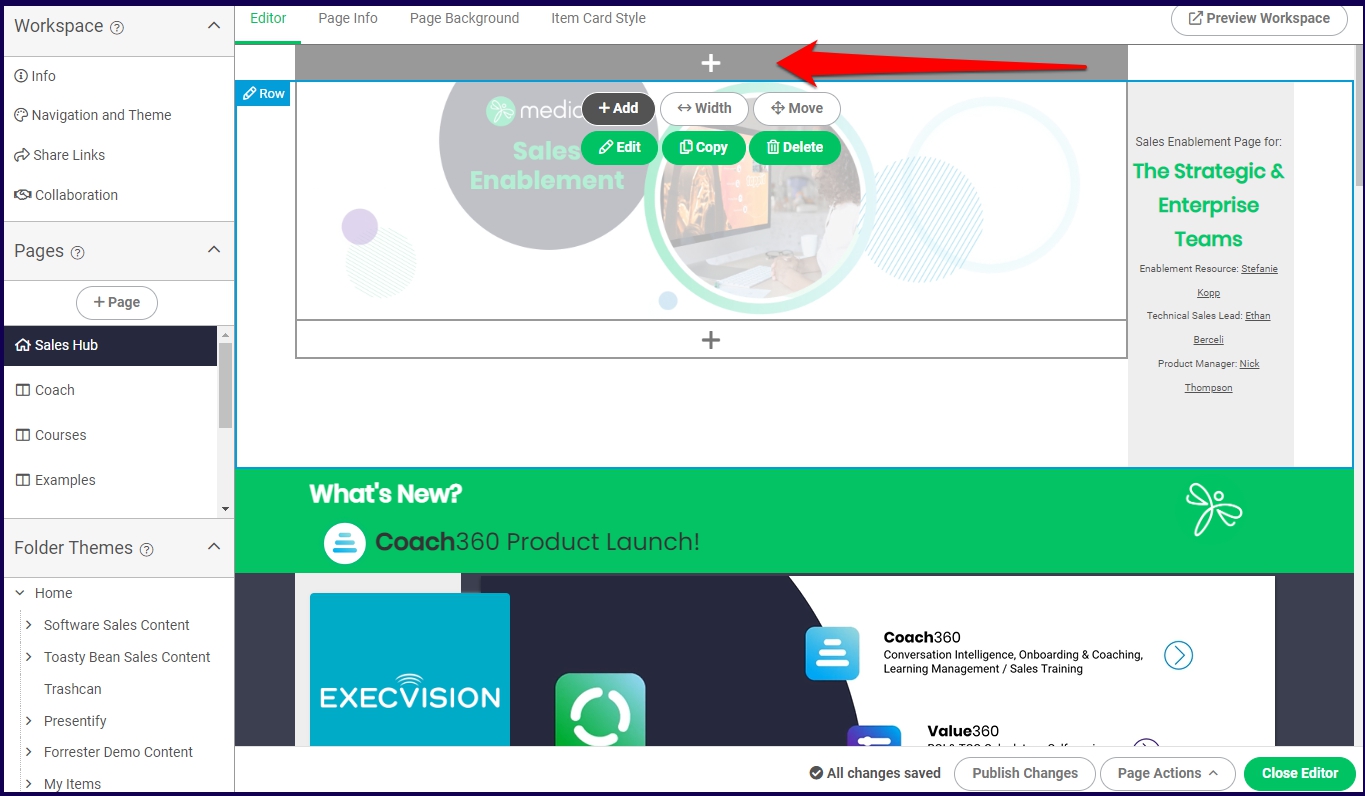
If you want to add a banner on a Workspace with existing content, click on the '+' button in the direction or location of where you want to put the banner. In this example, I am adding a Banner above the uppermost existing content.
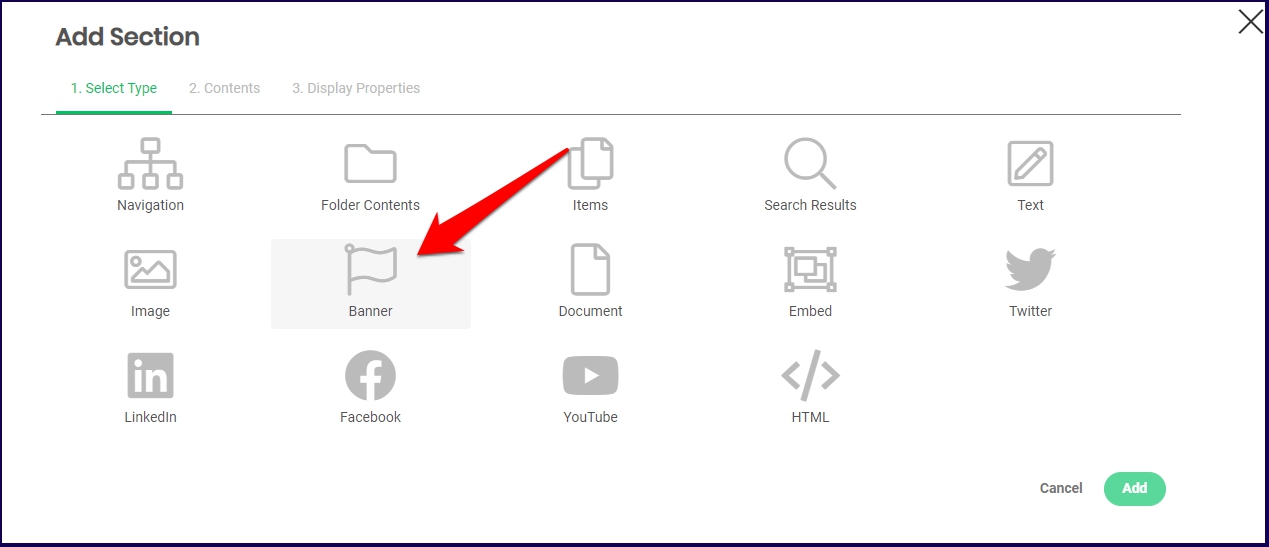
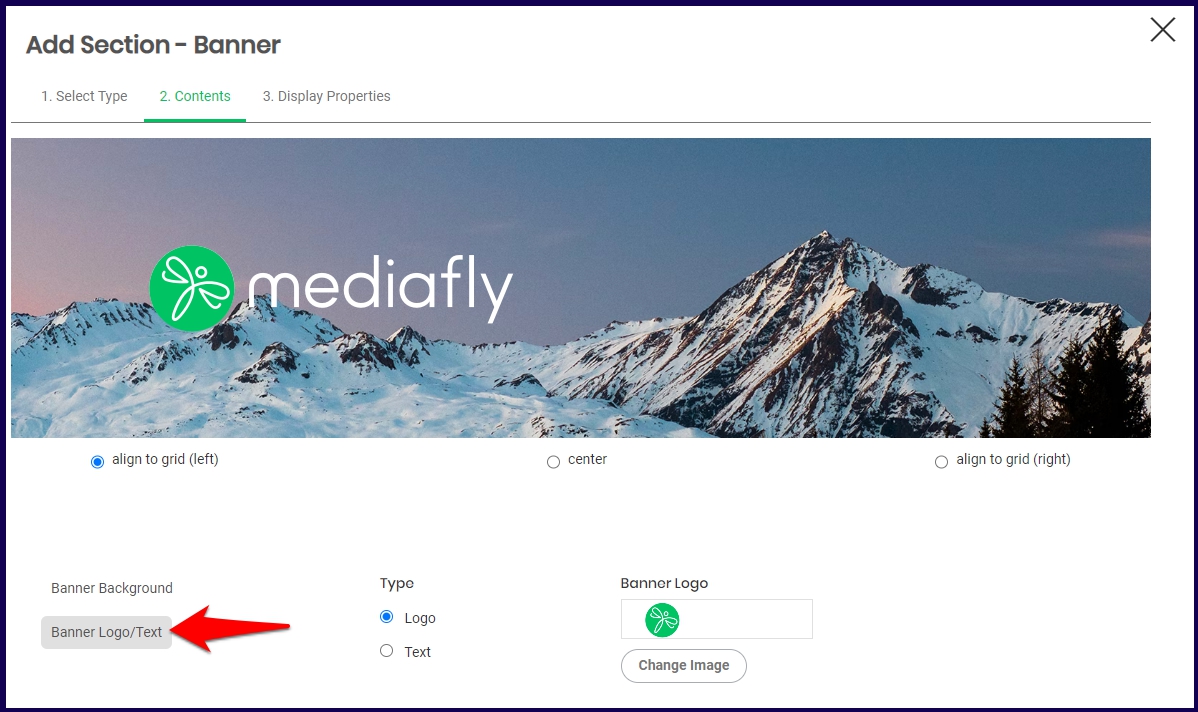
- In the Add Section window, select Banner under the Select Type tab.
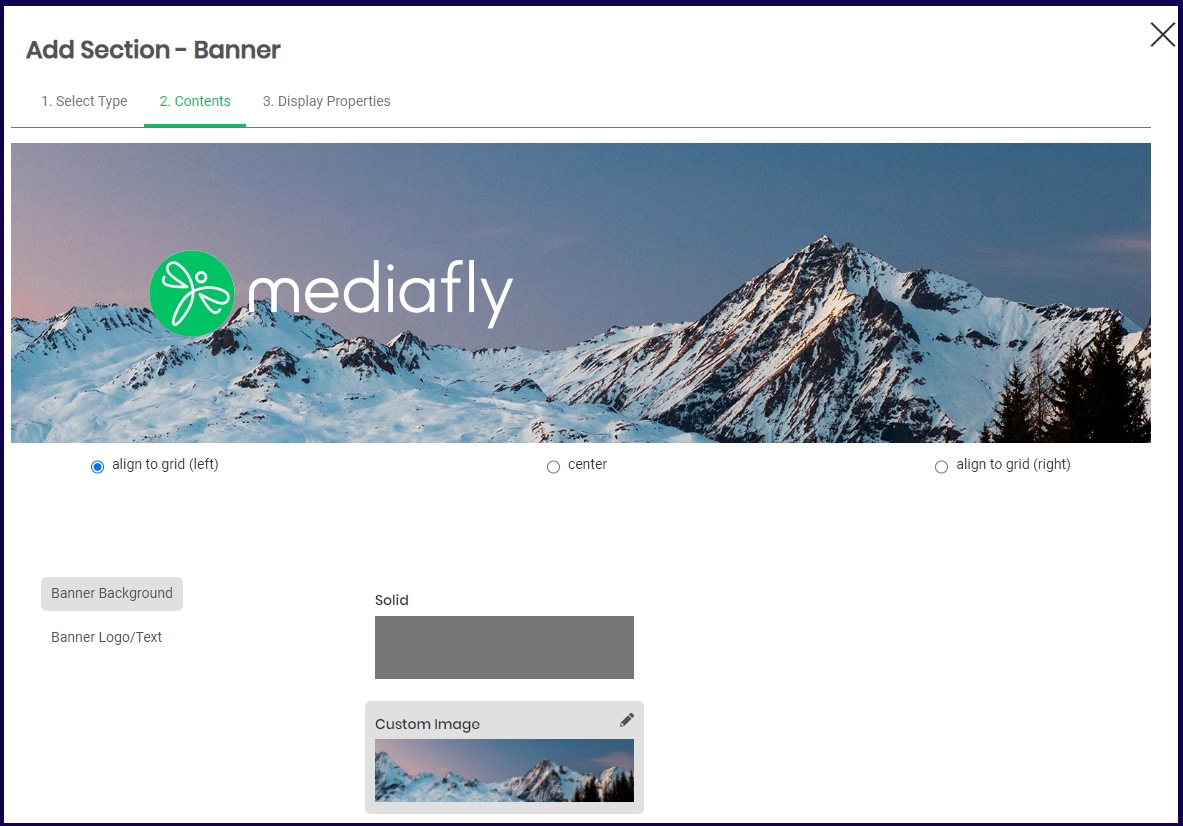
- In the Contents tab, design the background of the banner. You have the options to select a solid color or to upload a custom image by clicking the pencil button and selecting an image.
- Select Banner Logo/Text to add a logo or input text for the banner. In this example, I am using a custom image for the Mediafly logo. Once a logo or text is inserted, you can then choose to align the logo or text left, center, or right within the banner.
-
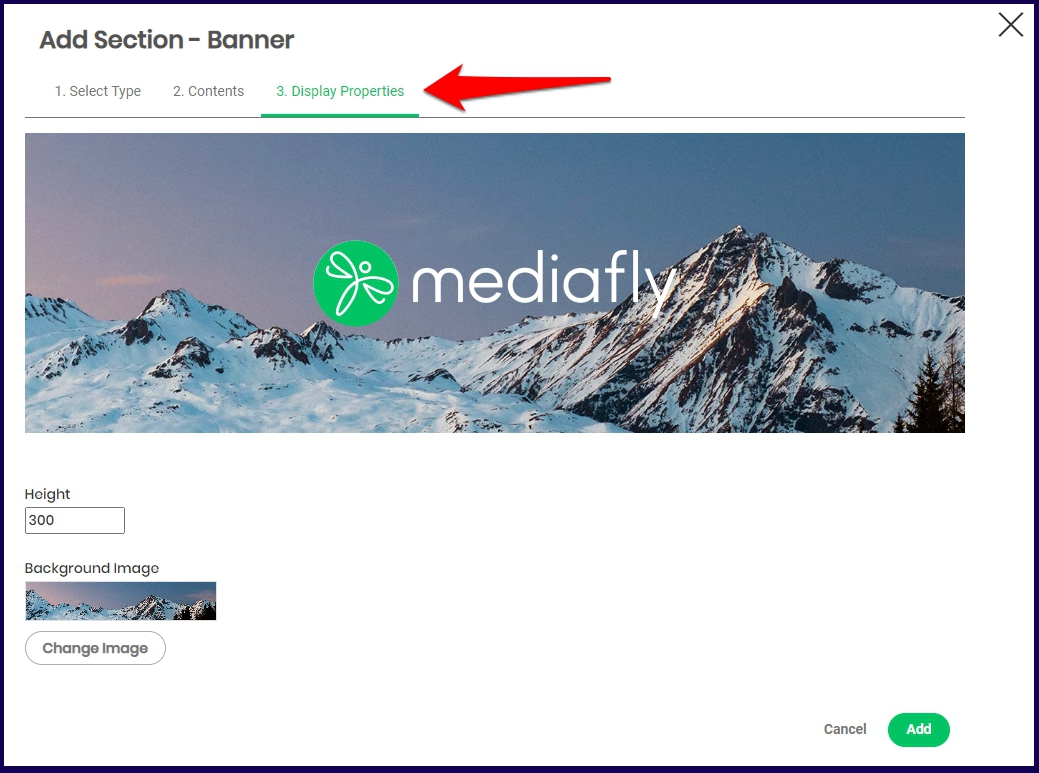
Optional: Click on Display Properties to define additional specifications of the banner.
Note:
- Mediafly will automatically scale banner images to meet the width of the screen and match the selected height you configure.
- Please ensure you provide an image wide enough for larger monitors at higher resolutions (suggestion 2000px or more for a default height of 300 px), and if your image appears distorted, increase the width to height ratio.
- Click Add.
If you run into any issues, please contact support.
Replies have been locked on this page!