
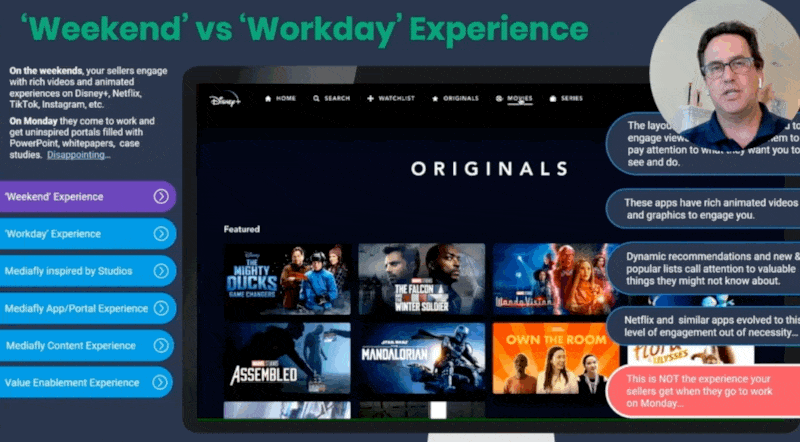
Screen Recording* is an interactive feature that allows users to record videos of themselves to provide personalized context on sales, marketing, demo, and training content. Instead of sending stagnant content to customers, prospects, partners, and employees, Mediafly users can combine a pre-recorded video vignette with content to provide personalized, conversational presentations without long email explanations or additional calls.
Seamlessly produce video voiceovers of presentations to deliver:
- Interactive proposal walk-throughs
- Value analysis reports
- Product demos buyers can consume on-demand
- Sales trainings for their teams, streamline onboarding and accelerating ramp times for new reps
After finalizing these videos, Mediafly customers can share them via their Mediafly sales applications and track their performance using Mediafly Insights content usage and consumption analytics.
Getting Started
Screen Recording is currently supported on Chrome and Brave browsers. Hardware acceleration must be enabled in your browser settings before you begin recording in order to maintain quality.
Stay up to date on Screen Recording updates by subscribing to Mediafly Changes.
- Creating your first Screen Recording
- Setting up your Screen Recording
- Recording your Screen Recording
- Adding additional Scenes to your Screen Recording
- Saving your new Screen Recording
- Viewing and sharing your Screen Recording
- Screen Recording Troubleshooting
Creating your first Screen Recording
Login to Mediafly
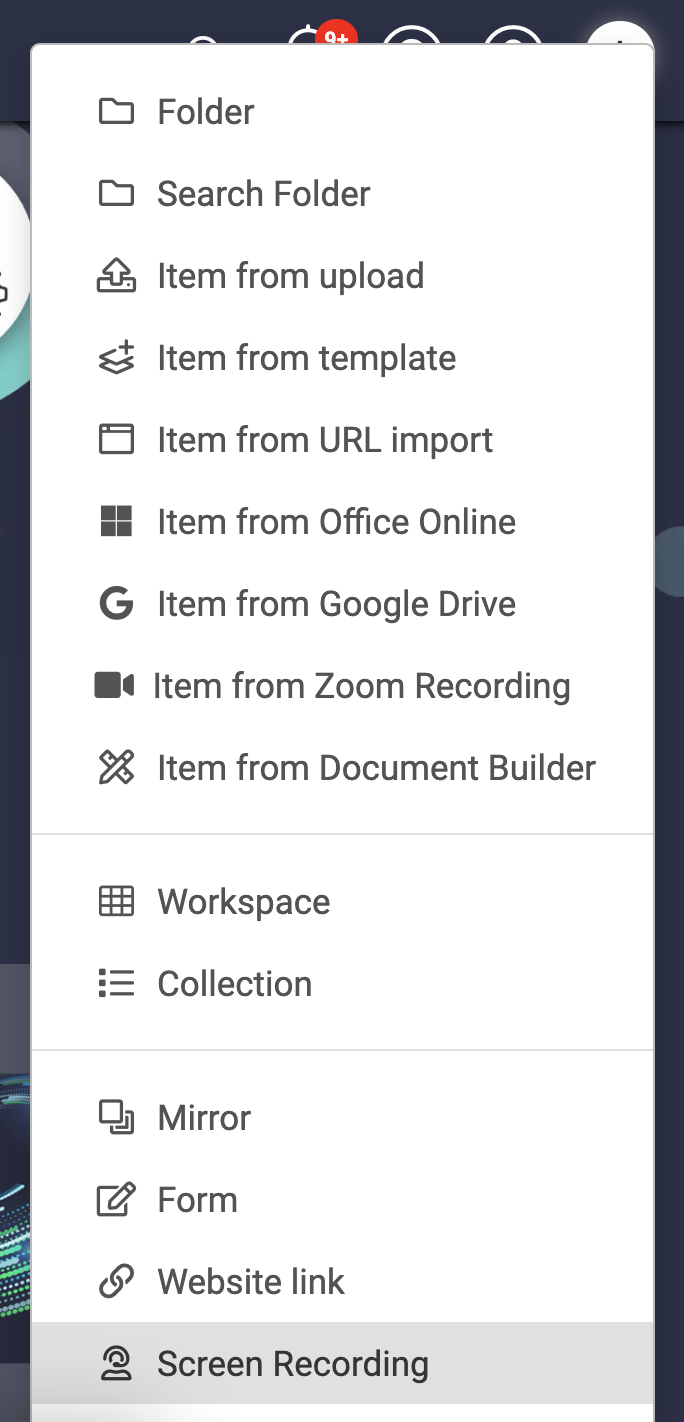
Click + Create then Screen Recording from the dropdown
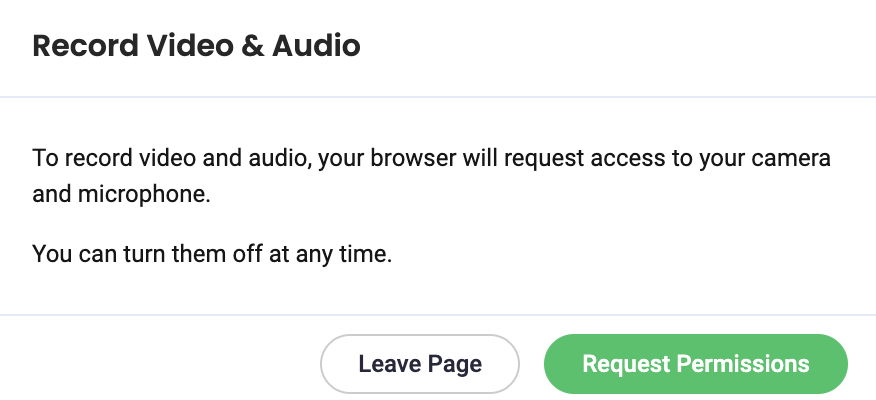
Click Request Permissions from the pop up to allow Screen Recording to record video and audio
Setting up your Screen Recording
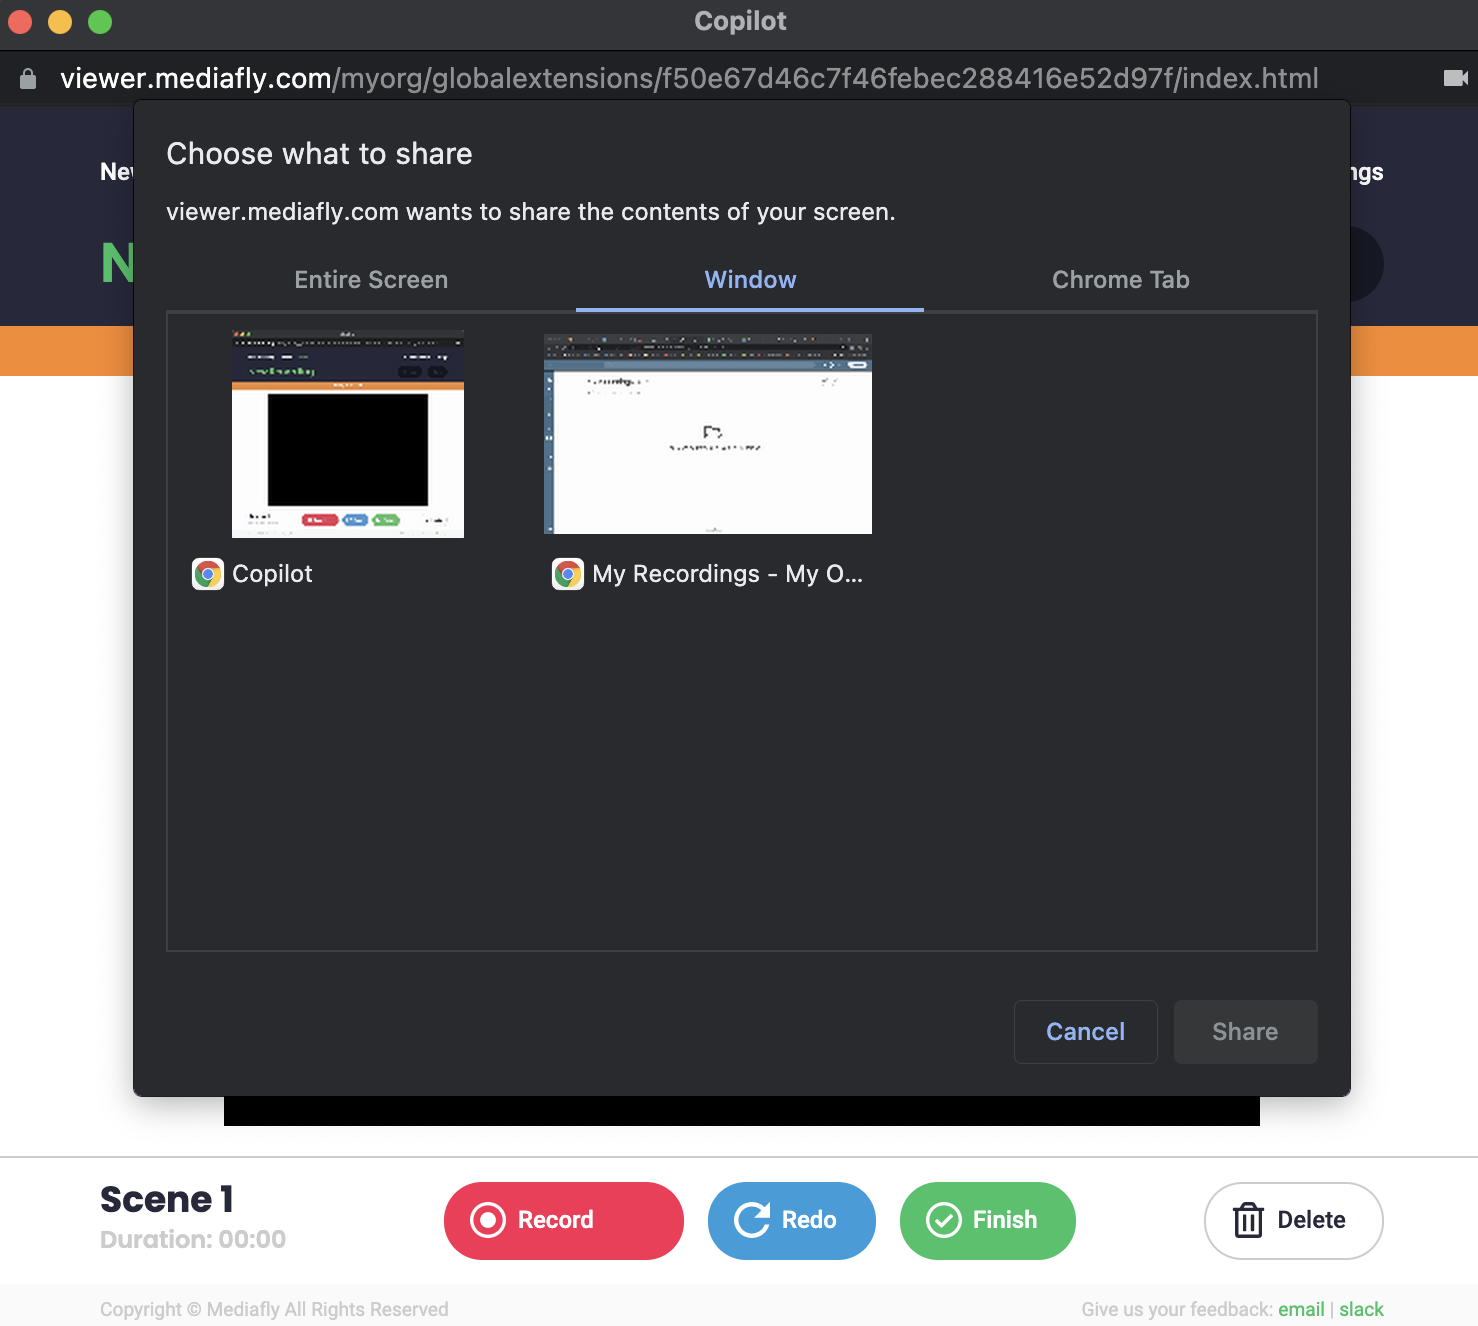
Select the screen, window or tab that you would like to record then click Share
Next, verify the video and audio devices for recording, ensure your audio is working, then select Continue
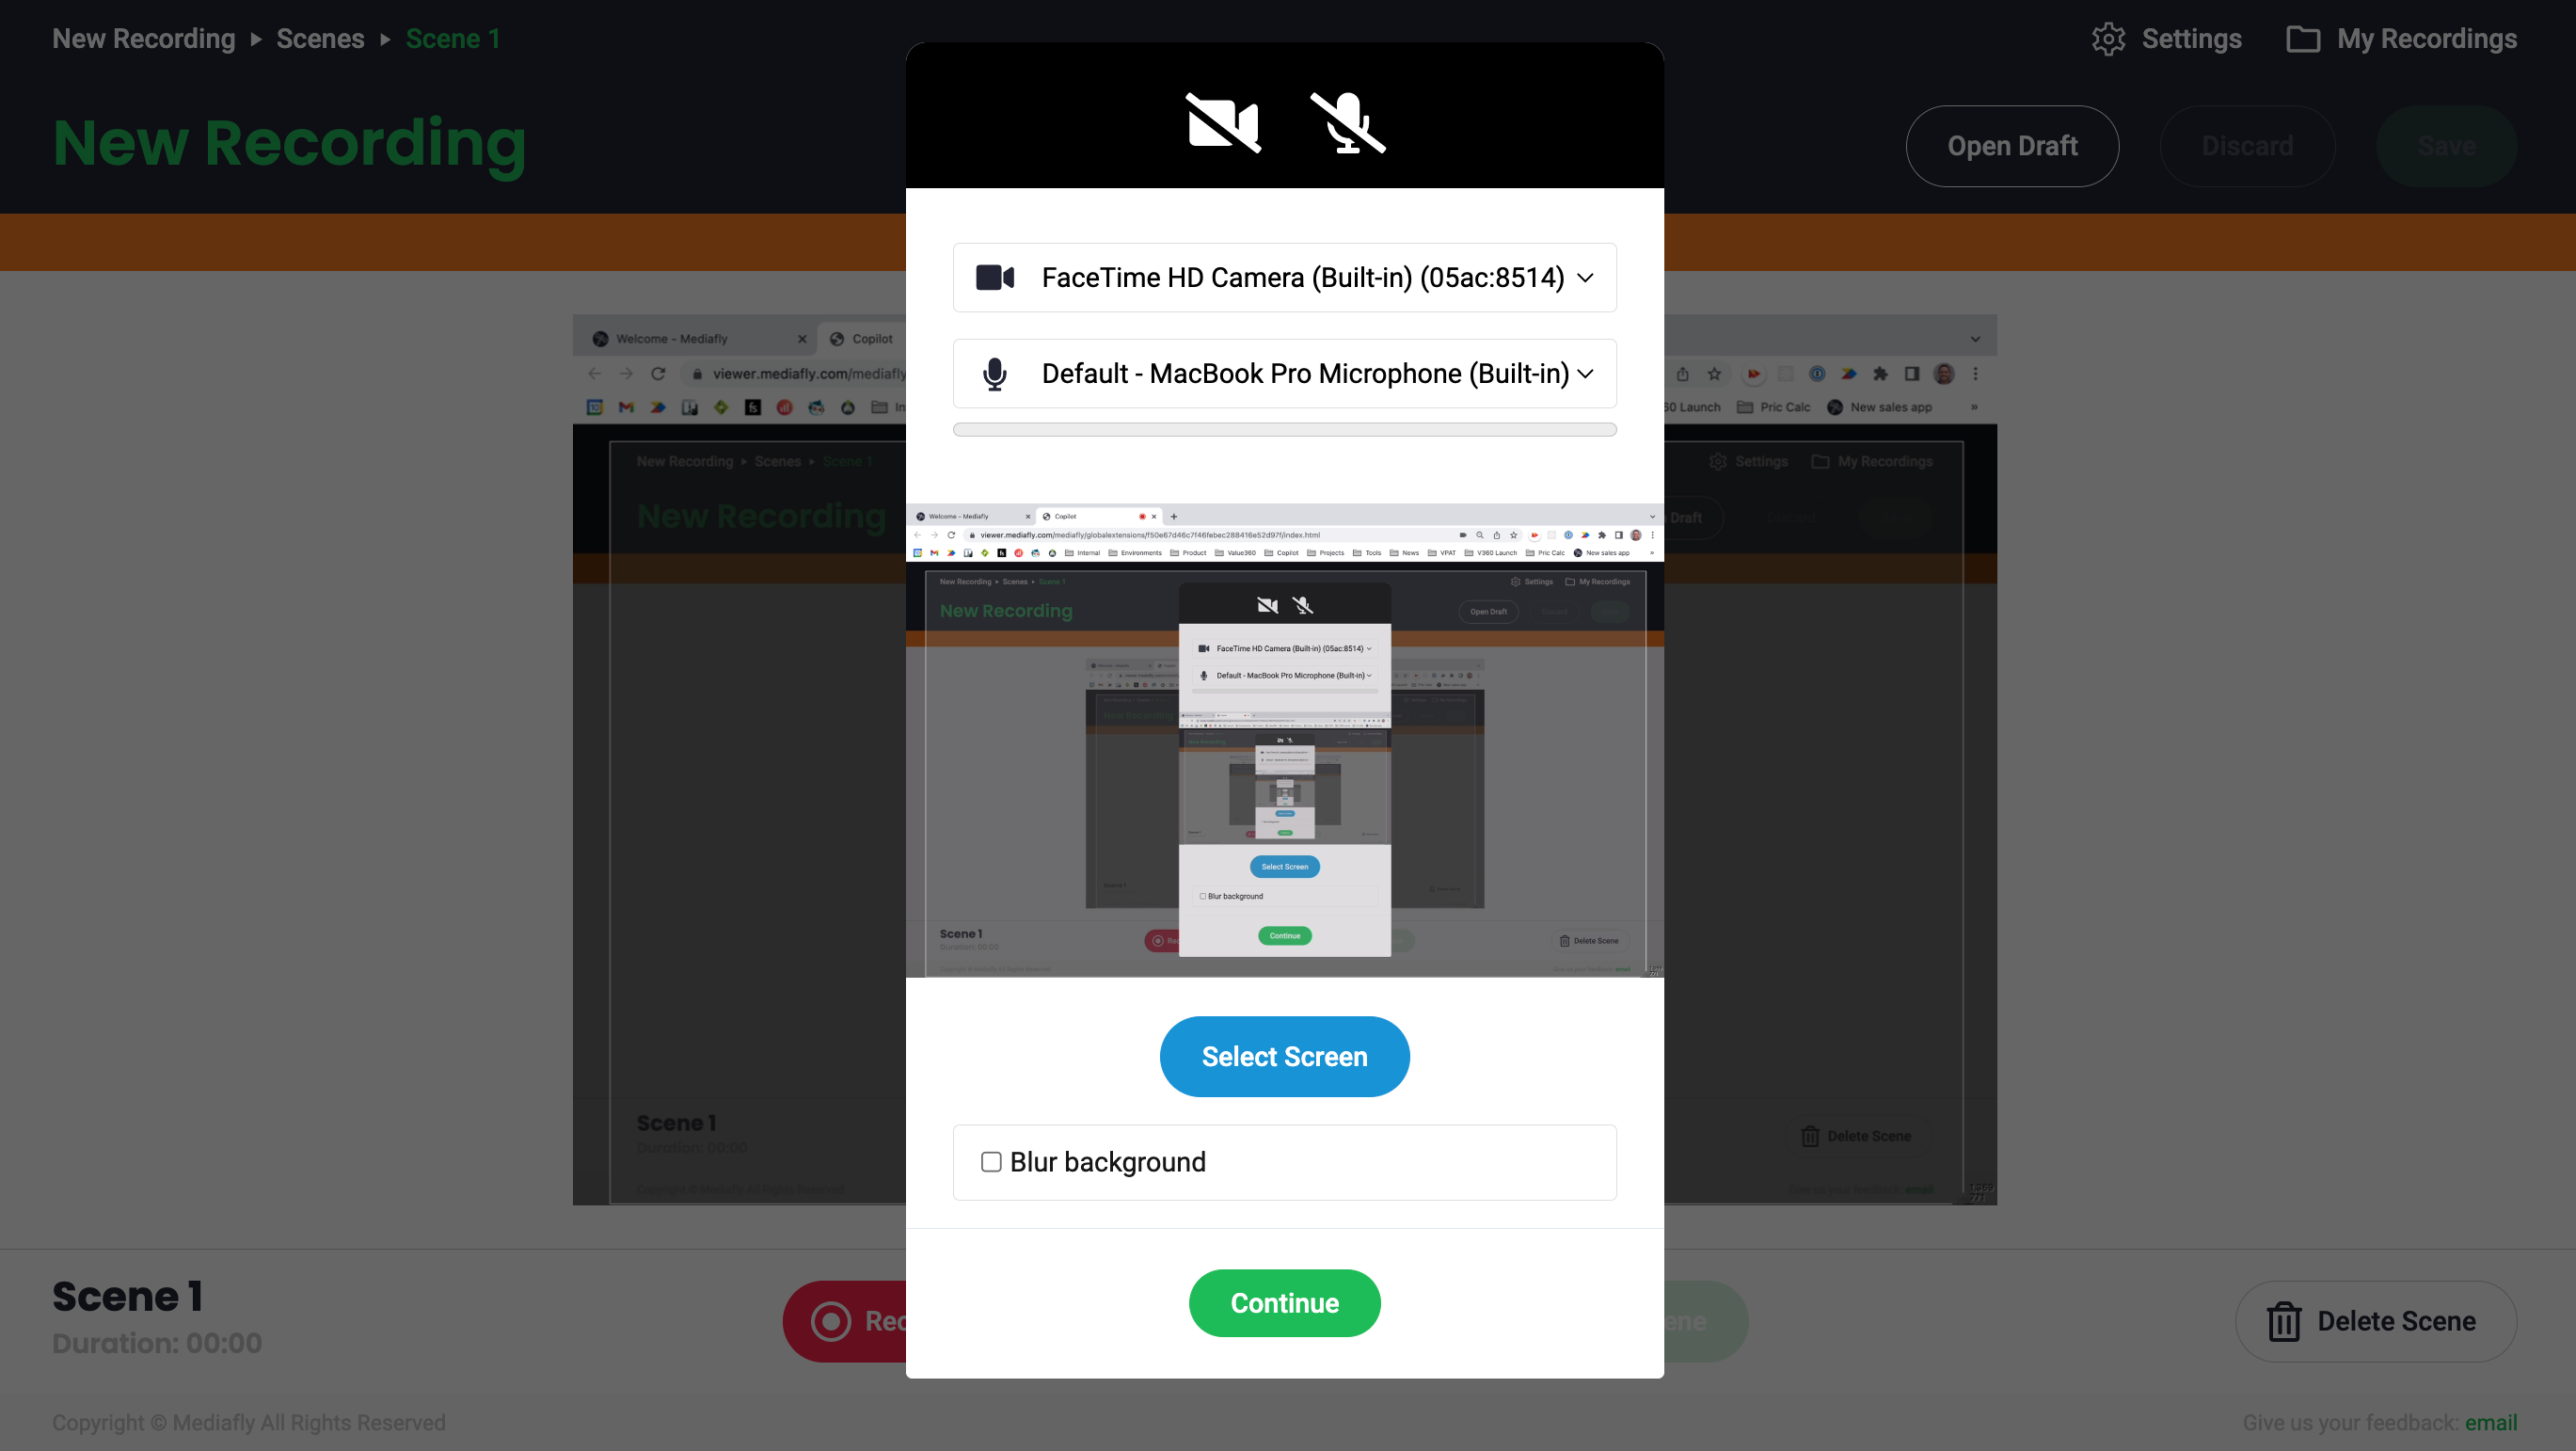
Now your screen, audio and video are ready to record your first scene.
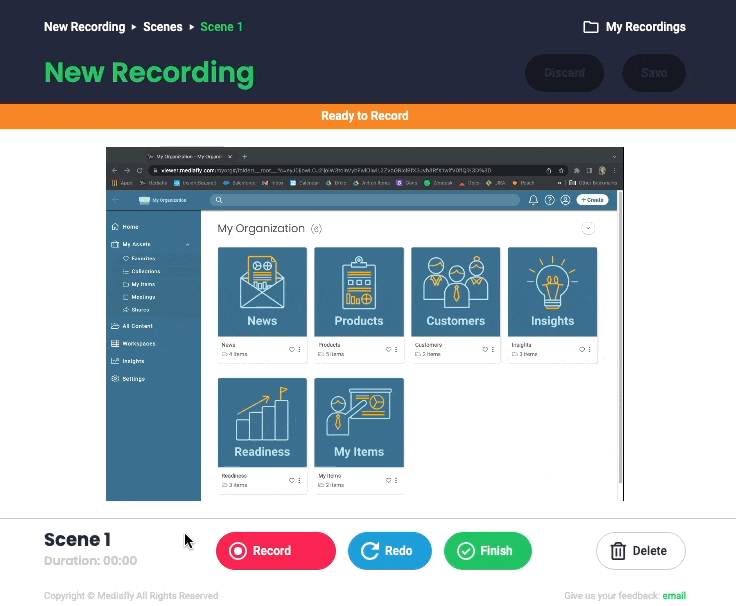
Recording your first Screen Recording Scene
Click Record to begin recording your Screen Recording presentation, a 3-second countdown will show
Your selected screen, audio and video will begin to record
Click Pause to temporarily stop the recording
If needed use the following actions
- Continue: pickup where you left off and continue your recording
- Redo: delete the recorded content and start again
- Finish: save Scene and return to menu to add more Scenes
- Delete: delete Scene and return to menu to start current Screen Recording again
- Discard: delete entire Screen Recording and exit without saving
- Save: once you are satisfied with your recording, save Screen Recording, name the recording and exit
Tip! Click and drag your video circle to other areas on the screen to place the your ideal location
Adding additional Scenes to your Screen Recording
Include more Scenes in your Screen Recording by selecting Record New button and recording a new Scene. The Scenes will be listed on the left menu as they are created. Scenes can be renamed, deleted or redone.
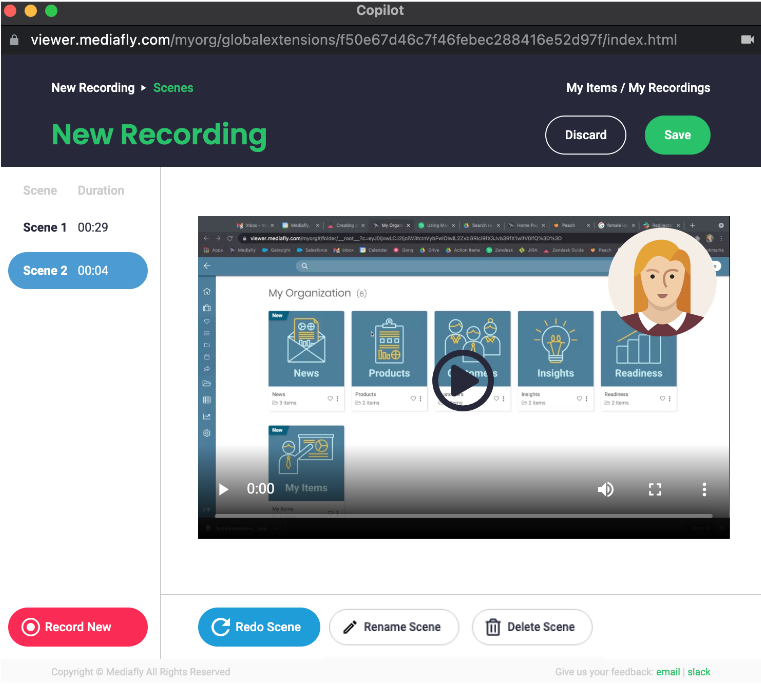
Tip! Scenes can be renamed by selecting the scene and clicking Rename Scene.
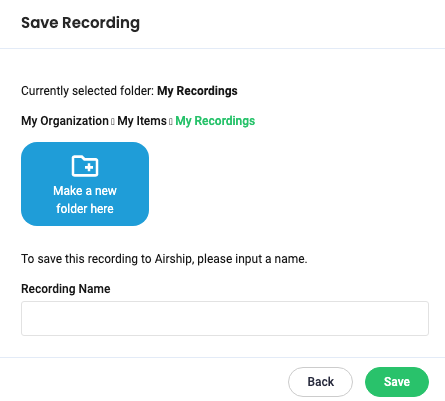
Saving your new Screen Recording
Once you record all your desired Scenes, select Save on the top right of the Screen Recording window
Give your recording a name and assign any relevant keywords (searchable in viewer)
Adjust your Thumbnail image (optional) by selecting a point in the recording and hitting Take Screenshot
Make a new folder to store your new Screen Recording (optional)
Enter a name for the Recording and select Save
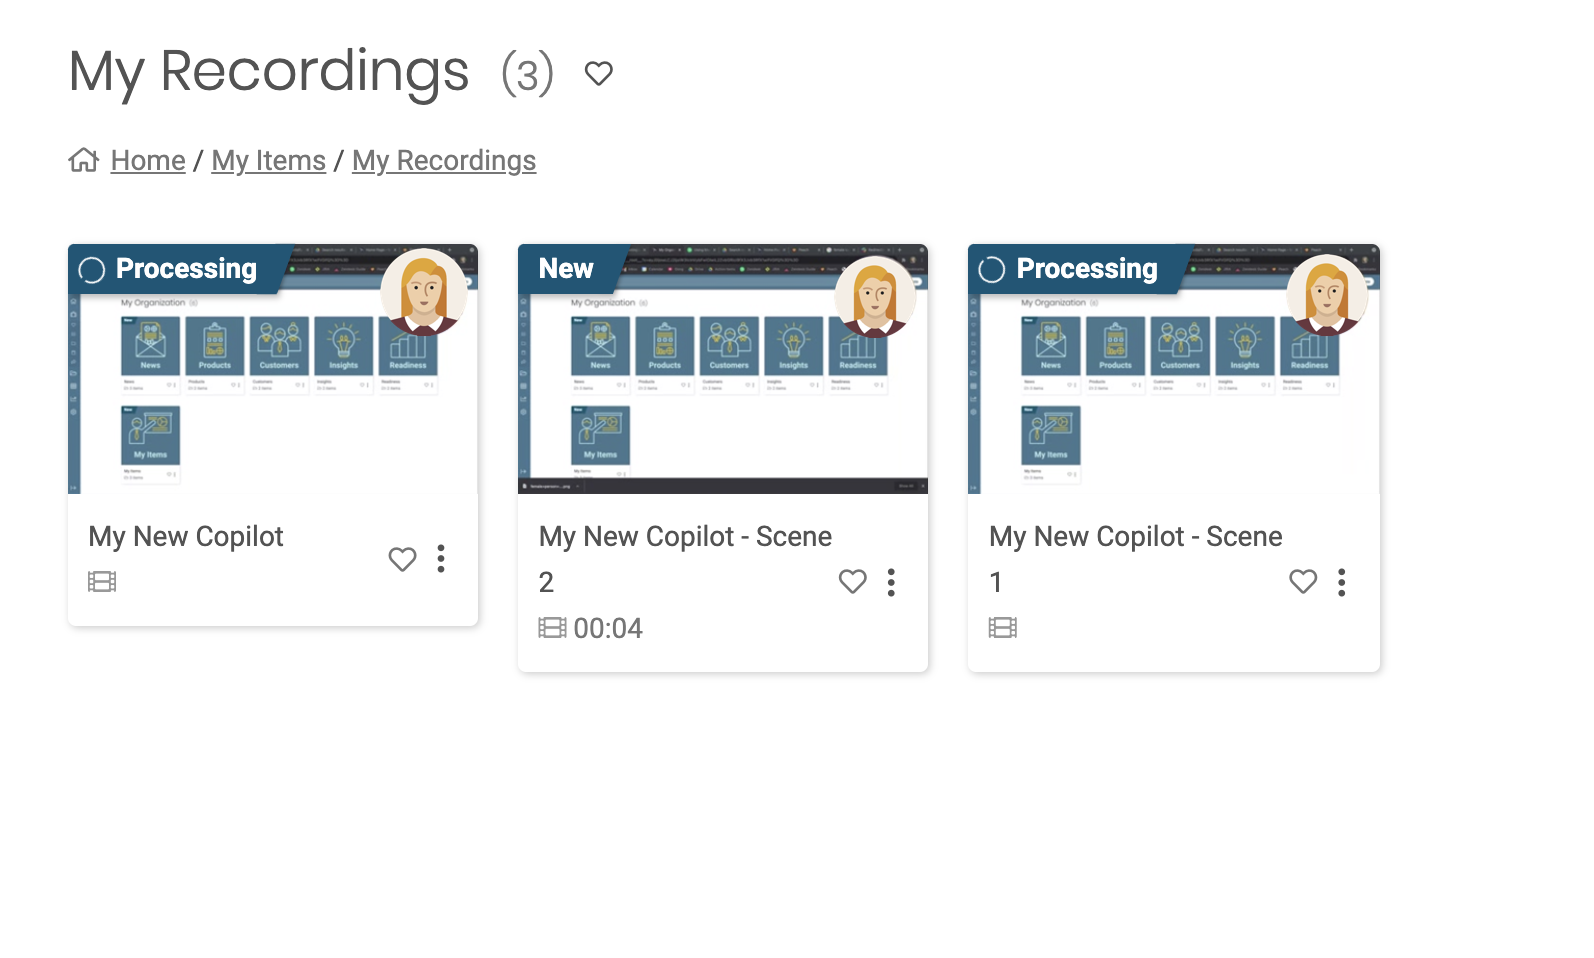
Great work! You can locate your Screen Recording recordings within My Items > My Recordings
Viewing and sharing your Screen Recording
From My Recordings with My Items, you can view, collaborate and share your new Screen Recording presentations just like any other files in Mediafly
Screen Recording presentations will create a single video with all Scenes, plus separate videos for each Scene
Advanced Playback controls
The Advanced Playback Controls feature can be turned on and off from peach for each content source, allowing you to increase the playback speed. On iOS, the Advanced Playback Controls also enable the Resume/Restart prompt that allows users to resume videos at the Items given bookmark value. To enable this feature, please reach out to your account team.
Screen Recording Troubleshooting
In the case where a user's video or audio is not registering, please follow these instructions:
-
On a mac
- Navigate to Settings > Security and Privacy
- Click the lock at the bottom and enter in your credentials to make changes
- First, enable Hardware Acceleration (if disabled)
-
To enable audio
- Select the 'Microphone' option on the left scroll section
- Enable for your browser (Chrome and Brave supported)
-
To enable video
- Select the 'Camera' option on the left scroll section
- Enable for your browser (Chrome and Brave supported)
- Click the lock again to save changes
If admin permission is required to make these changes, please submit a ticket to your internal support and IT can make the changes for you.
*Screen Recording was formally known as Copilot.
Replies have been locked on this page!