
Branding is a powerful tool that can enhance the way you present your content within Mediafly’s Engagement platform. By customizing the look and feel of your Mediafly environment, you ensure that all user interactions reflect your brand identity, fostering recognition and trust. This guide will walk you through the benefits of branding within Mediafly, customization options available, and the steps you can take to tailor your platform to your company’s unique style.
- Why Branding in Mediafly Engagement is Beneficial
- Environment Branding Options
- Leveraging Additional Mediafly Tools for Enhanced Branding
- Best Practices for Effective Branding in Mediafly
Why Branding in Mediafly Engagement is Beneficial
-
Brand Consistency:
- Keeping your branding consistent across all customer touchpoints strengthens brand recognition and builds trust with your audience.
- Through Mediafly, you can align your platform with your company's visual identity by customizing elements like logos, color schemes, and fonts.
-
Enhanced User Experience:
- A branded environment ensures users are met with familiar colors, logos, and layouts, providing a seamless and professional experience.
- Tailored visuals can improve navigation and engagement by aligning with users' expectations of your brand.
-
Differentiation and Customization:
- By utilizing Mediafly’s theming capabilities, your environment can stand out and reflect your company's personality, setting you apart from competitors.
- Custom features like folder icons, favicons, and banners can be integrated for additional brand flair.
Environment Branding Options in Mediafly
Mediafly offers a variety of branding customization options to help you align your environment with your brand. Some of these options can be customized directly by you, while others require assistance from your Customer Success Manager (CSM).
User Applied Branding in Mediafly
Users can customize:
- Site Logo in Viewer
- Menu Colors in Viewer
- Default Banner in Viewer
- Default Content Categories
- Site Footer in Airship
Customize Site Logo in Viewer
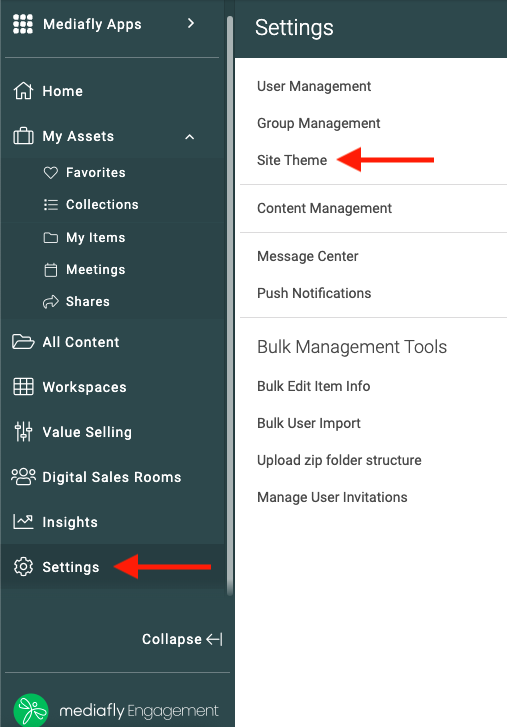
- In Viewer, click Settings > Site Theme .
- To update Site Logo, select the Logo/Menu tab then navigate to Site Logo then click Change Image.
- From your Media Library, select a new Logo or Upload a New Image.
- Click Save.
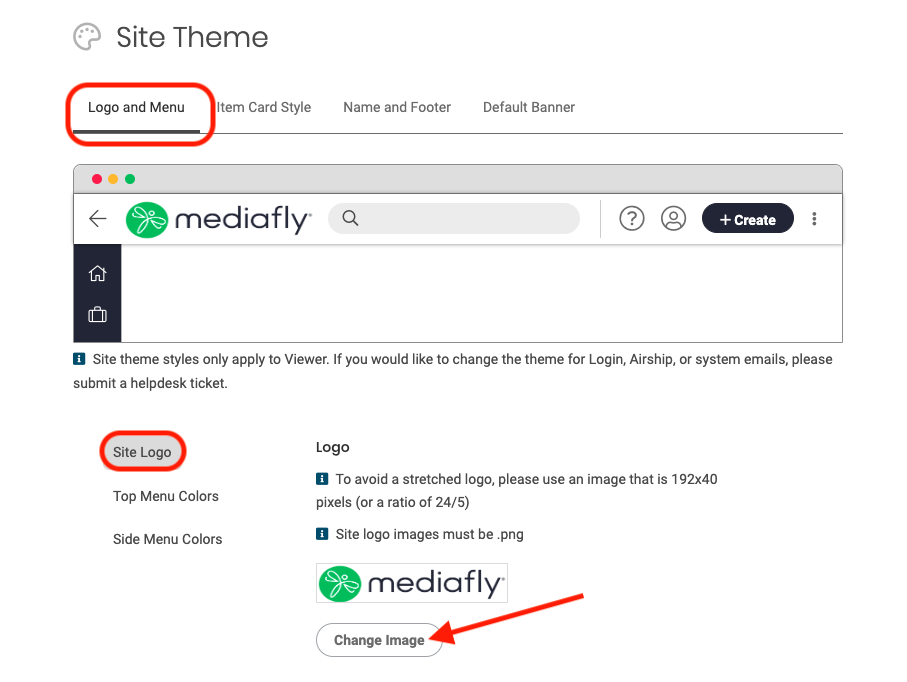
Notes:
- To avoid a stretched logo, please use an image that is 192x40 pixels (or a ratio of 24/5)
- Site logo images must be .png
Customize Menu Colors in Viewer
- In Viewer, click Settings > Site Theme
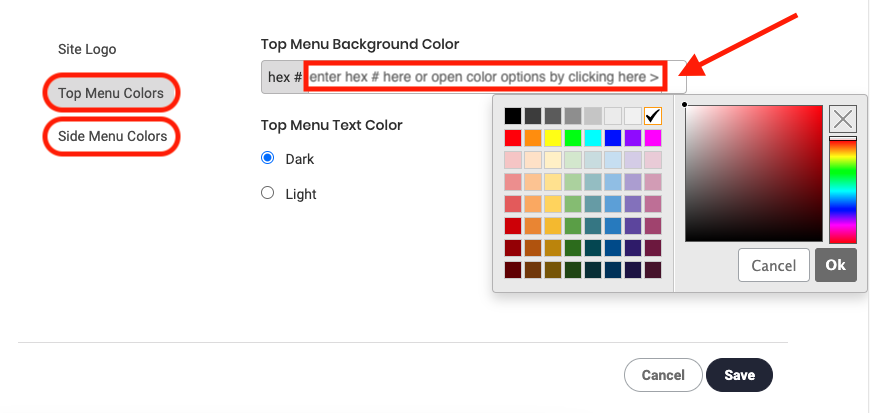
- Under the Logo and Menu tab you'll have both Top Menu Colors & Side Menu Colors options. Select which you'd like to change, then either click the color box on the right of the hex menu, select a color from the menu and click OK or enter your desired hex code.
- Click Save
Customize Default Banner(s) in Viewer
Admin can create default banners for Digital Sales Rooms. Room banners can be edited within rooms to become more specific to the room itself, or custom banners can be created within rooms - but admin created default banners will be the default options for the Digital Sales Room banner in all newly created rooms until otherwise customized.
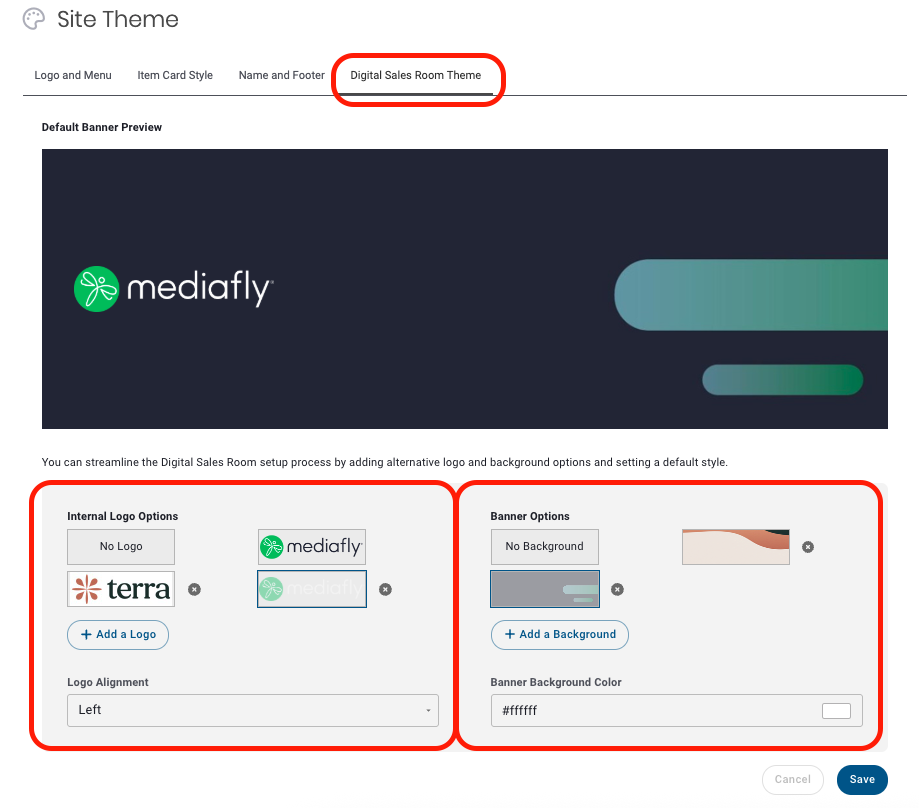
- In Viewer, click Settings > Site Theme
- Under the Digital Sales Room Theme tab, you can create and provide internal logo & banner options that will become the default options for Digital Sales Rooms banners. Add a logo or background to add available options, you can also select the default alignment & background colors. Having multiple banner options gives your team the flexibility of selecting different logos for selling through multiple partners, products, and channels.
Note: Recommended banner size + resolution for DSRs is 1400x350px exported at 2.5x. - Click Save
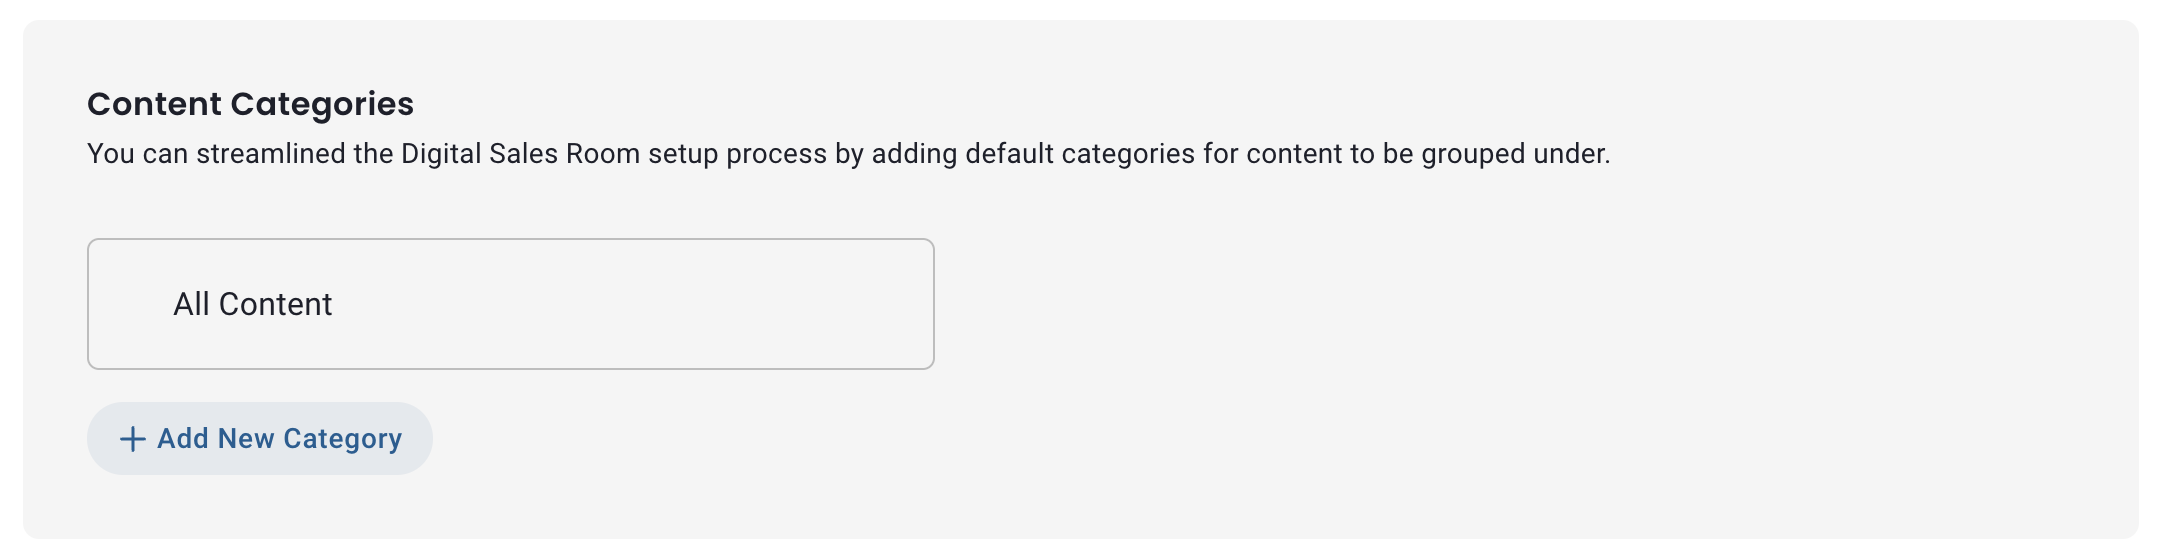
Default Content Categories in Digital Sales Rooms
Admin can create default content categories for Digital Sales Rooms to provide standardized organization, making it easier for teams to structure documents consistently across all rooms.
- In Viewer, click Settings > Site Theme
- Under the Digital Sales Room Theme tab find Content Categories
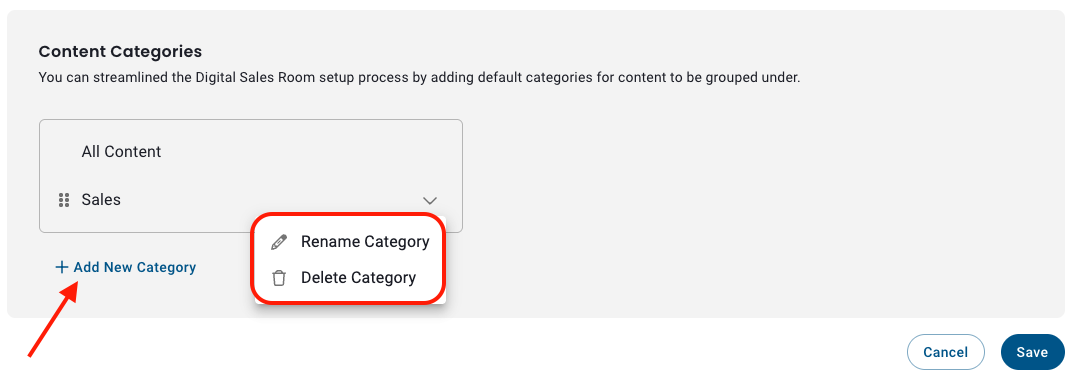
- a. Click Add New Category > enter a name > click Save OR
b. Select the dropdown next to an existing category to rename or delete categories as needed. - Click Save.
- Categories added here will be available to users in Digital Sales Rooms.
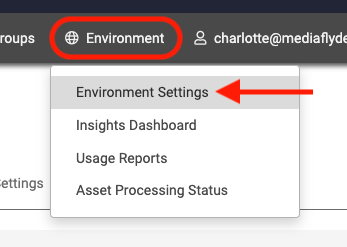
Customize Footer in Airship
- In Airship, click Environment > Environment Settings
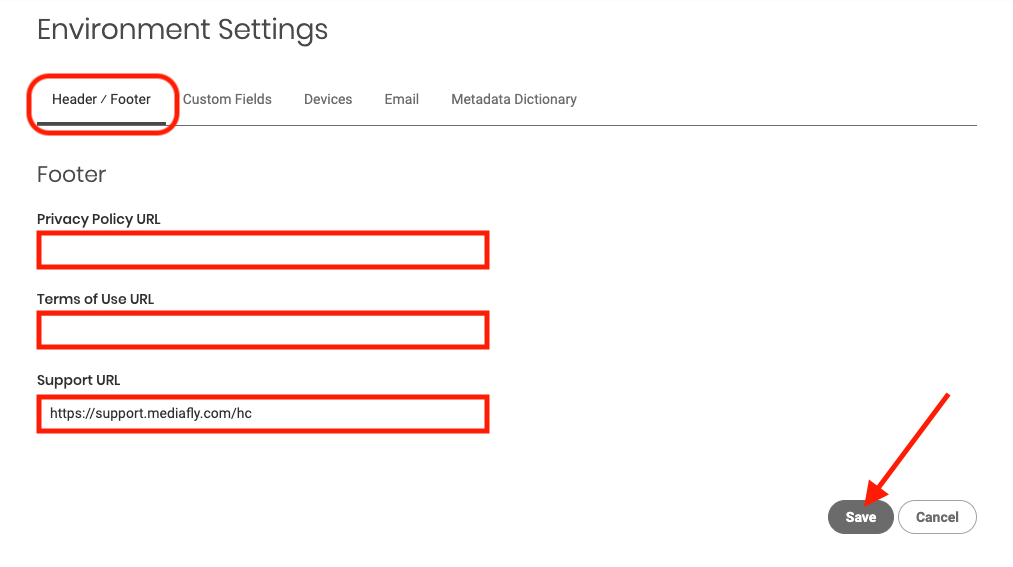
- Select the Header/Footer tab
- Update Privacy Policy URL, Terms of Use URL and/or Support URL
- Click Save
Branding Items that Require CSM Assistance
The branding items that require CSM assistance were created when your Mediafly environment was created; if you need to make changes to any of these items, please contact your CSM. This includes:
- App Name: This is the name of your app, it will appear in your URL and various places around the environment
- Login Page Banner: This is the banner that appears when your users log in to your Mediafly Environment.
- Email Notification Banner: This is the banner that will appear in your configured email notifications.
- Registration Form: This is a page for Users to register for access to the Environment.
Leveraging Additional Mediafly Tools for Enhanced Branding
Beyond site customizations, Mediafly offers tools that enable you to personalize your content, extending your branding beyond the site itself and directly into the content you share. Check out Using Templates, Collections, and Document Builder to learn more.
-
Templates:
- Create branded templates for presentations, ensuring all materials have a cohesive look and feel.
-
Collections:
- Use Collections to curate presentations with branded content, creating a consistent experience for viewers.
-
Document Builder:
- Gather and organize branded resources, making it easy to create documents that reflect your company's identity.
Best Practices for Effective Branding in Mediafly
- Consistency is Key: Use the same logos, colors, and font styles across all elements to reinforce your brand identity.
- Prepare High-Quality Assets: Ensure images are of high resolution, particularly for banners, to maintain quality across different screen sizes.
- Review and Update Regularly: As your brand evolves, revisit your Mediafly settings to make sure they stay aligned with your current branding standards.
Replies have been locked on this page!