
Story Mapper eliminates linear conversations by letting your customer drive the conversation, by discussing their challenges, needs and goal, and you instantly pivot to the most relevant content.
Keys to Success
- Using Story Mapper, you can creatively control, map and optimize content
- Build menu pages in your content and use Story Maps to create dynamic navigation
- When uploading a new version of a file with Story Maps, Mediafly will preserve all Story Maps from the previous version. If the order of pages changes, or pages are removed/added, you will need to manually update the preexisting Story Maps once uploaded.
Create a Story Map
Log in to Mediafly
Open the file you'd like to create a Story Map on
From the top menu, click the Story Mapper icon

Once the Story Mapper panel appears, click and drag to place a box on the file where you would like to place the Story Map
Next you will determine the action when clicking on the Story Map
- Go to a page in the document
- Open an item or folder
- Open a Workspace page
- Open a link to a website
- Close this document
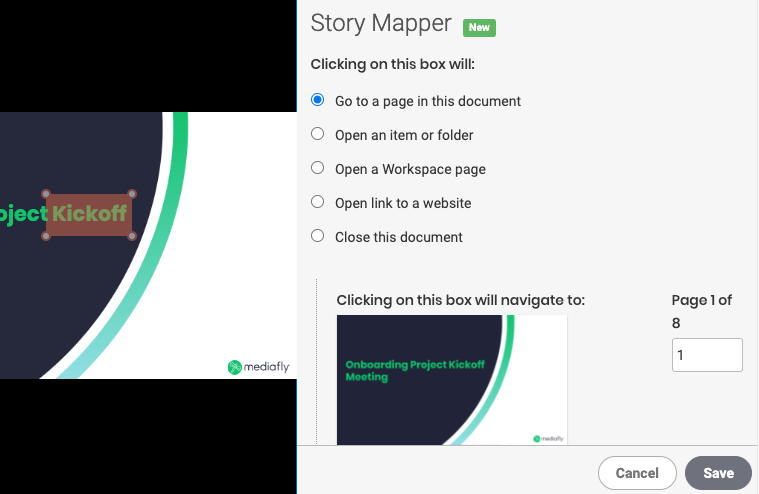
After you define the action, click Save and the Story Mapper panel will update with the new Story Map

Edit or Delete an existing Story Map
Navigate to the file and click on the Story Mapper icon 
Select the pencil icon 

When editing a Story Map, you can reposition the Story Mapper box, duplicate, apply to all pages in the document or modify the action for the Story Map.

Replies have been locked on this page!