
The Global User Management (GUM) system allows administrative users to manage the users in their system (across solutions), including creating/editing users and assigning which solution(s) to which users have app switcher access.
Jump to:
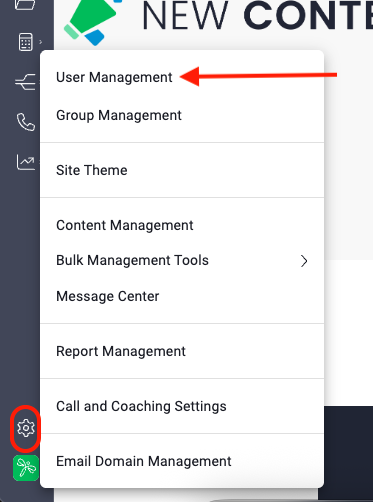
GUM Access
- Go to Settings > User Management
-
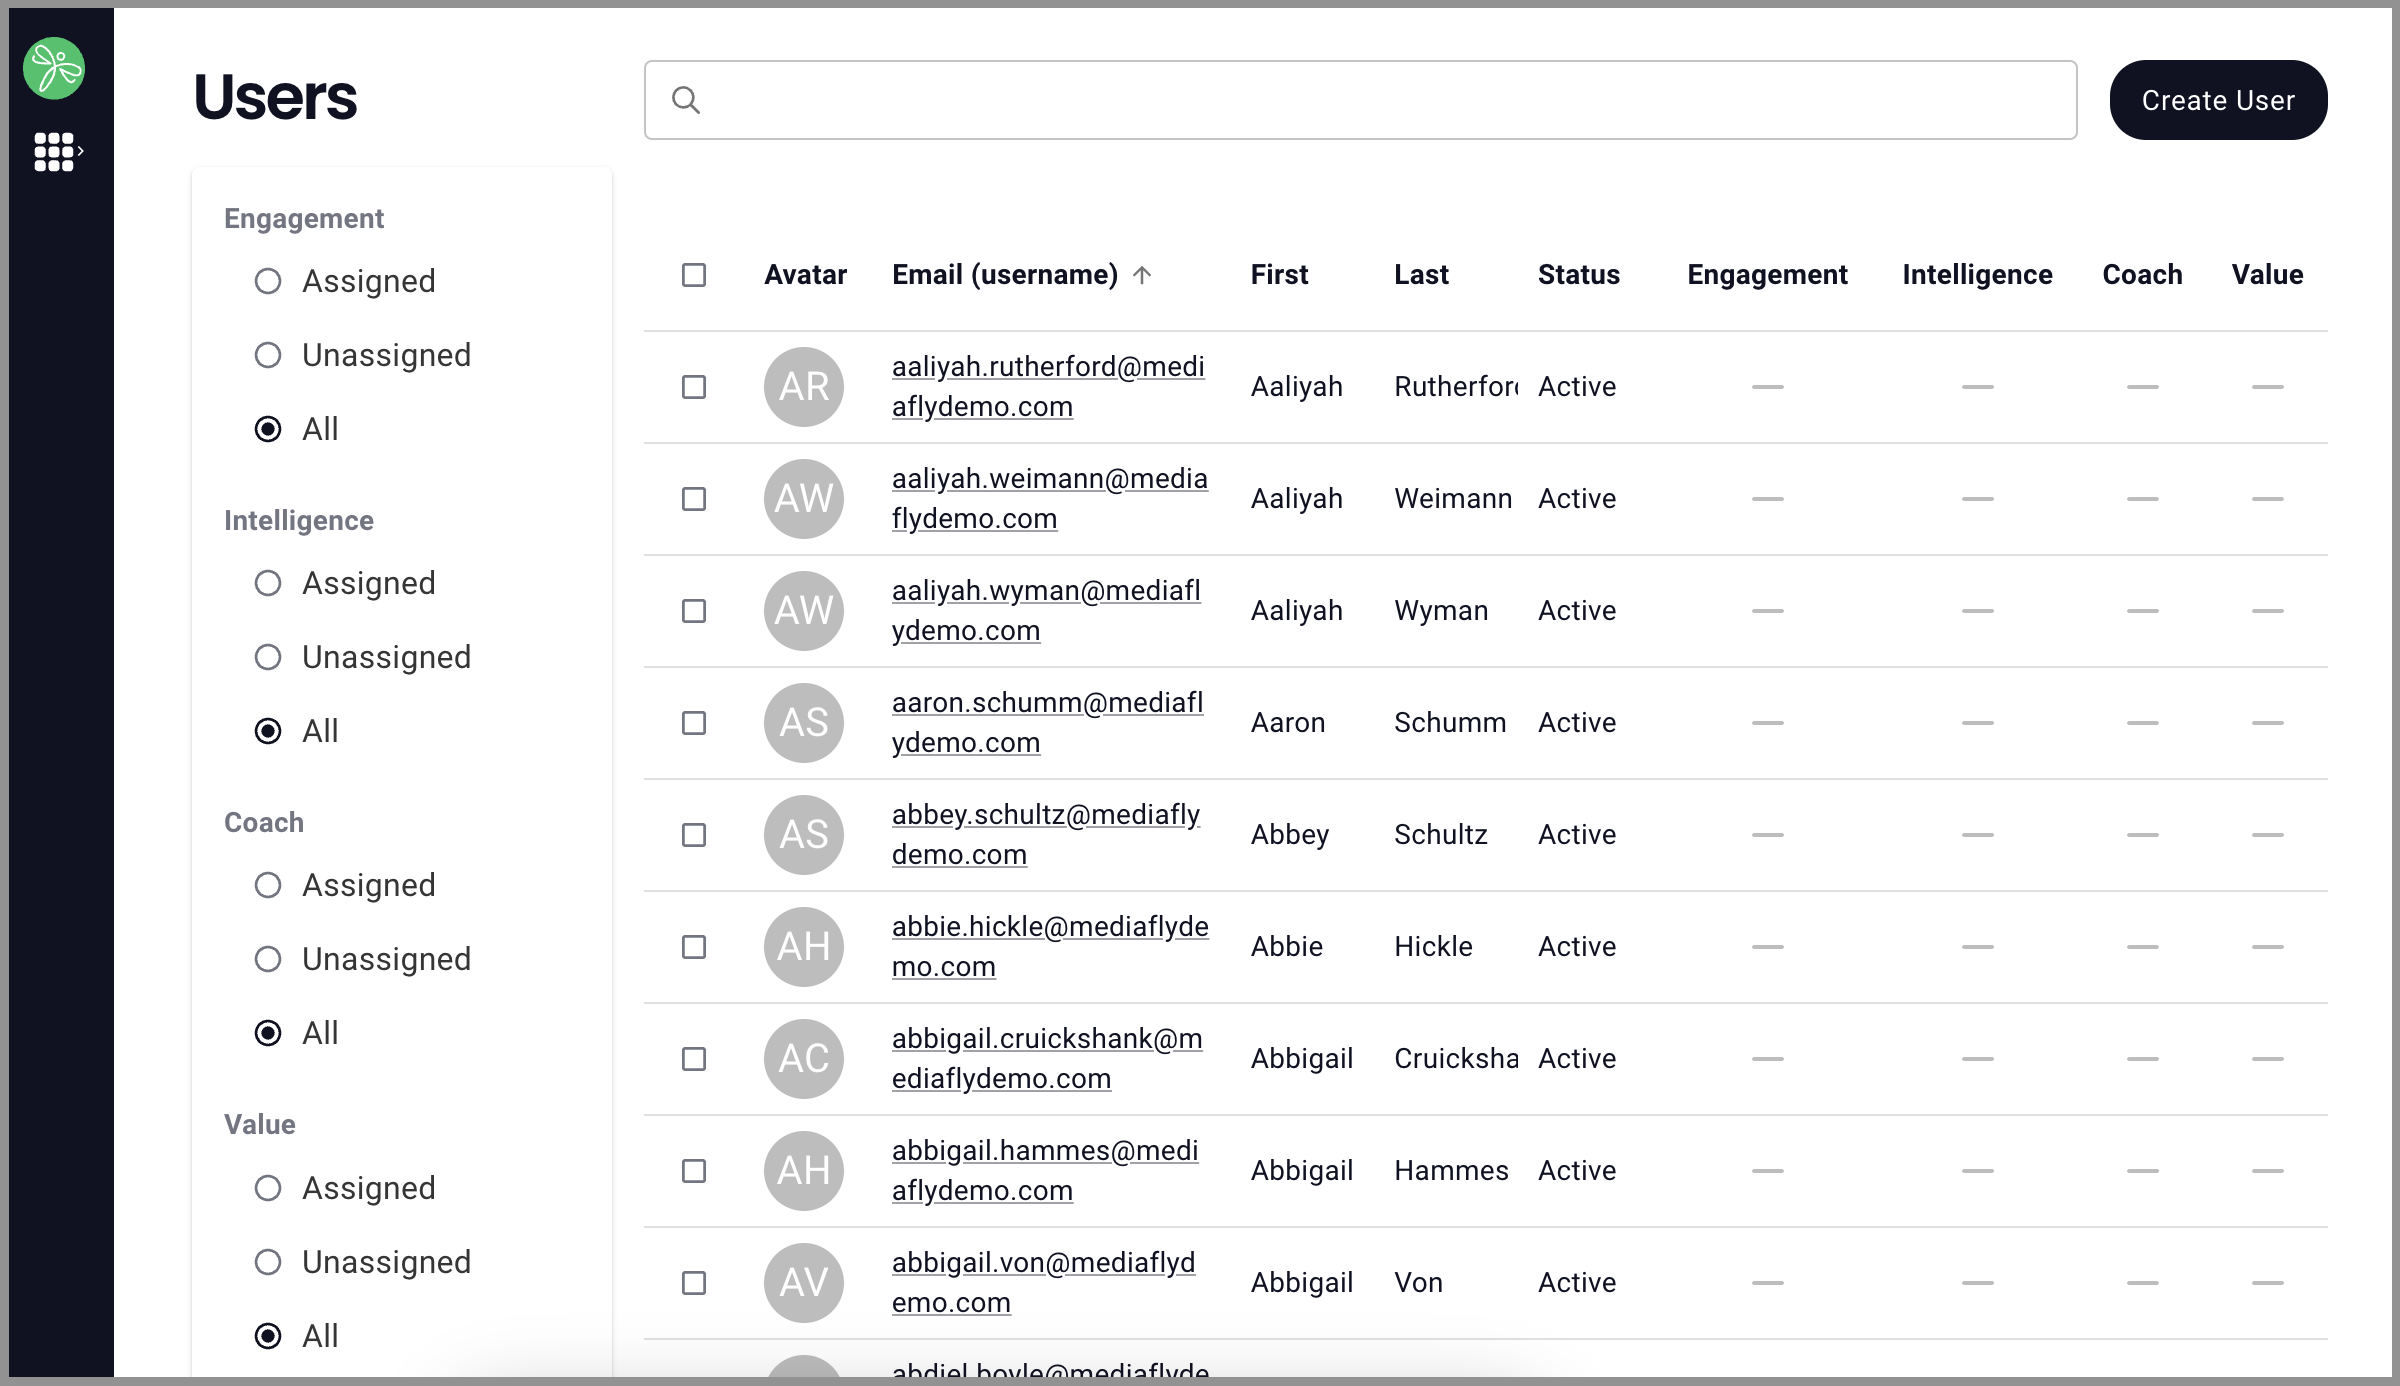
The Users page will reflect only the solution(s) licensed to your instance, but it will look something like this:
Creating Users
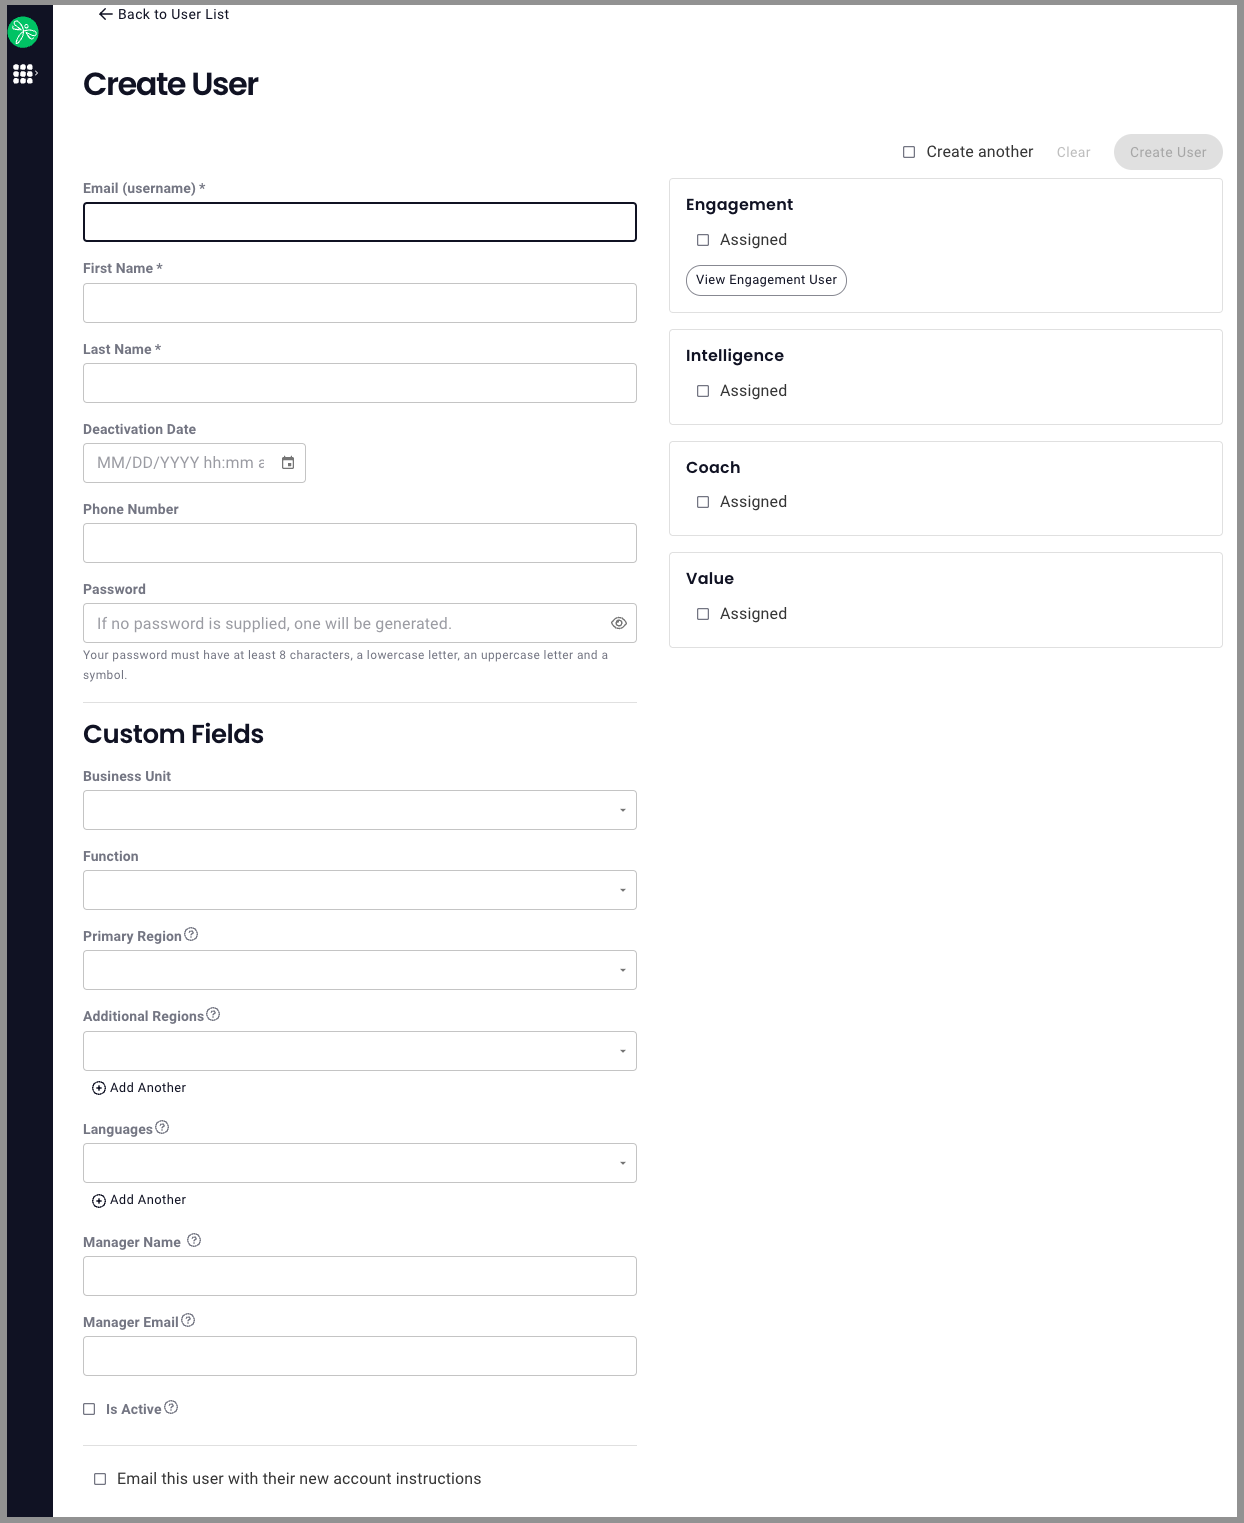
- Click Create User
- Enter the following info for the user (* denotes required field)
Note: Some environments may define additional user attributes, or custom fields, and may mark them as required.
-Email (username)*
-First Name*
-Last Name*
-If a user is deactivated, the Deactivation Date will show here, no need to enter info here
-Phone
-Password (If no password is supplied one will be generated automatically)
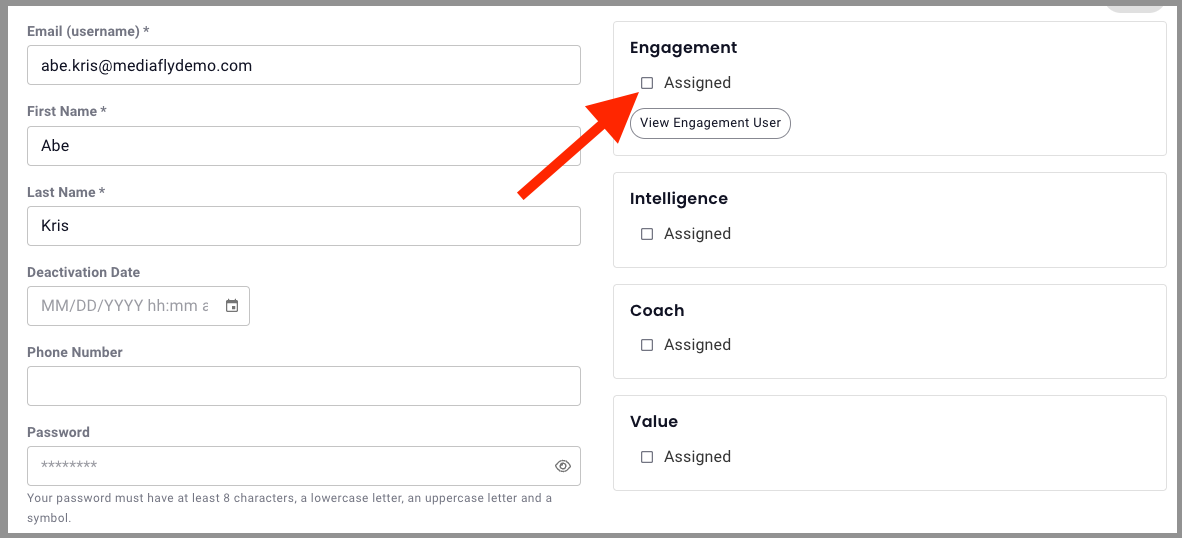
-Check the box for "Email this user with their new account instructions" if you'd like to enable that action - Check the "Assigned" box for each solution you wish the user to have app switcher access
- Check "Create another" to create another user or click Create User to complete creating this user only
- Once a user has been created, their app switcher will show all solutions to which they've been given access
- After adding the user(s) to GUM, make sure they are added to the relevant tools they’ll be using and that their user settings in each tool are configured as needed:
- Intelligence: Determine the user's permissions in Intelligence beginning with Step 3 of these instructions.
-Engagement: Update the user’s information and permissions in Engagement for anything outside default settings. If you are adding a user that needs GUM admin privileges, you need to add them to engagement and give them permission to manage accounts, regardless of whether they are using the Engagement tool.
- Coach: Add the new user(s) in Coach. If your org uses the bot, ensure the new user is also enabled in the service account.
Managing Users
Edit / Deactivate
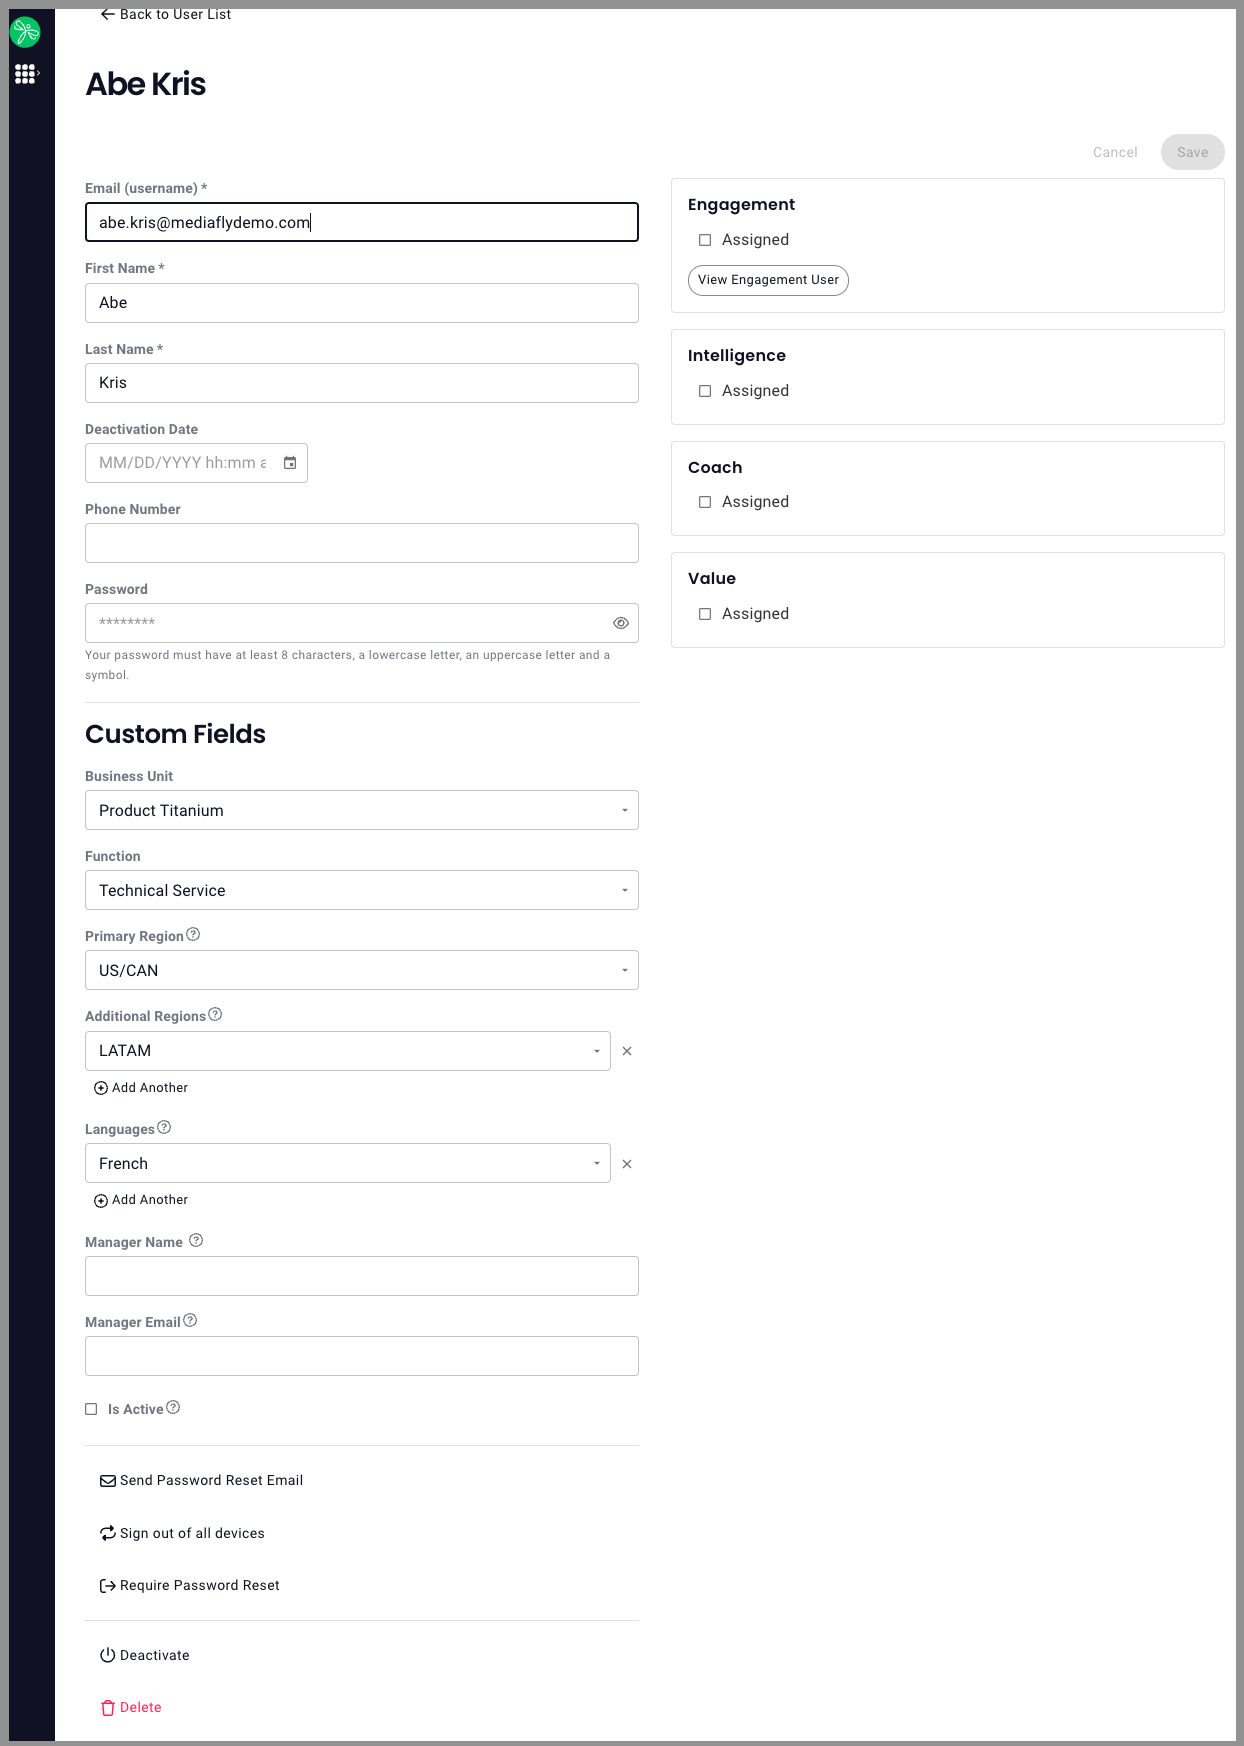
Click on a username to select a user from the user list to open their profile and edit their info. From this page you can:
- Edit user information (including solution access assignments)
- Send Password Reset Email
- Sign out of all devices
- Require Password Reset
- Deactivate user (When deactivated, the user won't be able to access/authenticate into the system, platform, or any solutions.)
Remember to click Save once you've made changes!
Managing Individual Solution Access
- On the user list page, you will see a user's active access indicated by product names, checkmarks will appear for each solution to which a user currently has access.
- Click on the user's email to open their GUM management page check or uncheck the box next to assigned to to add or remove access to an individual tool for that user.
Bulk Edit: Activating or Deactivating Multiple Users
Admin can activate or deactivate multiple users at once from the user list page.
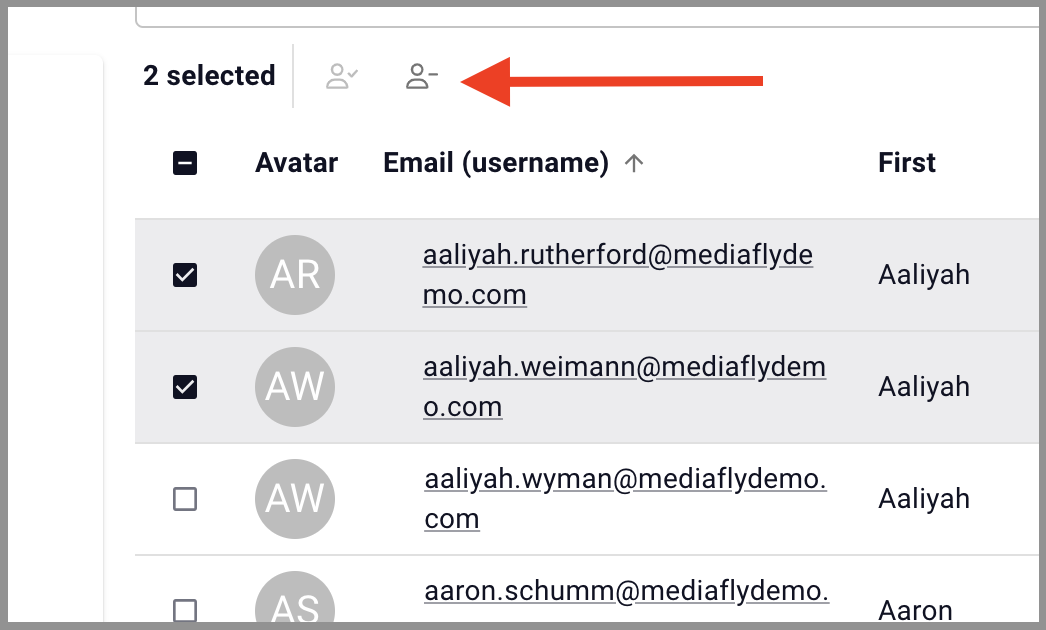
- Click on the empty box next to multiple users to select the users you want to update, or select the "select all" box above the list of users to select all
- Select the desired action (eg. "deactivate users" = person icon with a - sign)
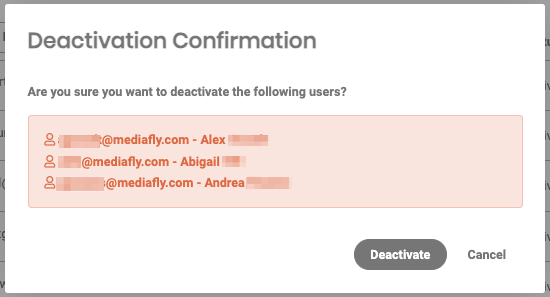
- A confirmation window will appear, if you wish to complete the action, confirm here or click cancel to abandon the action
Replies have been locked on this page!