
Adding users in Mediafly may be done one by one through Airship, or by bulk using the bulk import option. Content managers and admins may create a CSV file to list the usernames, emails, and names of all users.
Note: Adding users to the environment requires user management permissions. Groups and users with no permissions will not see the options and buttons displayed in this article.
Creating a CSV file for Users
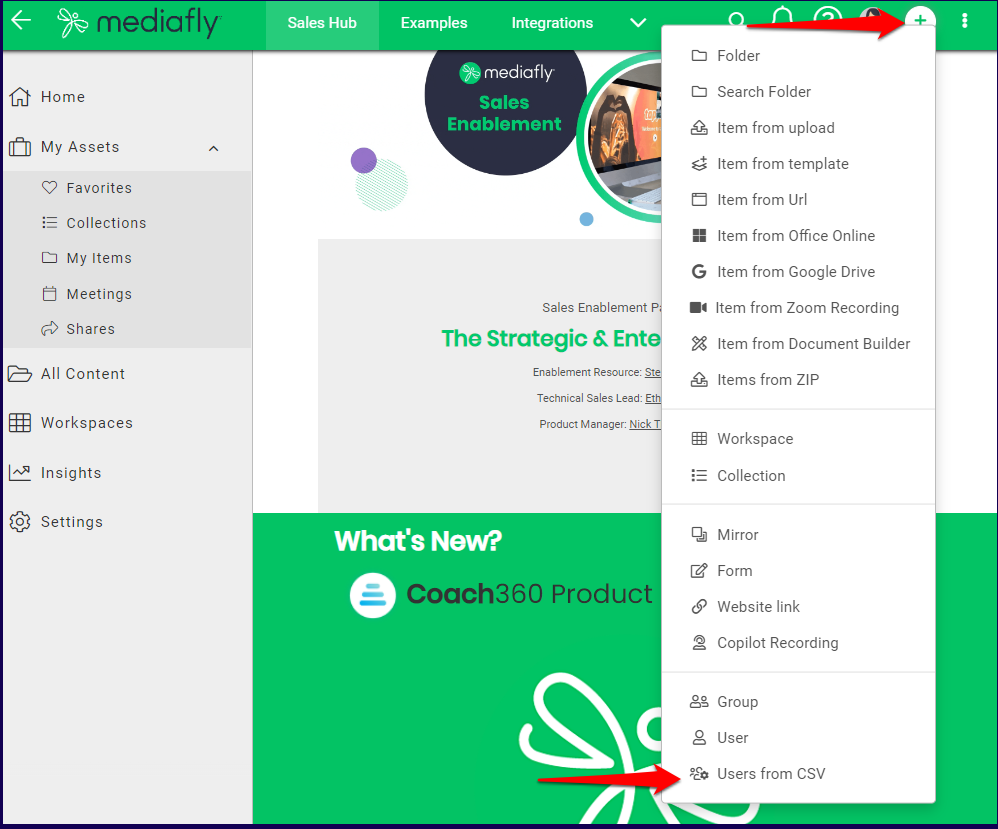
1. On the Mediafly viewer page, click on the create or '+' button and select Users from CSV.
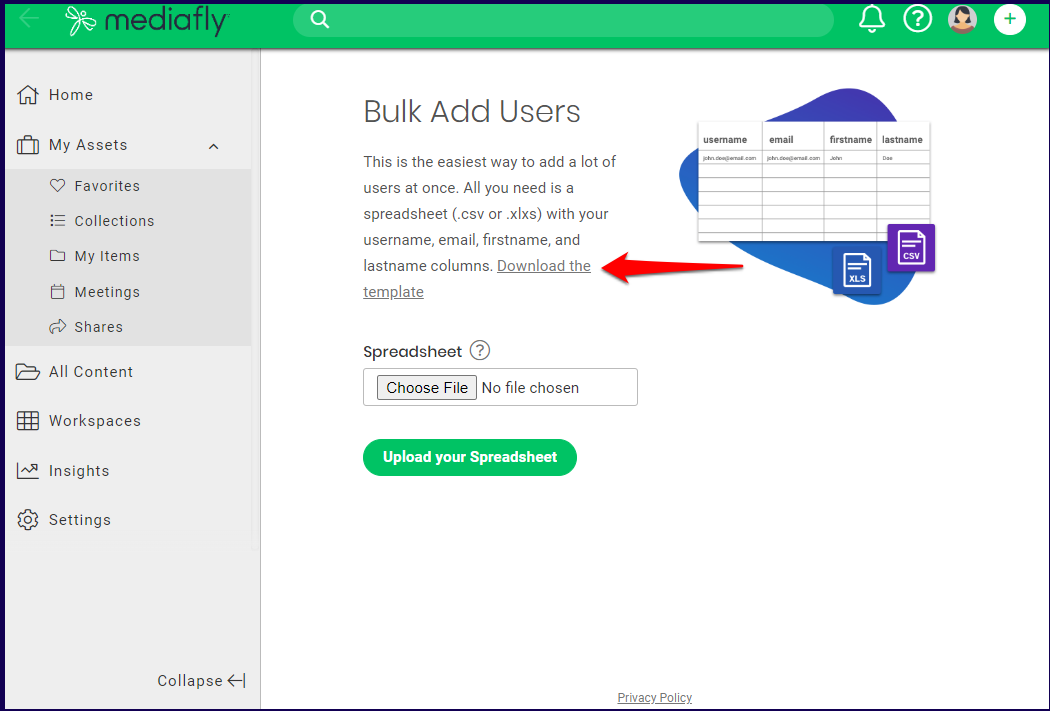
2. The Bulk Add Users page is displayed. Click on Download the Template to download a template CSV file.
3. Create a CSV file by listing the information on the users following the Template structure.
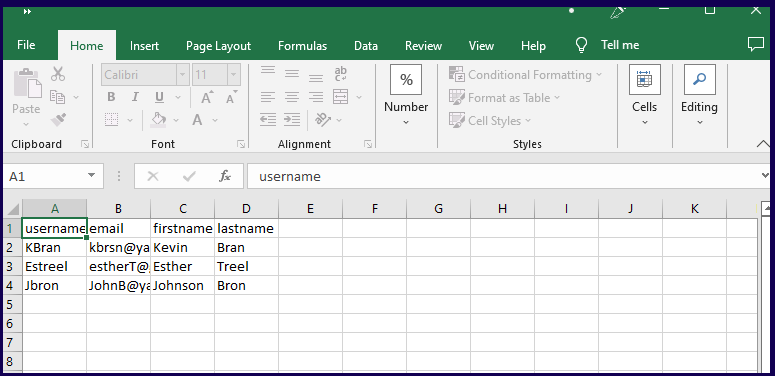
Note: Aside from the username, the order of columns is not important when uploading a csv.
Bulk importing users
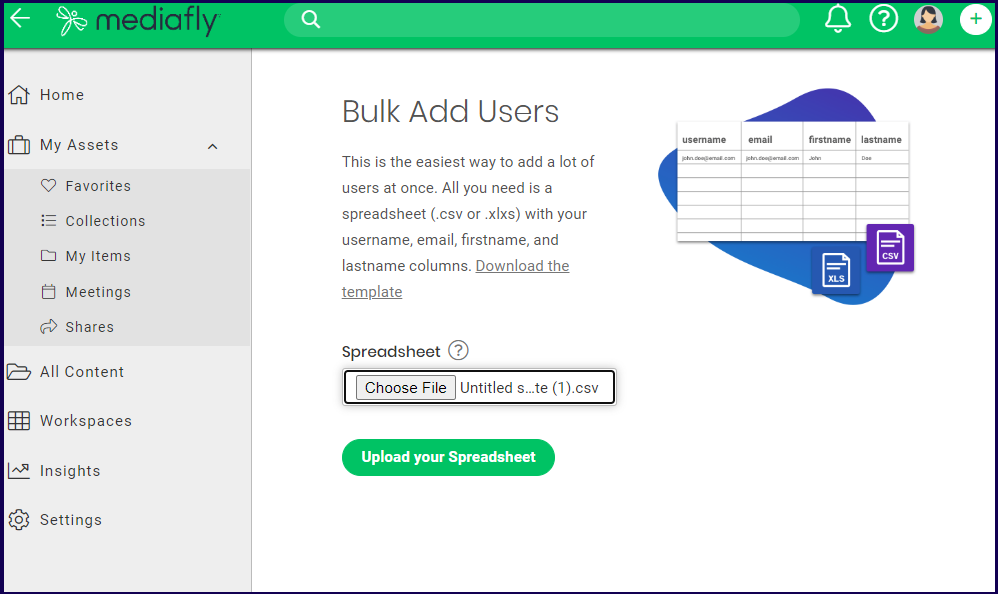
1. Access the Bulk Add User page. Click on choose file and select the created CSV file. Click on the Upload your Spreadsheet button.
2. The system checks and detects the users in the list.

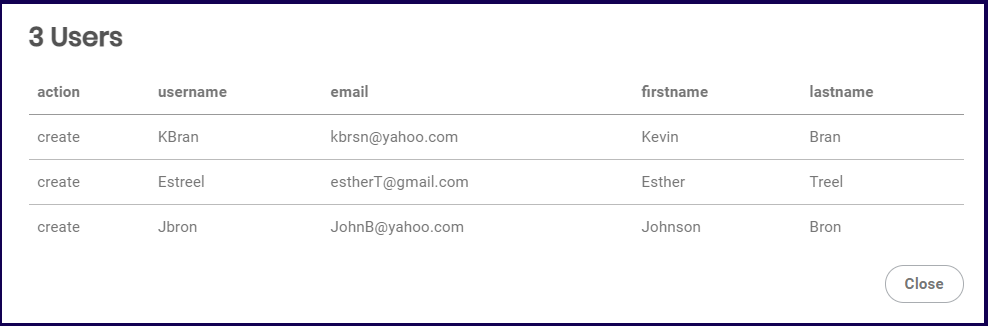
Note: To check on the uploaded items, click on the View list button. A window is displayed that lists the details of the users and the respective actions the system will perform based on its checks. In this example, all users are new users to be created in the database.
3.Click on the Additional Options button for any specific actions you want the bulk import to perform.
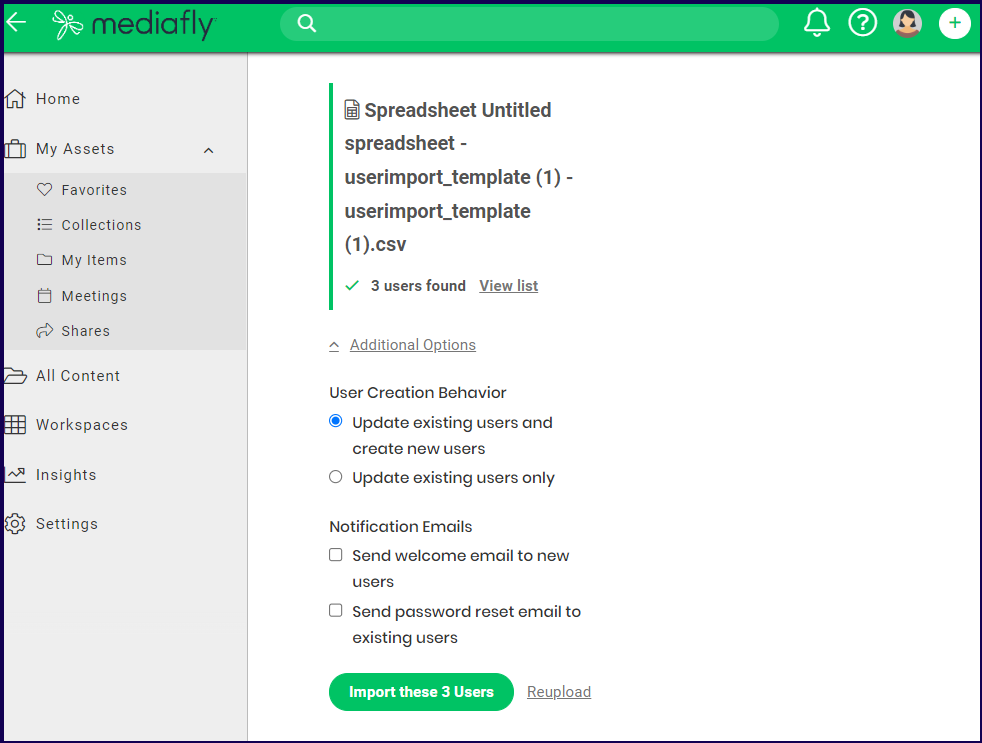
4. Select any desired additional options:
-
User Creation Behavior
- Update existing users and create new users: check this if you want the bulk import to create accounts for records identified in the spreadsheet that do not currently exist in the system
- Update existing users only: only update existing users but will not create any new accounts
-
Notification Emails
- Send welcome email to new users: check this option if you want users that will get created by bulk import to receive a Welcome email
- Send password reset to existing users: check this option if you want users that will get updated to receive password reset emails
5. Submit your import and the request will be processed shortly and should finish within a minute or so, depending on how many accounts are being updated.
Bulk User Import Technical Examples
Update Email and Username
To update the user’s Username and Email to new email, simply specify the new email under the email column.
Note: Prior to running the bulk import, if the user account’s username is the same as the email, then the update will change both the username and the email. Most user accounts have the same value for username and email, so this should work for most use cases. If the user account’s don’t have the same value for username and email, then there’s currently no way to update the username via User Bulk Import. This is the same behavior as Airship.
| username | |
| alice@example.com | alice.aberdeen@example.com |
| 123456 | bob@usa.example.com |
- Alice
- Before: Username == Email
- Username: alice@example.com
- Email: alice@example.com
- After:
- Username: alice.aberdeen@example.com
- Email: alice.aberdeen@example.com
- Before: Username == Email
- Bob
- Before: Username != Email
- Username: 123456
- Email: bob@example.com
- After:
- Username: 123456
- Email: bob@usa.example.com
- Before: Username != Email
Group Memberships
Add User to Group - Single Group Column
| username | group:1 |
| alice@example.com | Sales |
- Alice will be added to group Sales
Add User to Group - Multiple Group Columns
| username | group:1 | group:2 |
| alice@example.com | Sales | |
| bob@example.com | Sales | Marketing |
- Alice will be added to group Sales
- Importer will ignore group:2 cell for Alice since it's blank
- Bob will be added to both Sales and Marketing
Remove User from Group - Single Group Column
| username | removeGroup:1 |
| alice@example.com | Sales |
- Alice will be removed from group Sales
Remove User from Group - Multiple Group Columns
| username | removeGroup:1 | removeGroup:2 |
| alice@example.com | Sales | |
| bob@example.com | Sales | Marketing |
- Alice will be removed from group Sales
- Importer will ignore group:2 cell for Alice since it's blank
- Bob will be removed from both Sales and Marketing
Privileges
Add Privilege to User - Single Privilege Column
| username | viewcontent |
| alice@example.com | x |
| bob@example.com | admin |
- Alice will be granted View Content - Only on items with "View Content"
- Bob will be granted View Content - For All Items
Add Privilege to User - Multiple Privilege Columns
| username | viewcontent | managesite |
| alice@example.com | x | x |
| bob@example.com | admin |
- Alice will be granted View Content - Only on items with "View Content" and Manage Site
- Bob will be granted View Content - For All Items
- Importer will ignore managesite cell for Bob since it’s blank
Remove Privilege from User - Single Column
| username | viewcontent |
| alice@example.com | remove |
- Alice will revoke View Content
Add Privilege to User - Multiple Privilege Columns
| username | viewcontent | managesite |
| alice@example.com | remove | remove |
| bob@example.com | remove |
- Alice will be granted View Content - Only on items with "View Content" and Manage Site
- Bob will be granted View Content - For All Items
- Importer will ignore managesite cell for Bob since it’s blank
Custom Attributes
Set Custom Attribute - Type: String
| username | title |
| alice@example.com | President |
- Alice’s Title will be President
Set Custom Attribute - Type: String Array - Replace
| username | locations |
| alice@example.com | Chicago,New York |
- Alice’s Locations will have 2 values Chicago and New York
Set Custom Attribute - Type: String Array - Add/Remove
| username | locations:Chicago |
| alice@example.com | true |
| bob@example.com | false |
- Chicago will be added to Alice’s Locations
- Chicago will be removed from Bob’s Locations
User Deletion
| username | delete |
| alice@example.com | true |
- Alice will be deleted
Replies have been locked on this page!