
The Basics
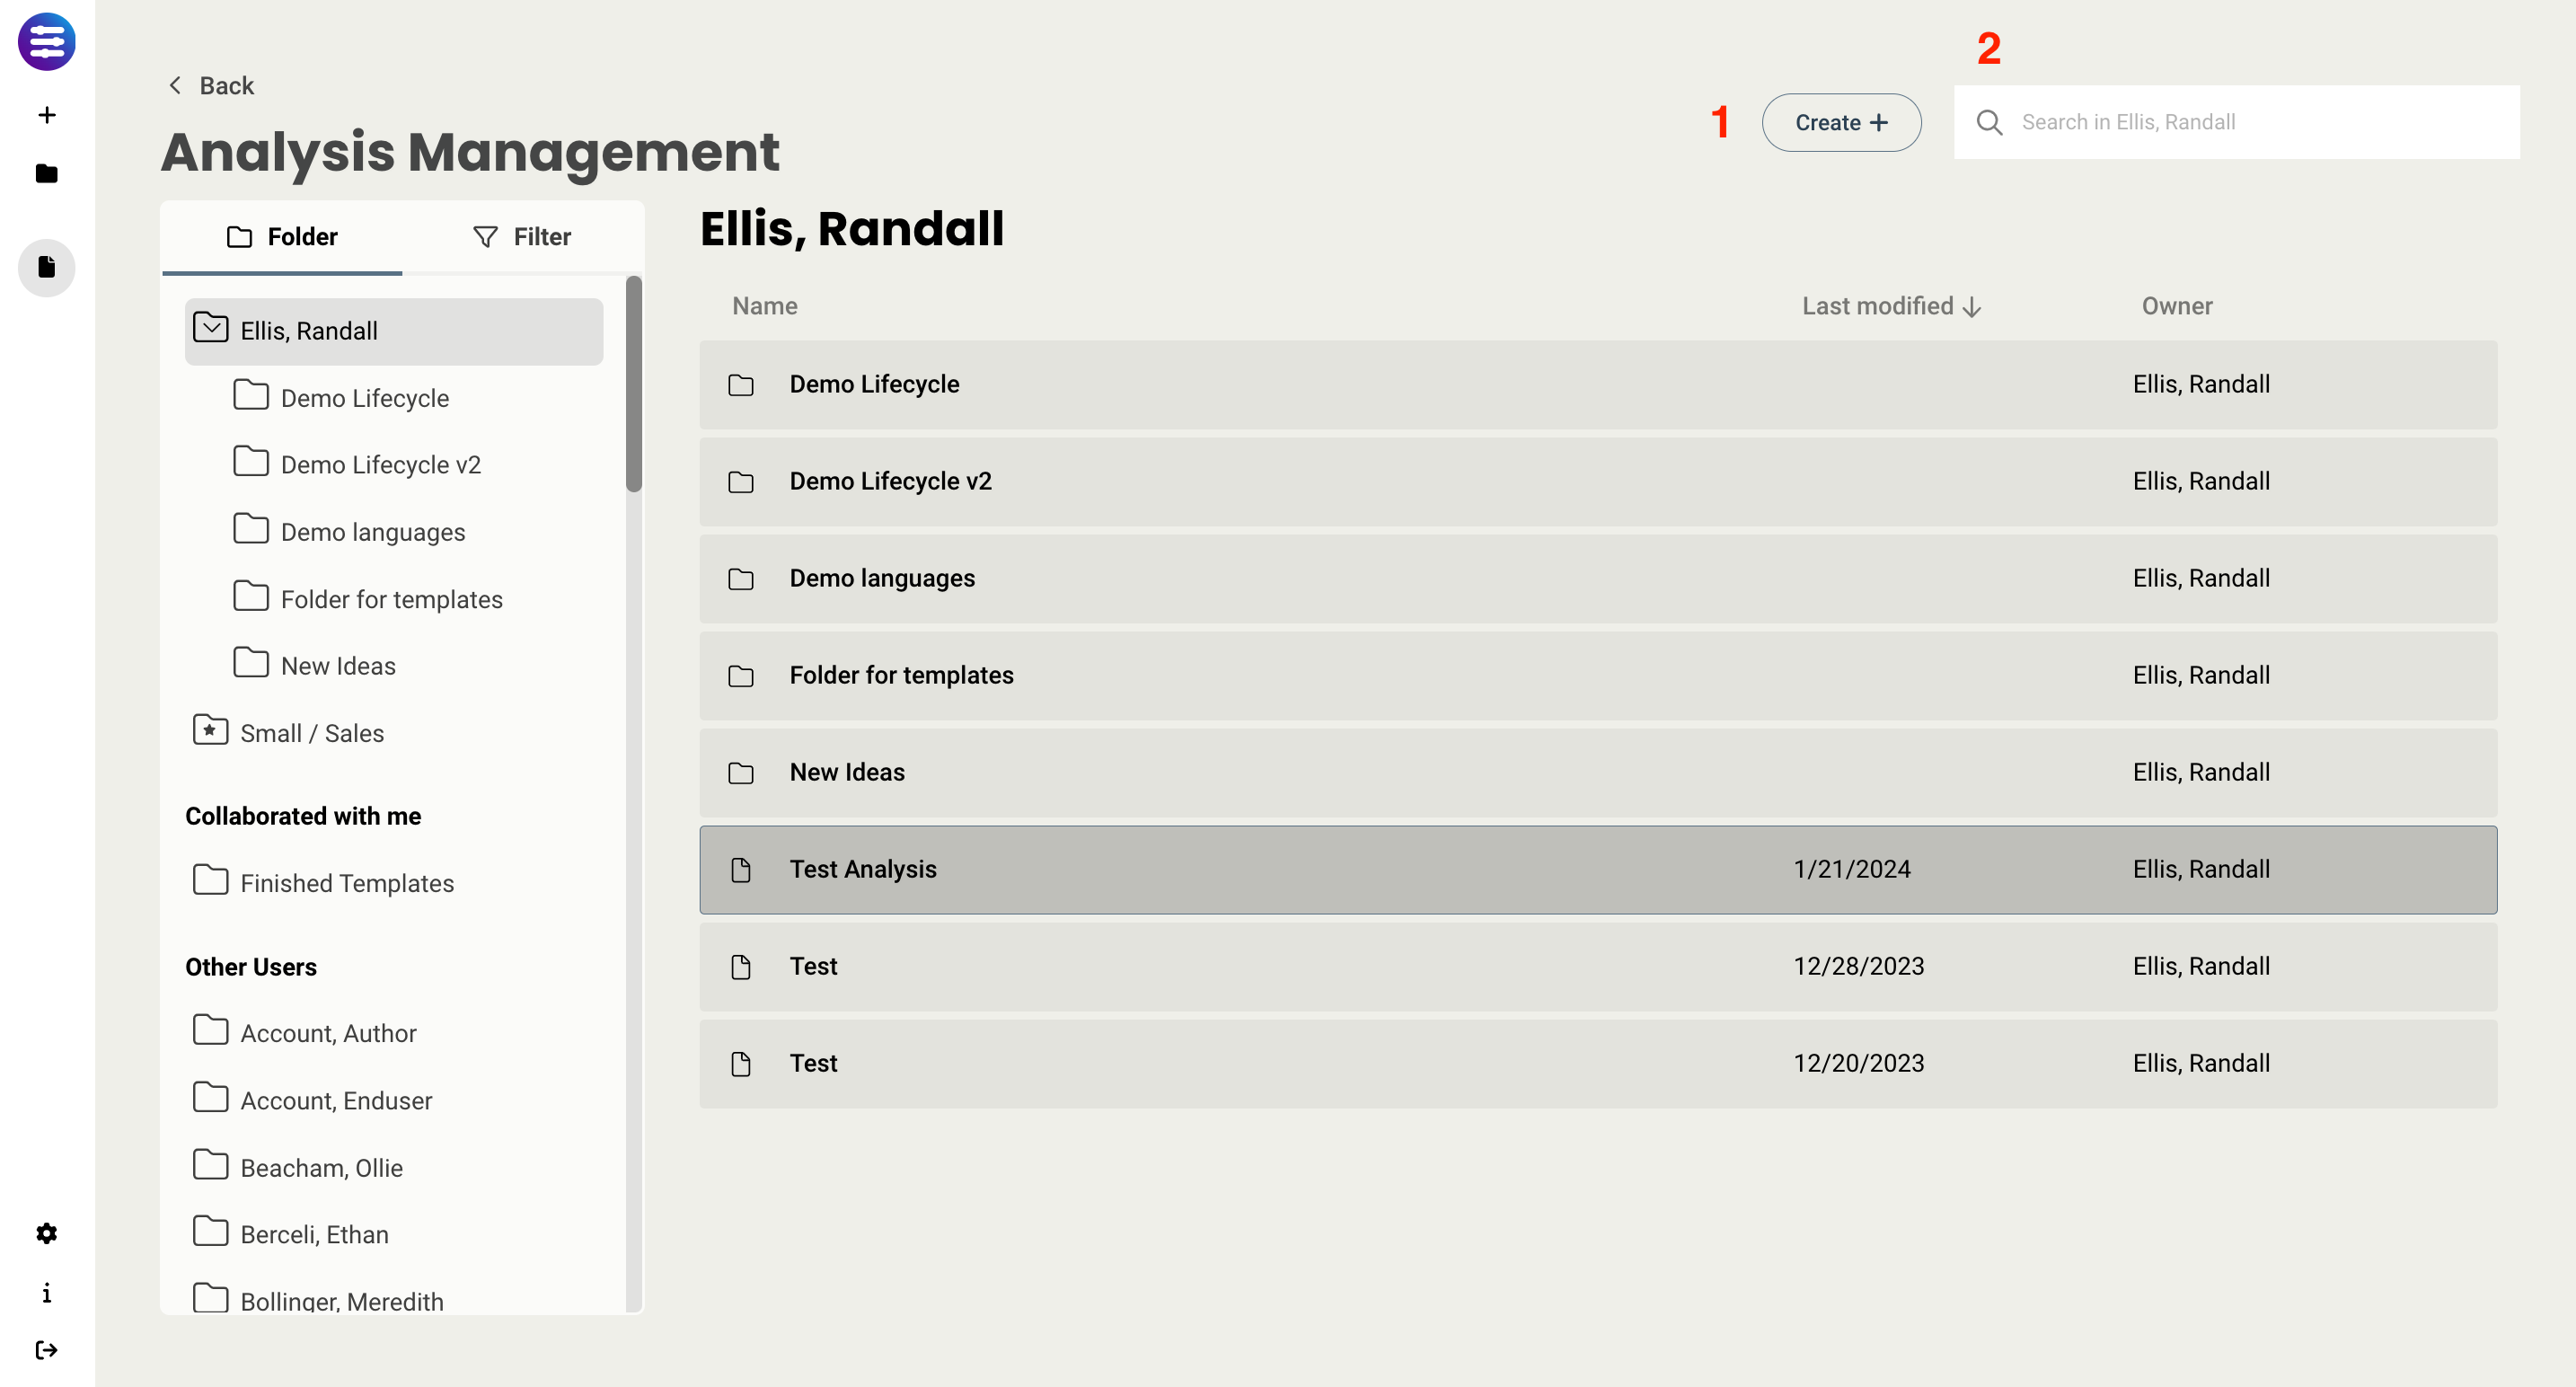
The Analysis Manager is accessible via the Folder icon on the left nav bar and is composed of three major sections:

- Search bar at the top
- Left sidebar, which facilitates organizing analyses into folders and creating filters
- Main panel, which contains the list of analyses that match the chosen filters
Basic actions that one can take from this screen:
- Create a new analysis, using the Create button in the upper right
- Search to find an analysis, using the search bar at the top
- Open an analysis by double clicking, or selecting and choosing Open Analysis
- Clone an analysis, by selecting an analysis and clicking the clone button at the top of the tray
- Move an analysis into a folder clicking and dragging, or by selecting an analysis and clicking the move icon at the top of the tray. This is particularly useful if you wish to collaborate that folder with a user.
- Delete an analysis, by selecting an analysis and clicking the trashcan icon at the top of the tray
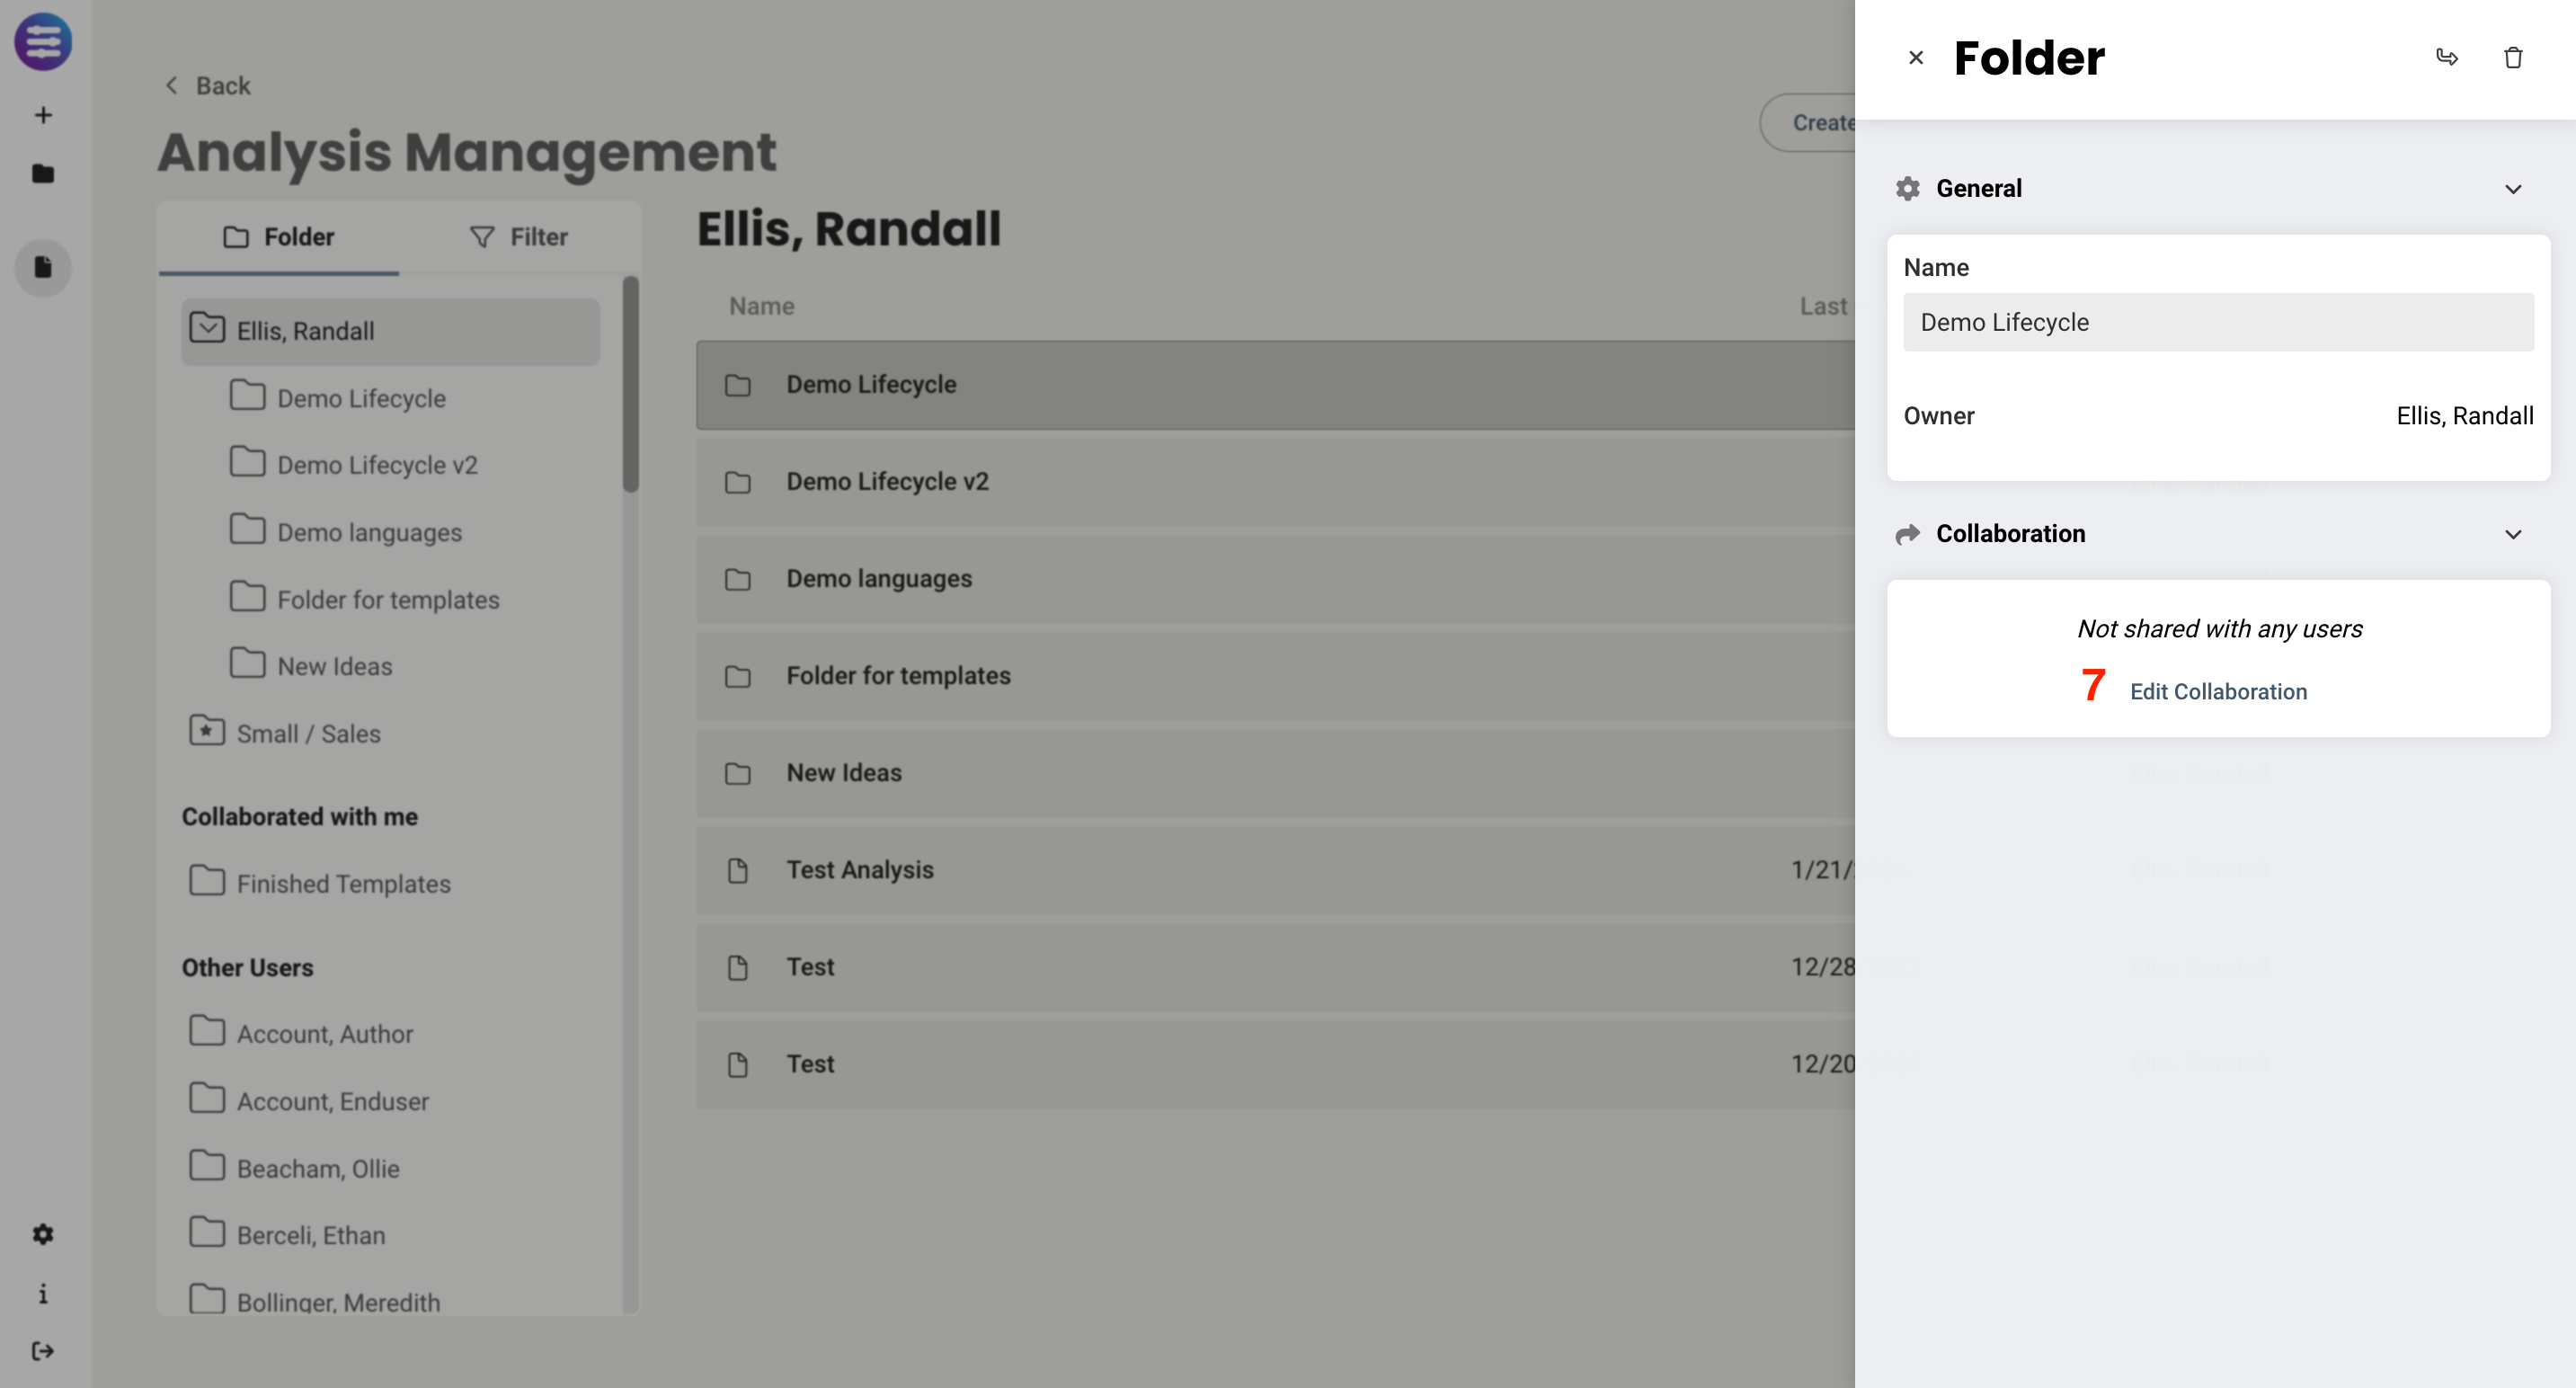
- Share (Collaborate) a folder by selecting the folder and selecting Edit Collaboration
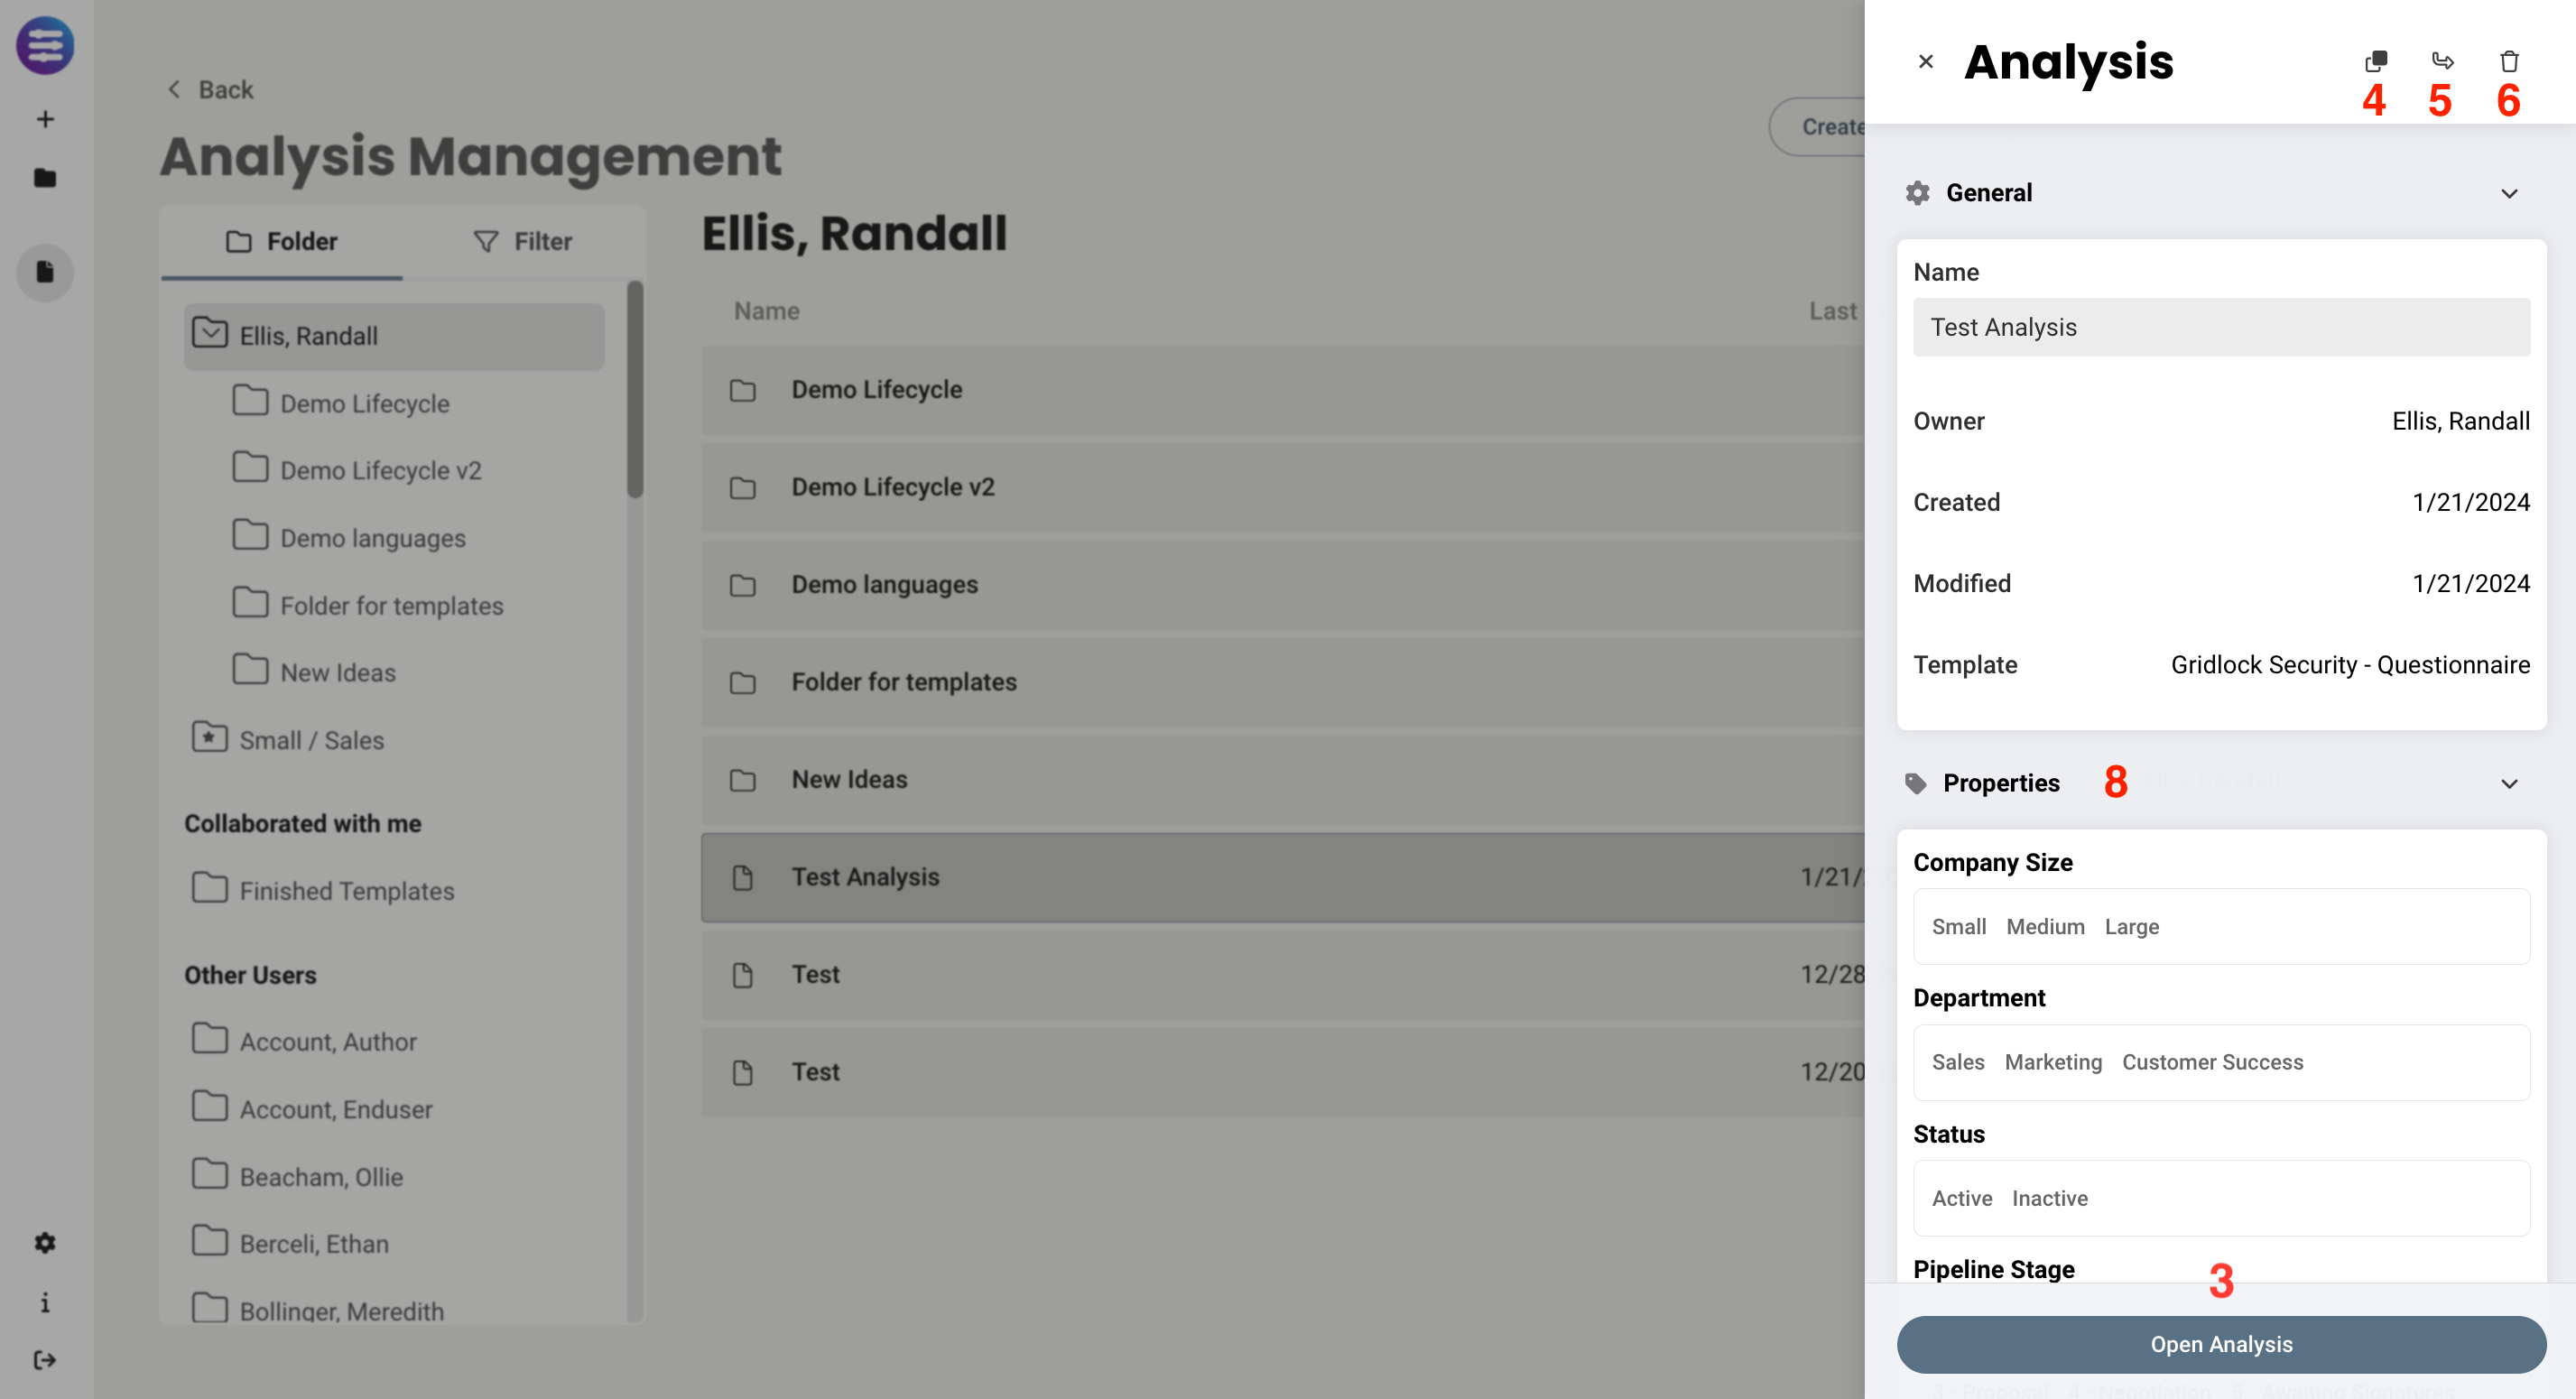
- Modify the properties of an analysis by selecting the analysis and adjusting the properties in the tray
Upon editing the properties of an analysis, a dialog like this is shown:
The following actions can be taken:
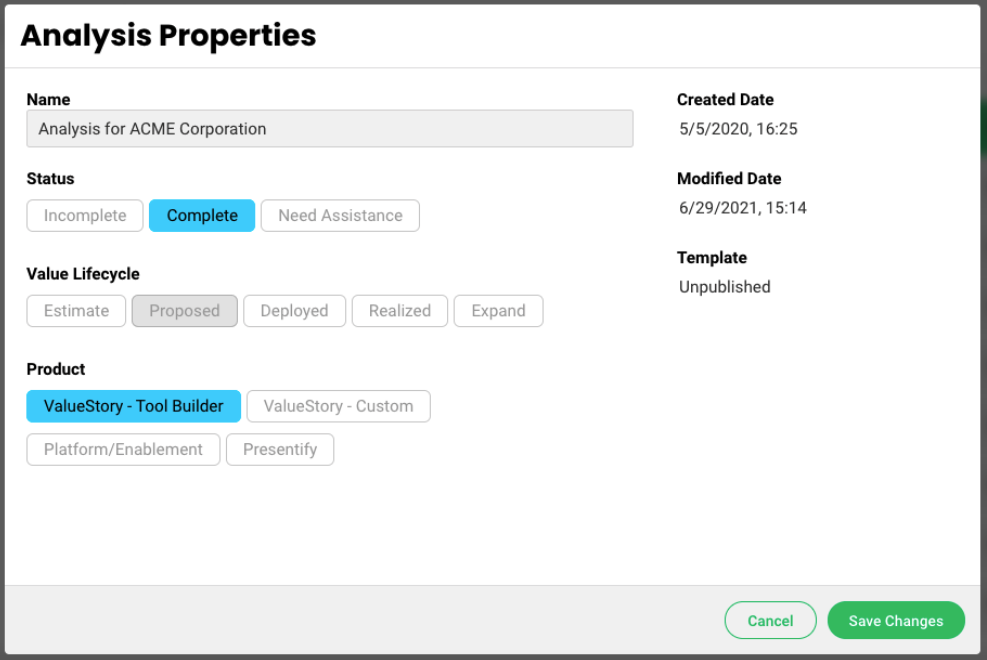
- The name of the analysis can be changed
- The user can select different properties for an analysis. These properties are set by the administrator. In the example above, the user had marked status as "Complete," and Product as "ValueStory - Tool Builder." The value of "Value Life Cycle" is by default selected to "Proposed." If a property has not been set, it will take on its default value, unless the user changes it.
- The create date, modified date, and template statuses are shown as well.
(If you are an administrator and want to change the properties available to your users, read here for documentation on how to do so.)
Searching, folders, and filters
Users can find previous analyses in one of several ways.
- The user can use the search box. Simply click into it and start typing. The list of analyses will auto-constrain based on the full-text search matched against what you enter.
- The user can make use of folders. Using the "Move" feature above, users can move analyses into folders and create new folders using the "+ Create" button.
- The user can use the filter tab to filter down a search. When the user taps on the filter tab, they will see something similar to this.
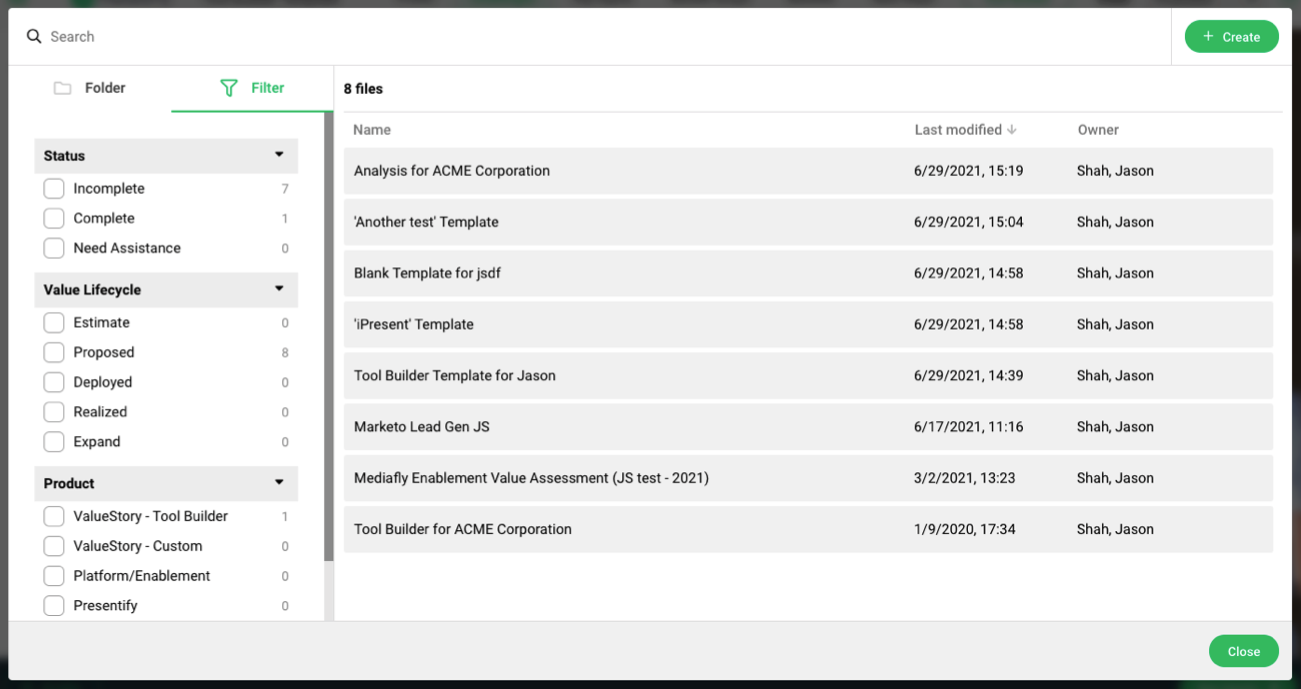
If the user wants to filter the list of analyses down, they can simply tap on any set of filters to which they are interested. The filters are AND-ed together.
So, if I want to see a list of analyses that have both the status of "Complete" and the Value Lifecycle of "Realized," I would check those two boxes in the left, and see what analyses show up in the middle.
Smart Folders
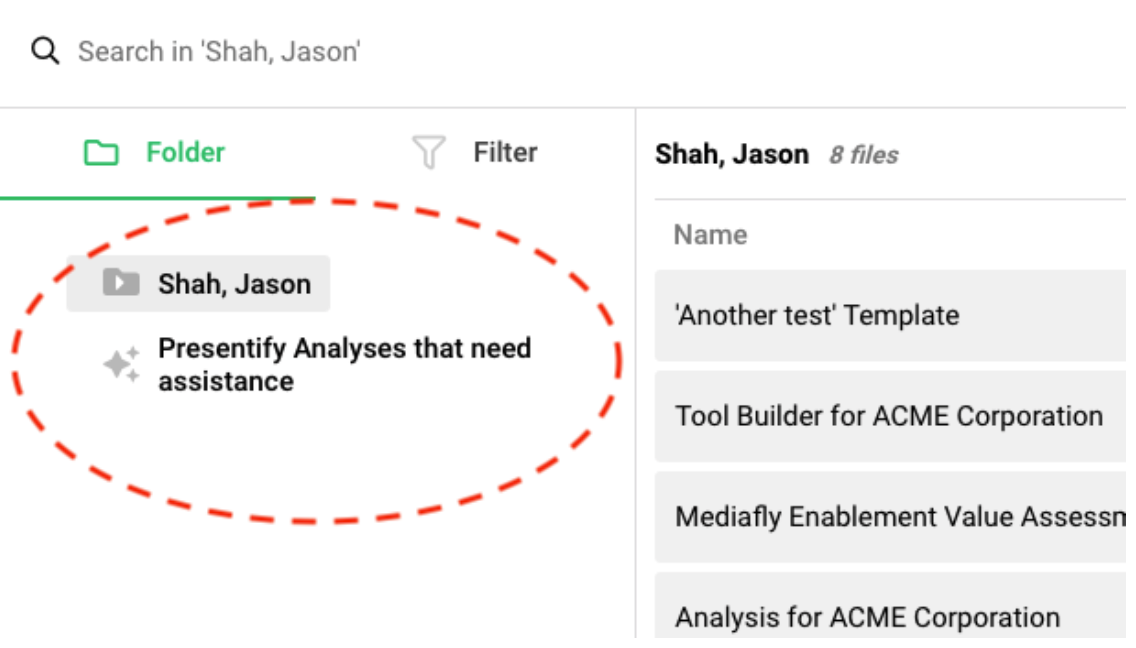
If a user finds that they are frequently searching or filtering the same things over and over, they can create a Smart Folder. This is a folder whose search and filter parameters are saved.
To create a Smart Folder, the user needs to either tap on the "+ Create" > "Create Smart Folder," or, from the Filters menu, scroll down to the bottom and tap on "Create Smart Folder from Settings." They will be presented with this dialog:
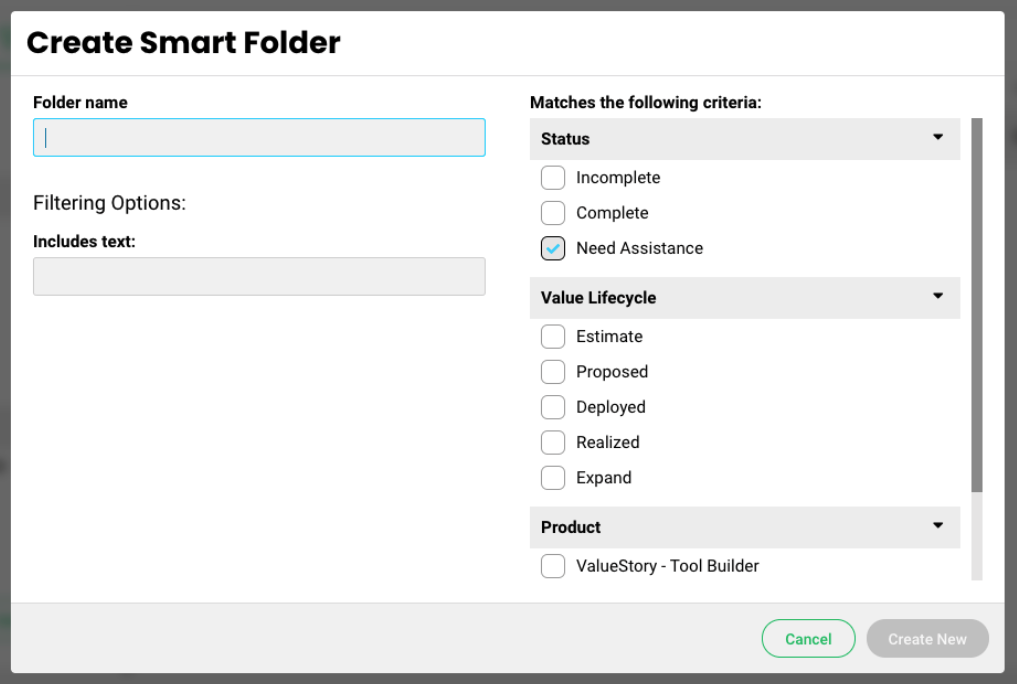
From here, they need to provide a name for their Smart Folder, enter the appropriate search terms and/or select the exact criteria that they wish to match, then tap "Create New." The Search Folder will then appear in their Folder list. For example:
Replies have been locked on this page!