
This article cover the Rules Editor, a dynamic feature designed to streamline the organization and management of rules. This guide will walk you through the high-level functionalities and provide insights into creating, managing, and troubleshooting rules effectively.
Jump to:
- Sheet Organization & Management
- Building / Managing Rules
- Advanced Rule Building: Complex and Conditional Rules
- Error Identification and Troubleshooting
- Examples
- Event Log
Sheet Organization & Management
You can create any number of sheets, which are collections of rules, to keep your rule sets organized and easily managed.
- Sheets Management: Organize your rules into sheets, creating as many as needed to organize your rules to fit your needs. You can create sheets based on rule types, initiatives, or product paths to keep related rules grouped together.
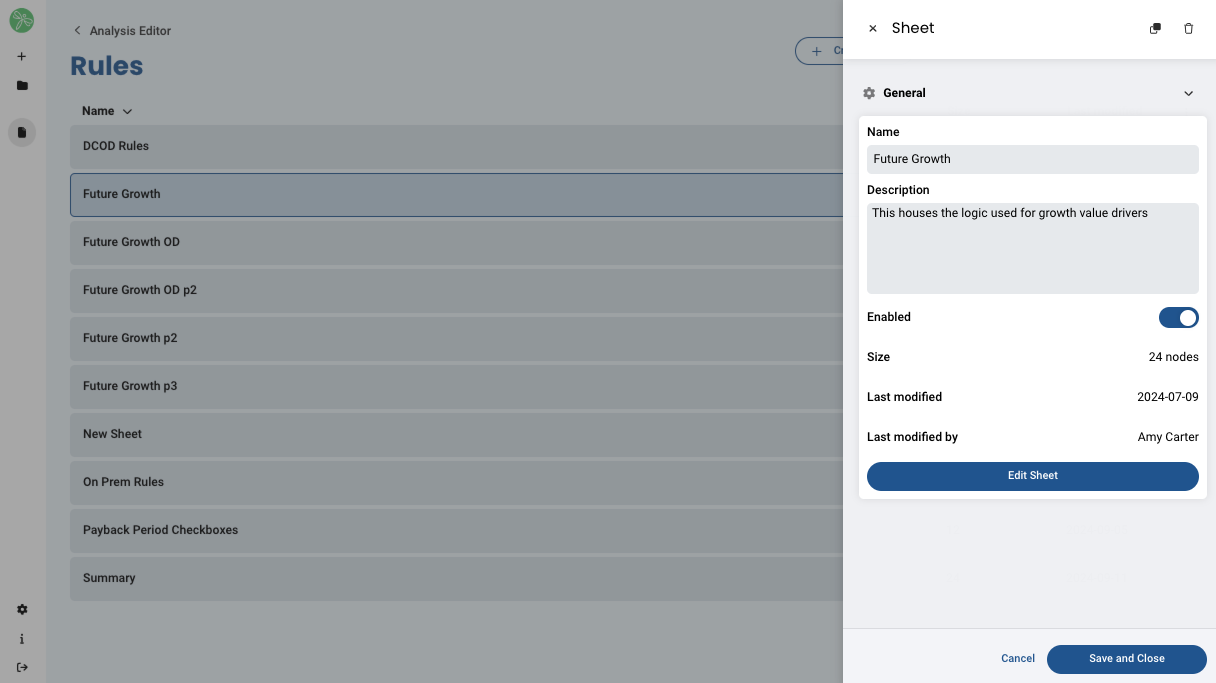
- Sheet Details: Clicking on a sheet in the list allows you to view its details, like name & description, to understand their contents at a glance.
- Modification Info: You will also be able to view the size, last modification date, and author of each sheet.
- Search and Filter: Utilize the search bar and filters to narrow down results or find specific item types within sheets.
If you select any sheet, you also have the ability to disable the sheet at any time. This turns off the rules on that sheet so that the logic doesn't trigger. This is especially helpful when testing new logic or building a new template that uses a new set of rules that you don't want to conflict with existing rules.
Building / Managing Rules
You will add event, condition, and action blocks and connect them with nodes to visually represent your rule logic.
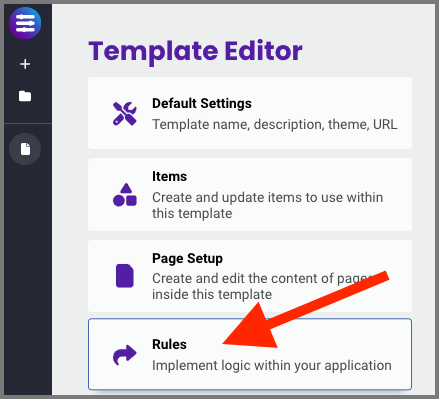
1. Access Rules
To access the Rules Editor, open an analysis, go to the template editor, and select "Rules".
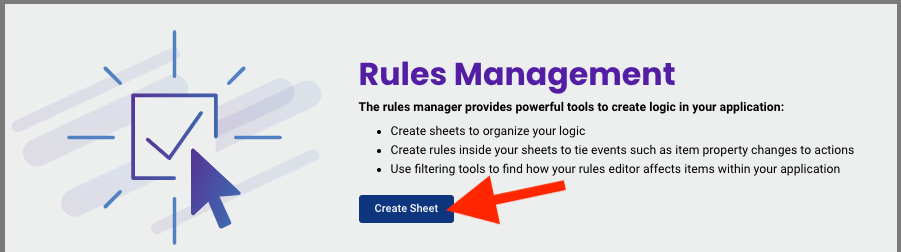
2. Open or Create Sheet
Click Create Sheet to create a new sheet or select an existing sheet > edit sheet to add or manage rules.
3. Create Event Trigger
Each rule begins with an event, which triggers subsequent actions.
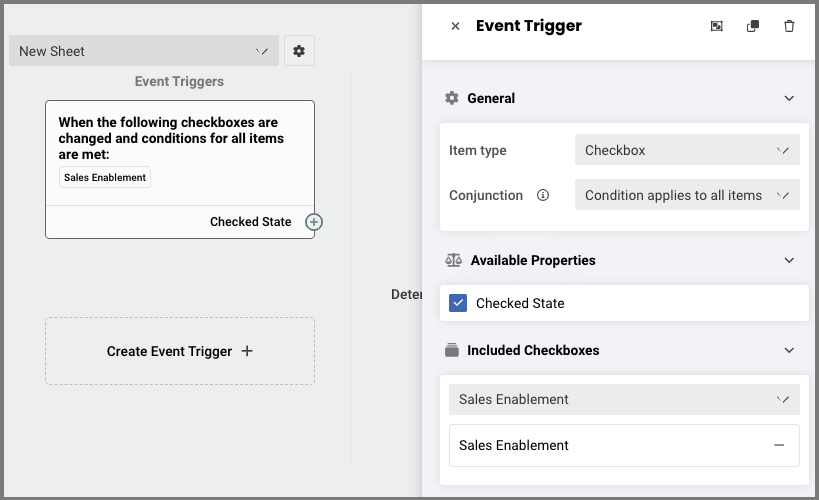
- Click Create Event Trigger +
- Under General, select the desired Item Type & Conjunction.
Item Types:
▪ Benefit
▪ Challenge
▪ Checkbox
▪ Global Variable
Conjunction:
▪ condition applies to all items
▪ condition applies to any item - Selected the desired Property(ies), a list of Properties will be populated based on the selected Item Type).
- Select from the "included" options, this list will also populate based on the selected Item Type.
- Close the Event Trigger window and proceed to Conditions.
4. Conditions
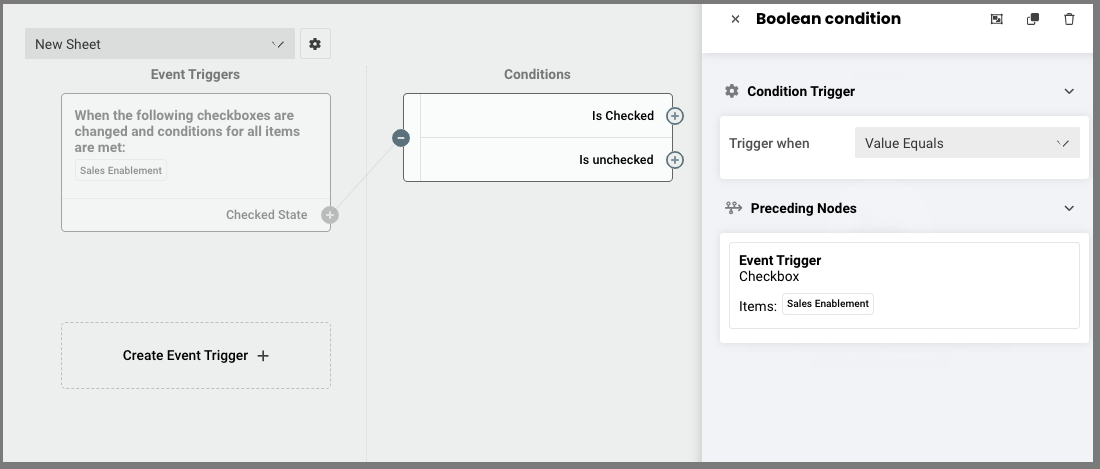
- To manage a Condition, click the ⊕ button on the right side of the Event Trigger and select either Connect to New Condition, Connect to Existing Condition, or Disconnect from all.
- Under Condition Trigger, select from the Trigger when dropdown menu to determine what conditions must be met in order to fire the rule:
Trigger When:
▪ Value Equals
▪ Value is Changed
▪ Property is Dirty - Close the Condition window and proceed to Operators or Actions.
5. Operators (optional)
You can choose to combine Operators (adding and/or) with conditions to provide more granular control over when an action will be executed, if you do not wish to include an Operator, move on to the next step.
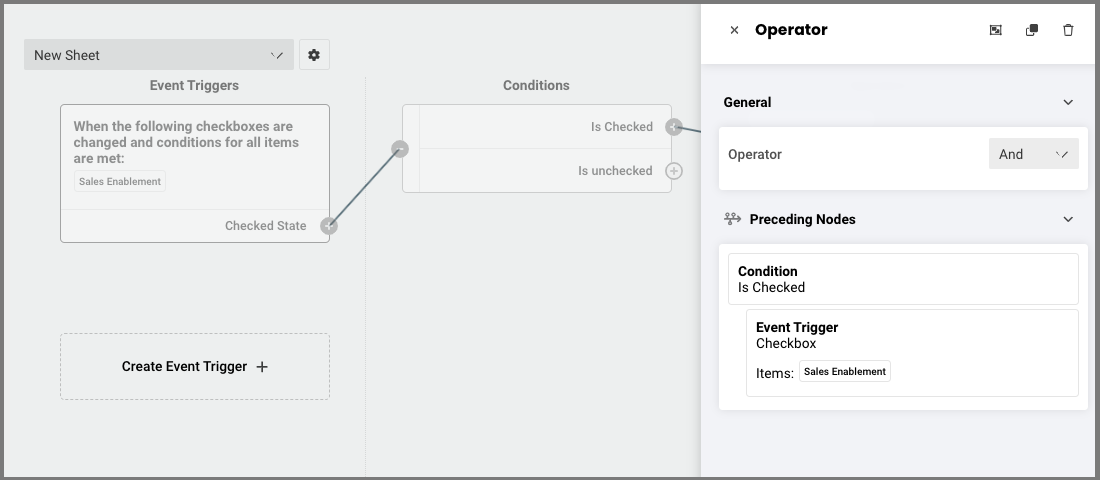
- To manage an Operator, click the ⊕ button on the right side of the Condition and select Connect to New Operation, Connect to Existing Action/Operation, or Disconnect from all.
- Under General, select whether the Operator will dictate AND or OR.
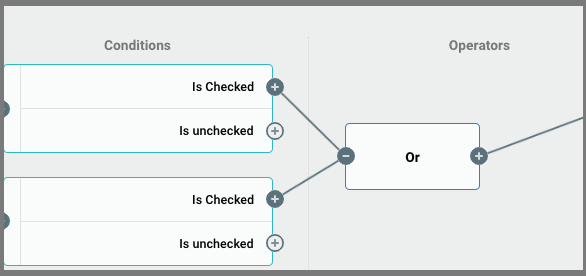
- Close the Operators window, then select the ⊕ next to the condition to which you want to connect this operator and select Connect to Existing Action/Operation
- You'll be prompted to "Select a node to connect to", where you will click the ⊕ of the Operator to activate the and/or operator between the conditions, e.g., If A is checked OR B is checked, proceed with the following action.
- Close the Operators window and proceed to Actions.
6. Actions
Actions define what happens when an event is triggered, e.g., showing a page when a checkbox is checked. You can also implement inverse actions within the same rule, reducing the total number of rules needed by adding an action to an inverse property, e.g. performing one action when a box is checked and another action when a box is unchecked.
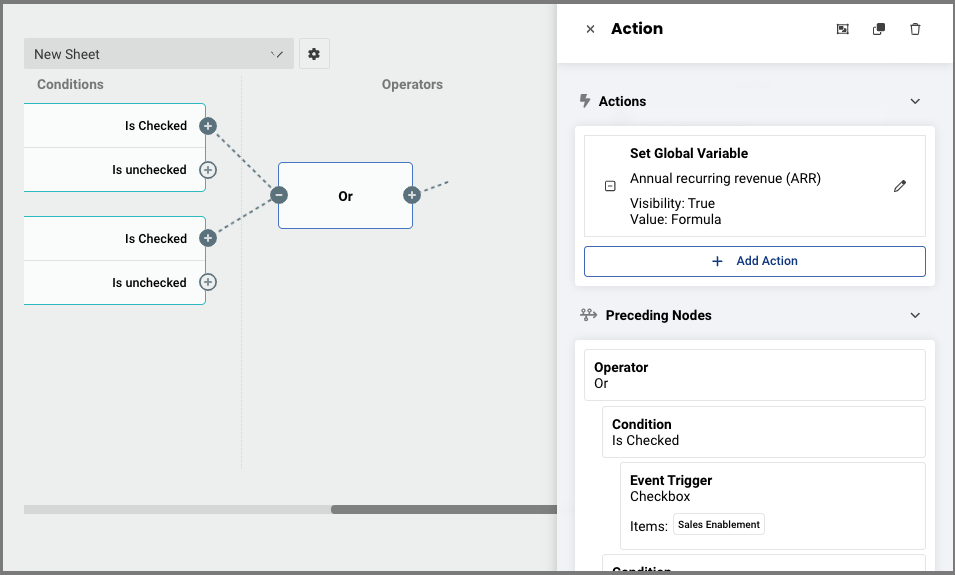
- To manage an Action, click the ⊕ button on the right side of the Condition or Operator and select Connect to New Action, Connect to Existing Action/Operation, or Disconnect from all.
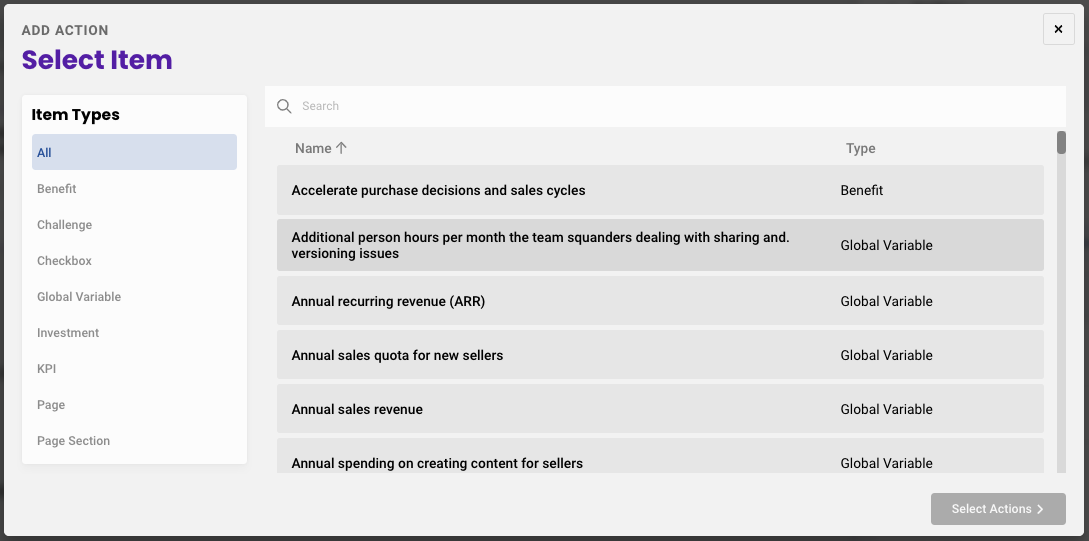
- Under Actions, click +Add Action.
- Select the desired item from the populated list, the click Select Actions.
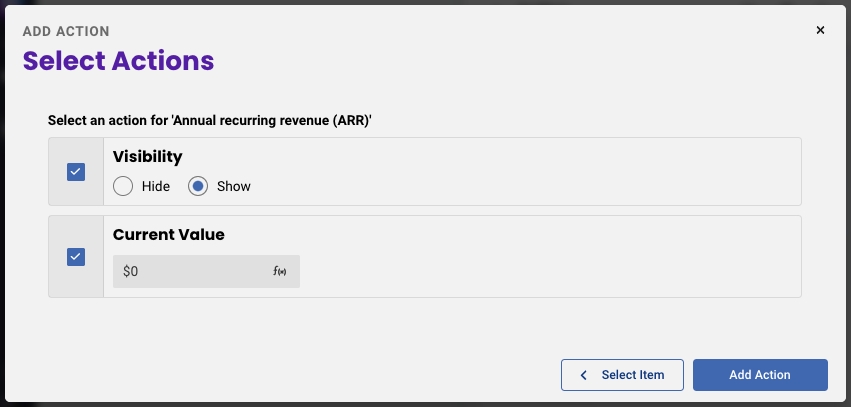
- Each action will populate its own set of options, select your desired options and click Add Action.
- Close the Actions window.
7. Review/Edit/Save
Review the flow of logic for your rule(s), then click Save and Close to activate. To make changes, click on a block to update its configurations or click on a ⊕ to adjust connections.
Advanced Rule Building: Complex and Conditional Rules
- Connecting Conditions: Link various conditions and actions by clicking on the ⊕ and selecting "Connect to existing" to create more intricate rules.
- Operators: Use operators like "and" or "or" to build complex rules with multiple conditions.
- Nested Conditions: Embed layers of conditions to create deeply complex rule structures.
- Comparing Variables: Create conditions by comparing one variable to another, enabling dynamic rule triggering based on variable relationships.
Error Identification and Troubleshooting
- Action Nodes: View all nodes connected to a particular action to identify potential errors or conflicts in rule logic.
- Rule Analysis: Analyze the impact and connections of each rule to understand its functionality and troubleshoot effectively.
- Event Log: access the event log via Menu > Event Log when in an analysis to bring up a side panel that shows the downstream actions triggered by an event, e.g., checking a checkbox, or entering a value into a field. This will allow you to see where your rule may not be triggering correctly.
Examples
Common Flow for Value Selling : Identify the persona or use case > identify and prioritize business challenges > include relevant benefits
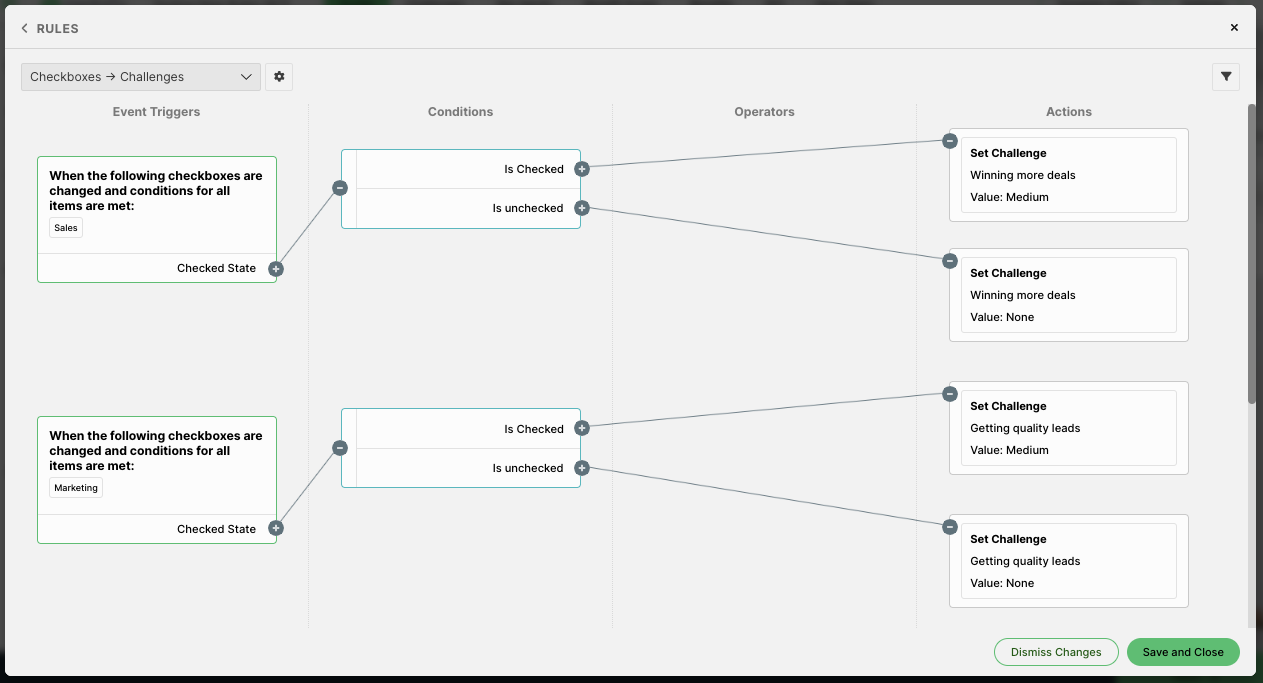
The following rule is set up so when the buyer is in sales (checks the Sales checkbox), the "winning more deals challenge" is automatically prioritized to the High priority as that's going to be one of the most relevant goals/challenges for the customer.
In the old system, this would be set up like so:
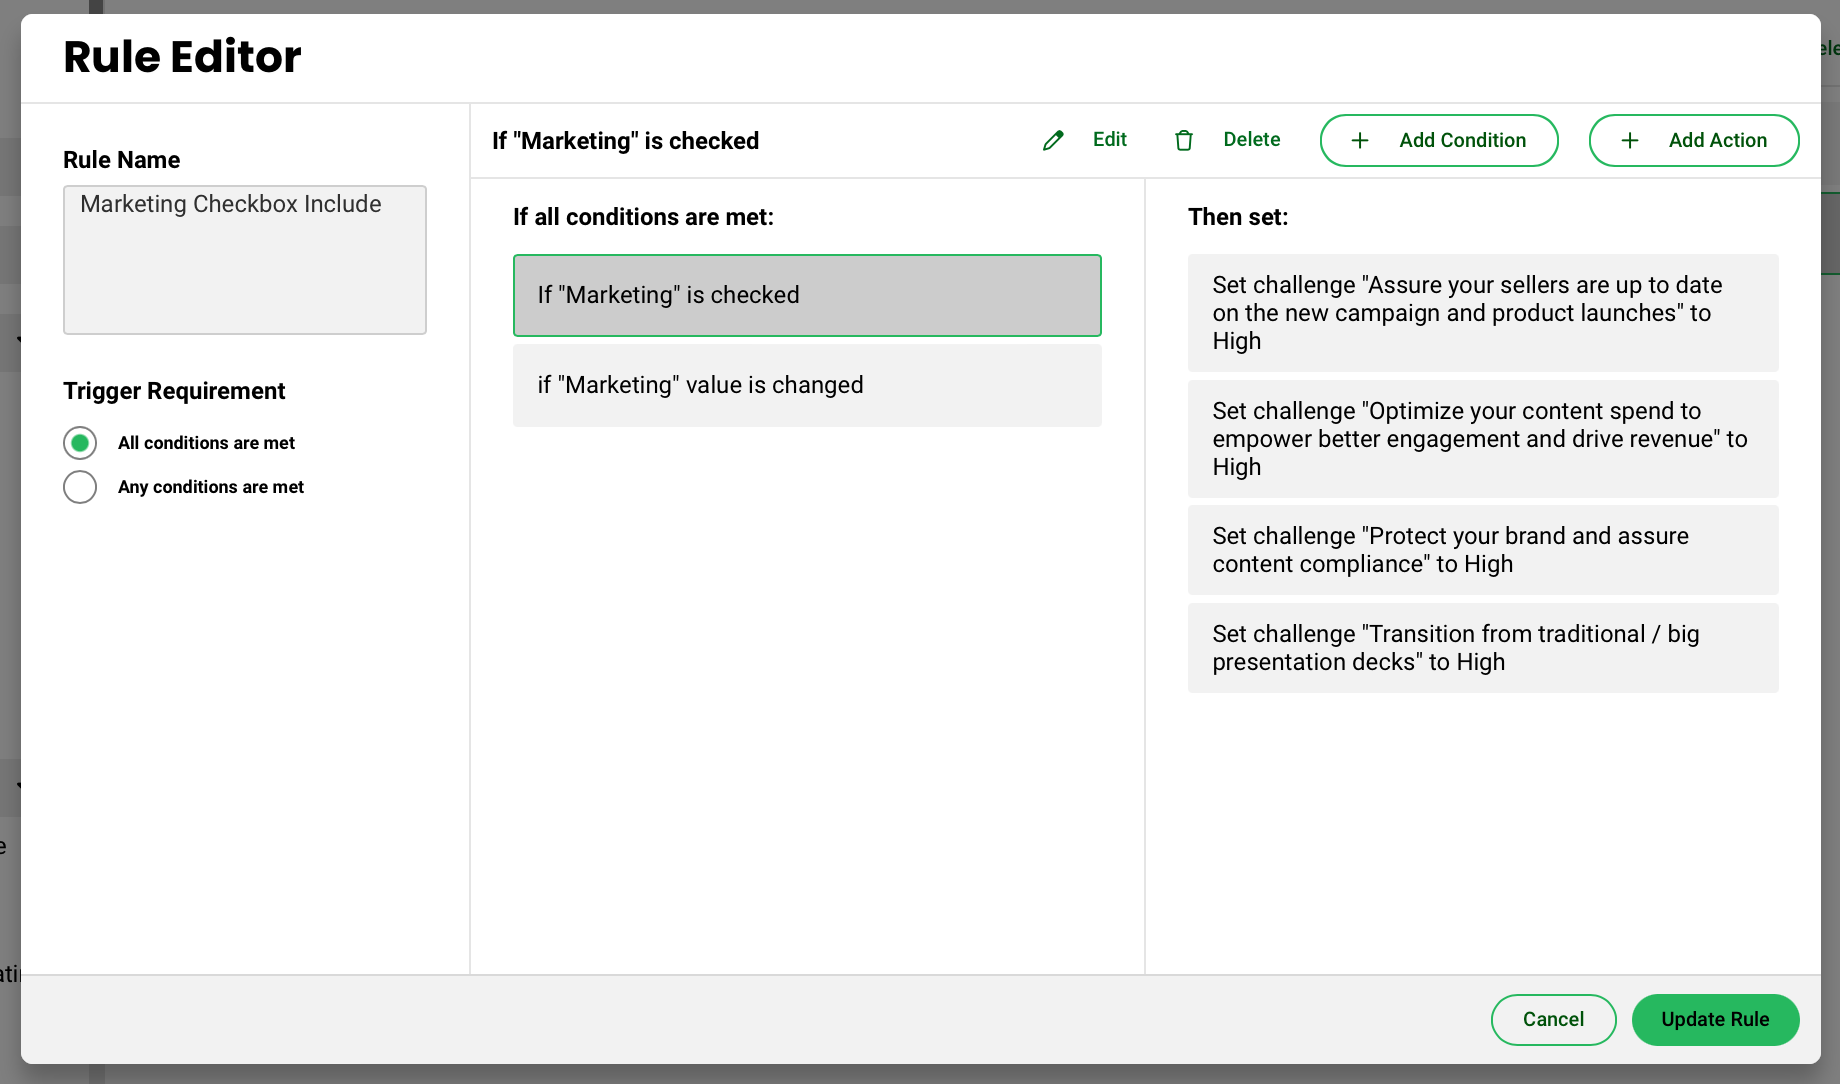

Here is the same set of logic in the new system:
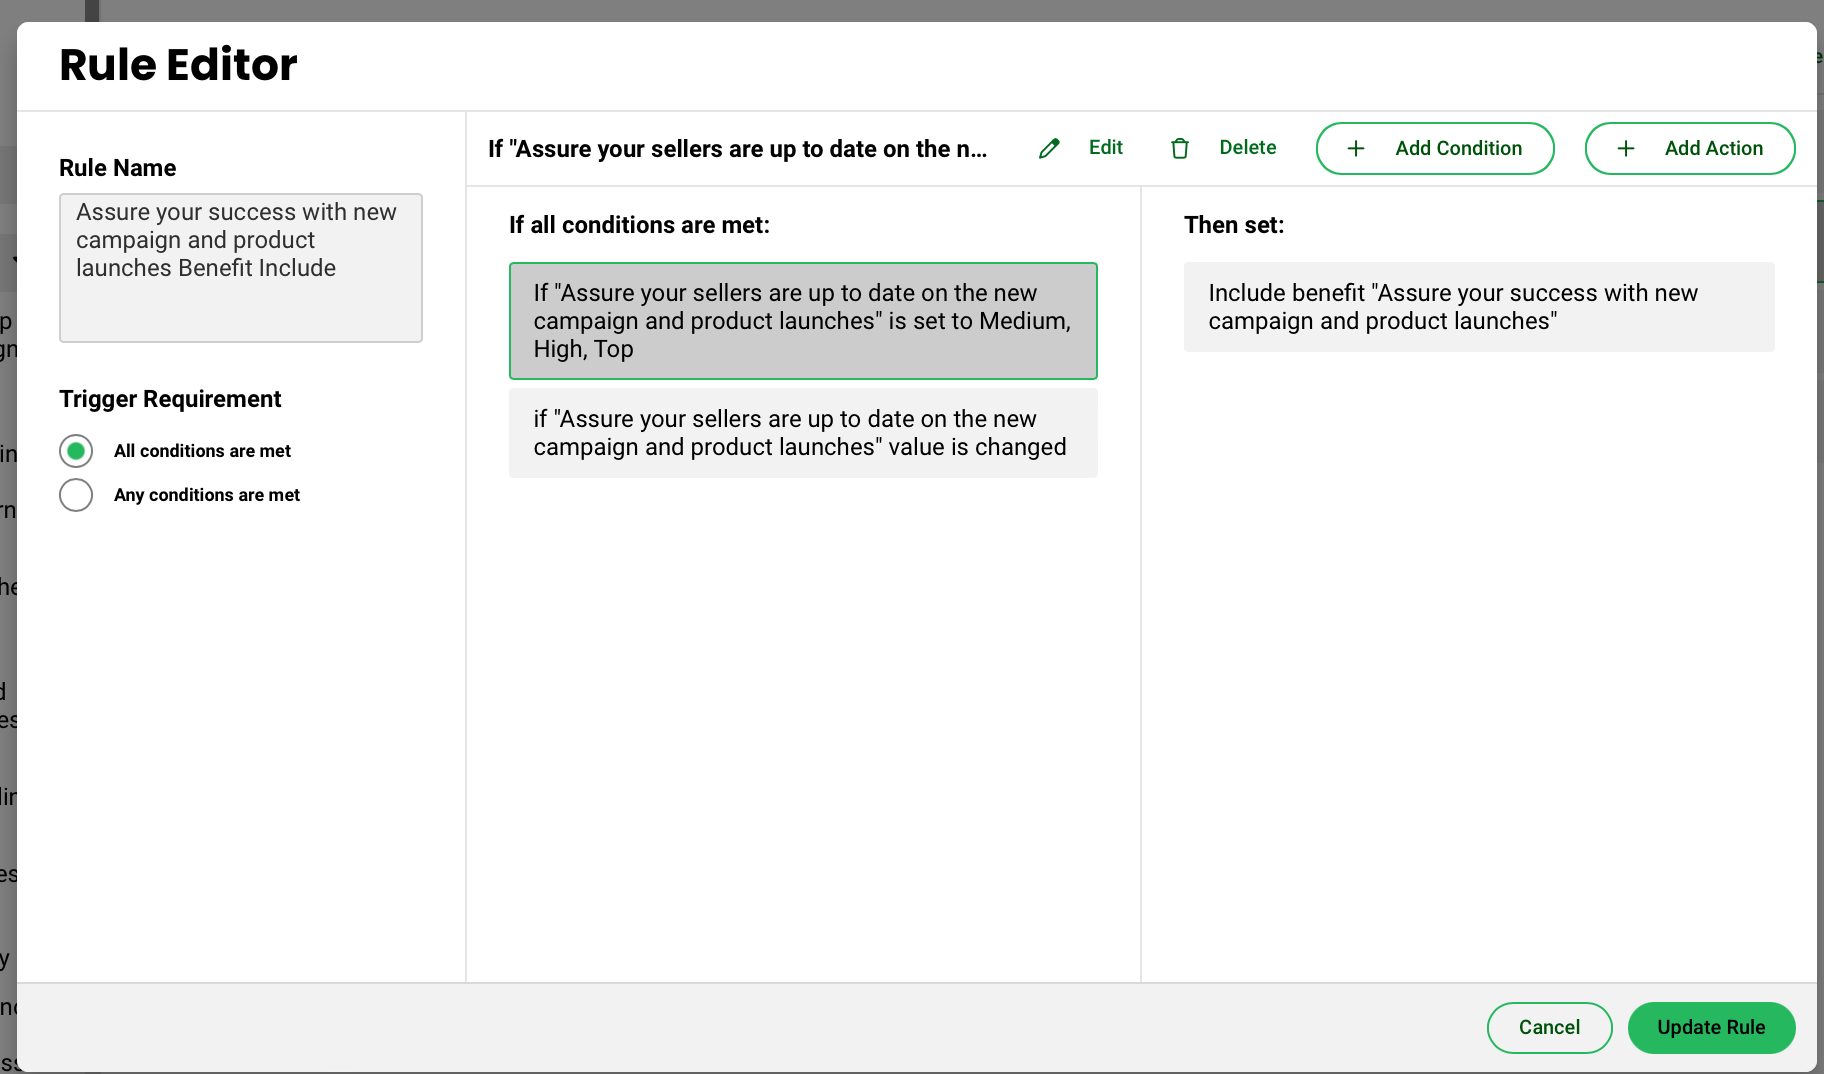
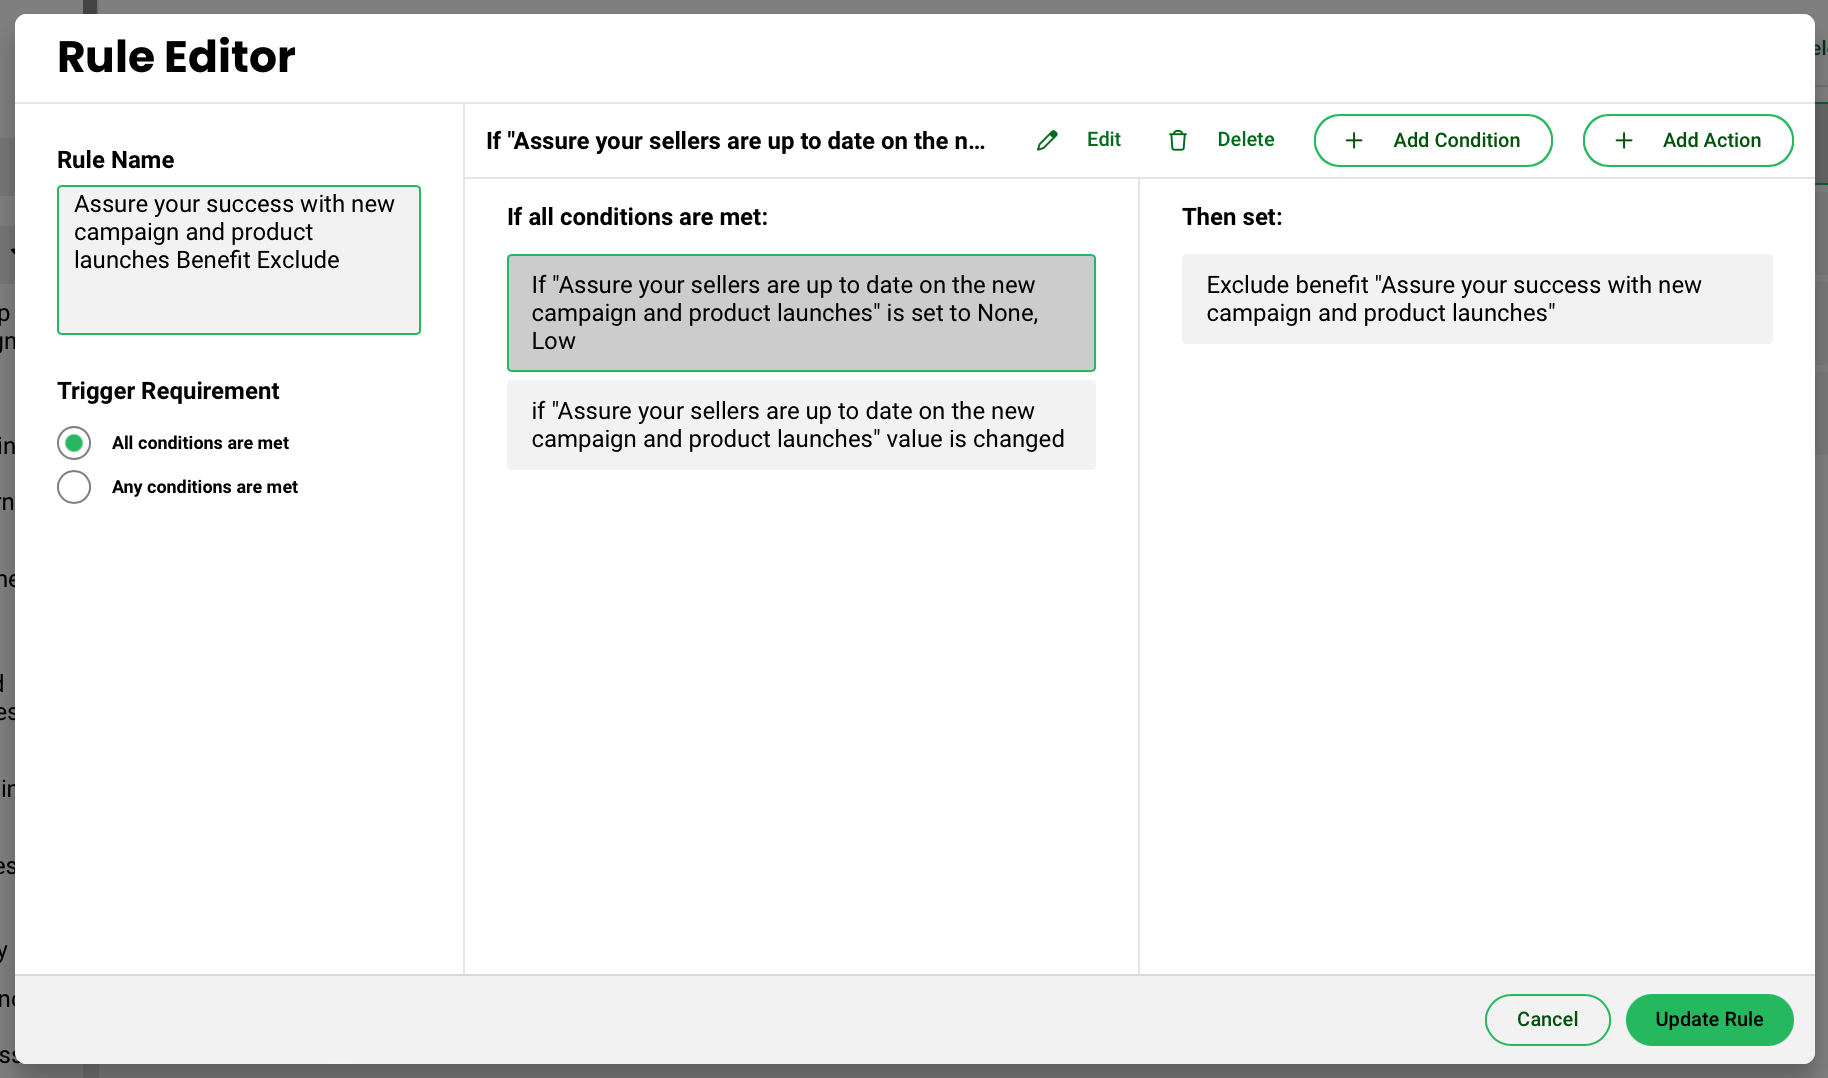
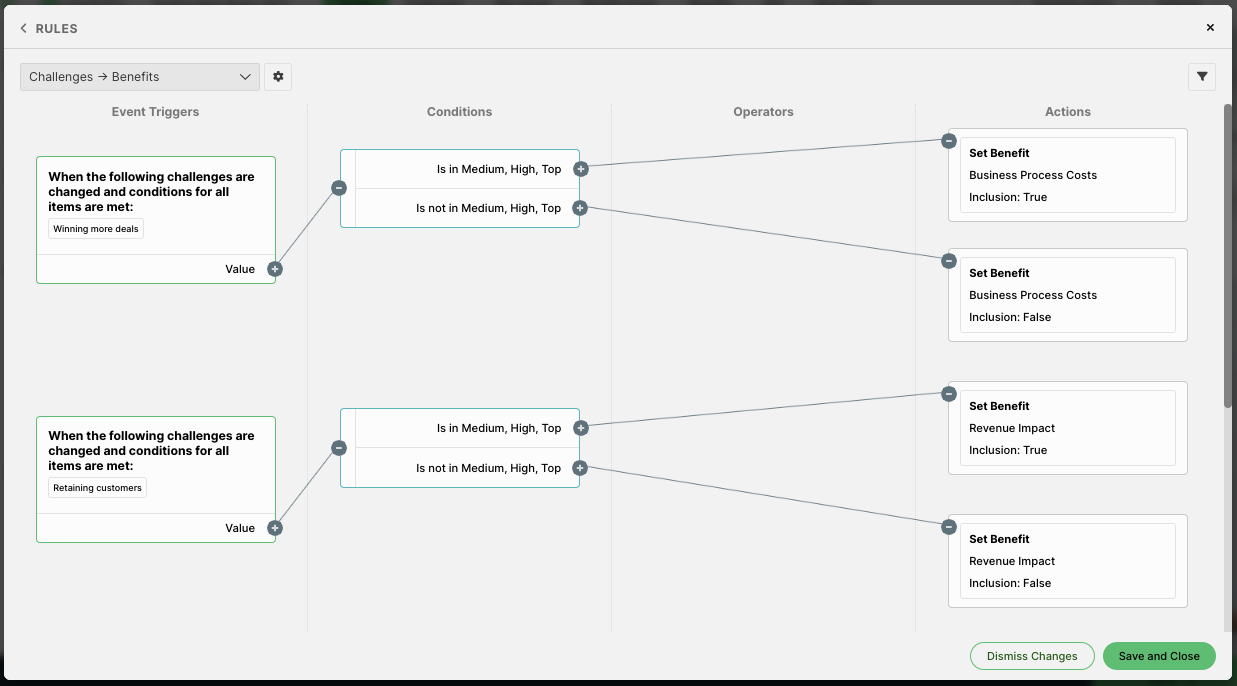
After the priorities are reviewed, those inputs can then trigger certain benefits to be set to Included so the buyer is only being presented with the information most relevant to them.
Old system:
New system:
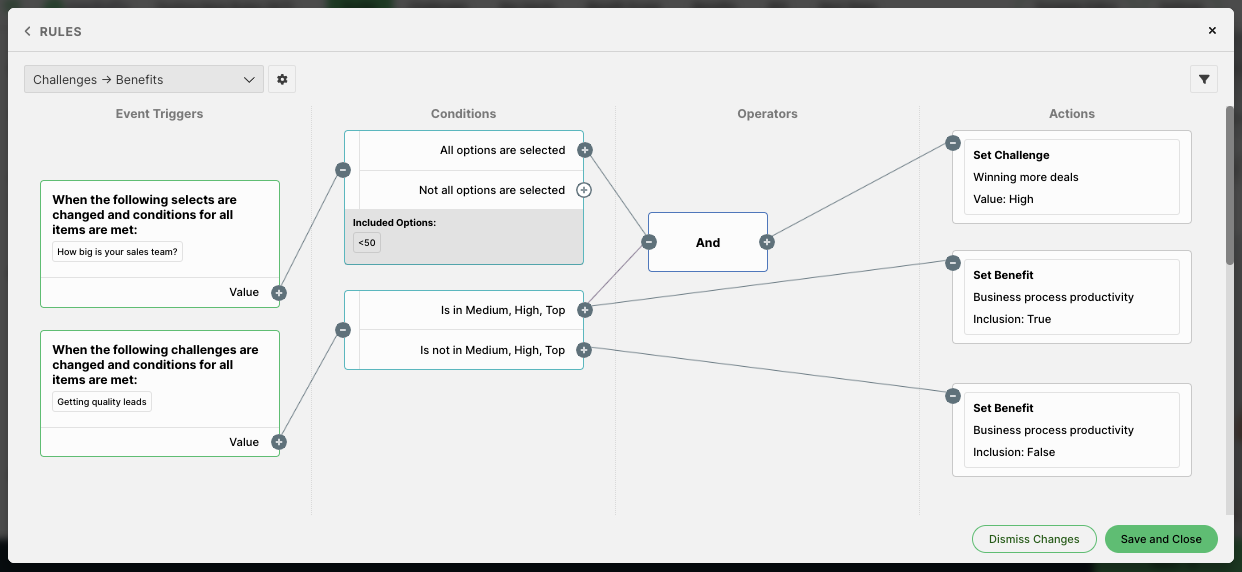
Let's say you want to expand that rule and include another component like the size of the sales team. You could add a connecting piece of logic that sets the priority of the "winning more deals" challenge to High as well, but only when the sales team is less than 50 AND the "getting quality leads" Challenge is set to either Med, High, or Top priority.
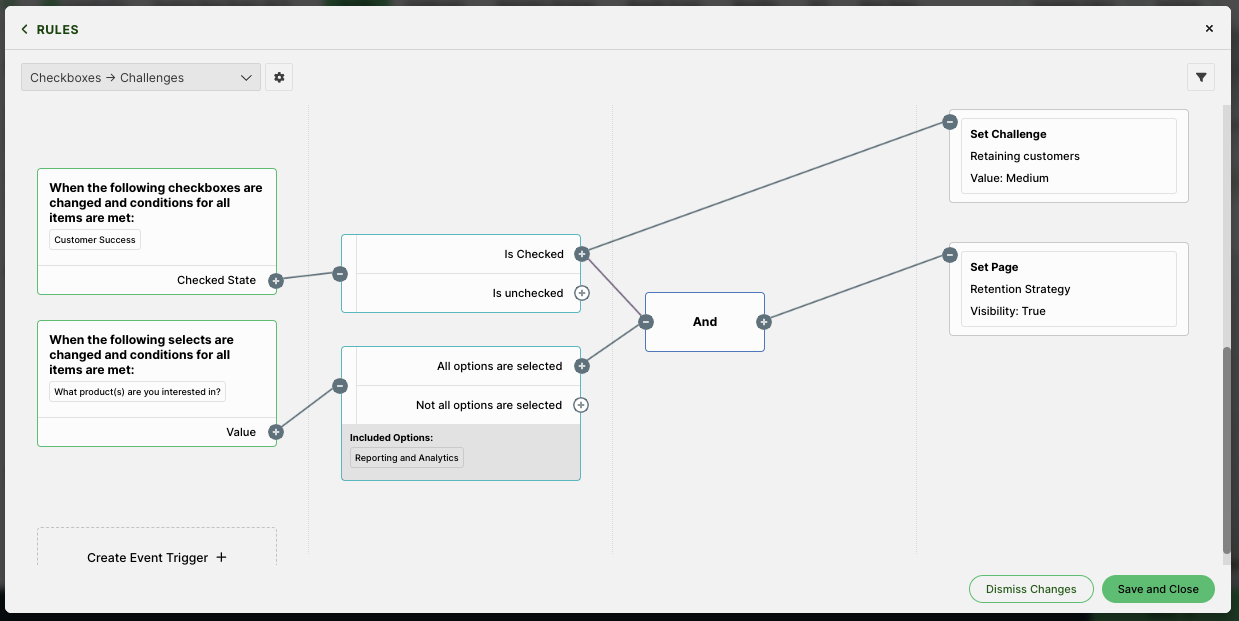
We can continue to expand on the first example and add an additional rule that says if the "Customer Success" checkbox is checked and they have selected the "Reporting and Analytics" product suite from the dropdown, show a hidden page that provides information on data strategies.
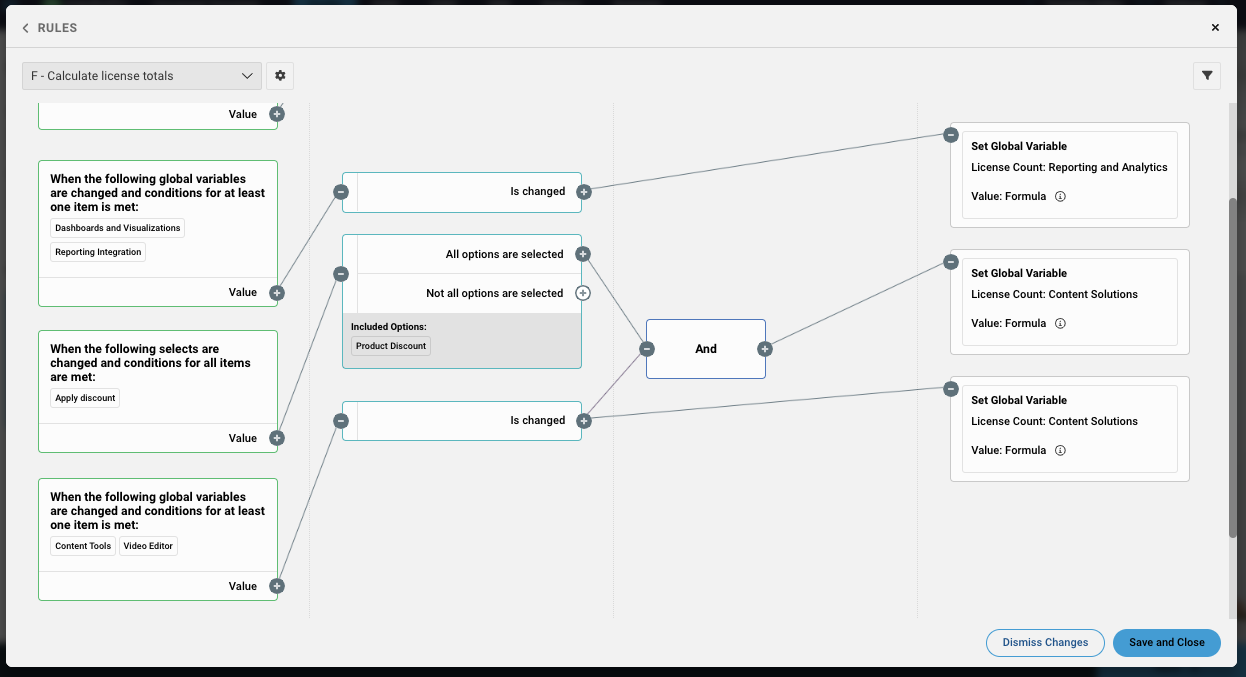
What if you want to capture the number of licenses selected for each product, total them up, and apply a discount in certain cases? You could create a rule that re-sums a set of variables any time any one of them is changed, and apply a discount to the total only if the "Content Solutions" checkbox is checked.
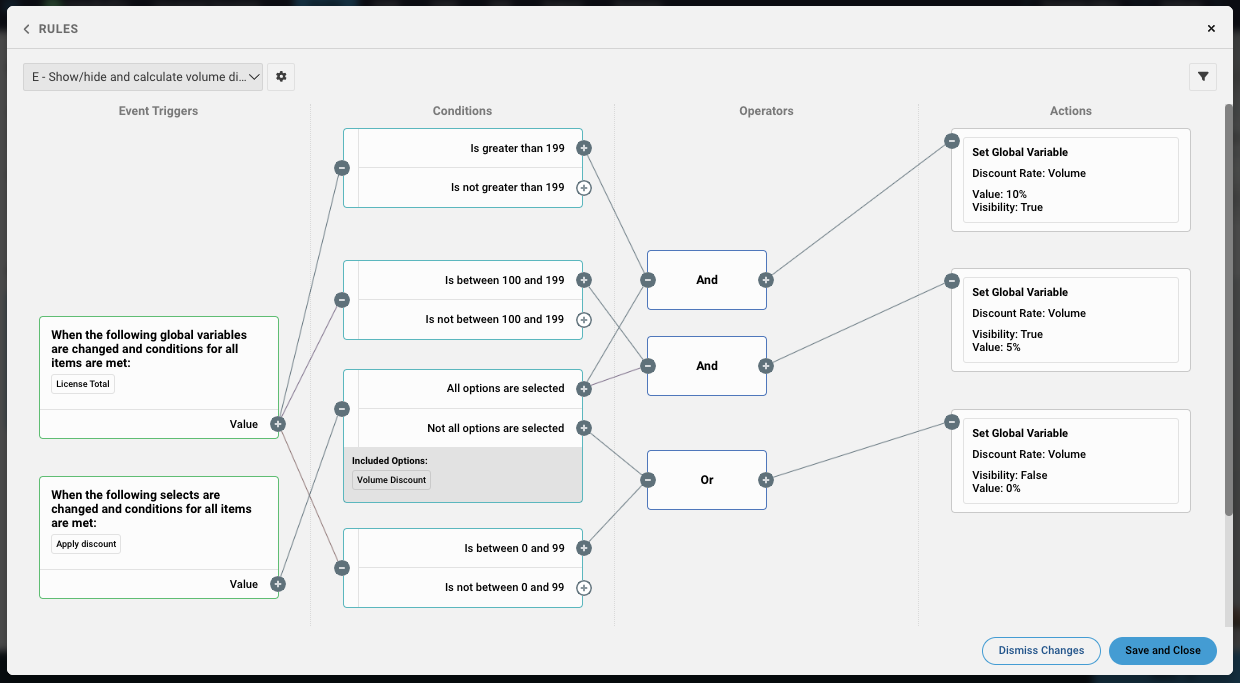
Operators allow you to create more complex rules with more parameters.
Expanding on the discounting further, you could add a rule that applies a specific volume discount and shows it on a page based on the range of licenses purchased, but only if the Apply Volume Discount checkbox has been checked.
Note - If your rules are not firing correctly, an easy way to diagnose the issue is to open the Event log and see if the right actions are triggering off event changes. Please see the article Event Log for more details.
Conclusion
The new Rules Editor System is designed to provide a visually intuitive, organized, and efficient method for rule creation and management. By understanding the functionalities and capabilities outlined in this guide, you can harness the power of the system to create simple to complex rules, ensuring a dynamic and interactive user experience.
Replies have been locked on this page!