
Integrating SAP C4C with Intelligence lets you link your org's SAP account with our application, allowing data synchronization across multiple entities, including accounts, opportunities, contacts, users, opportunity stages, tasks, and associated metadata.
Setting up SAP C4C Client
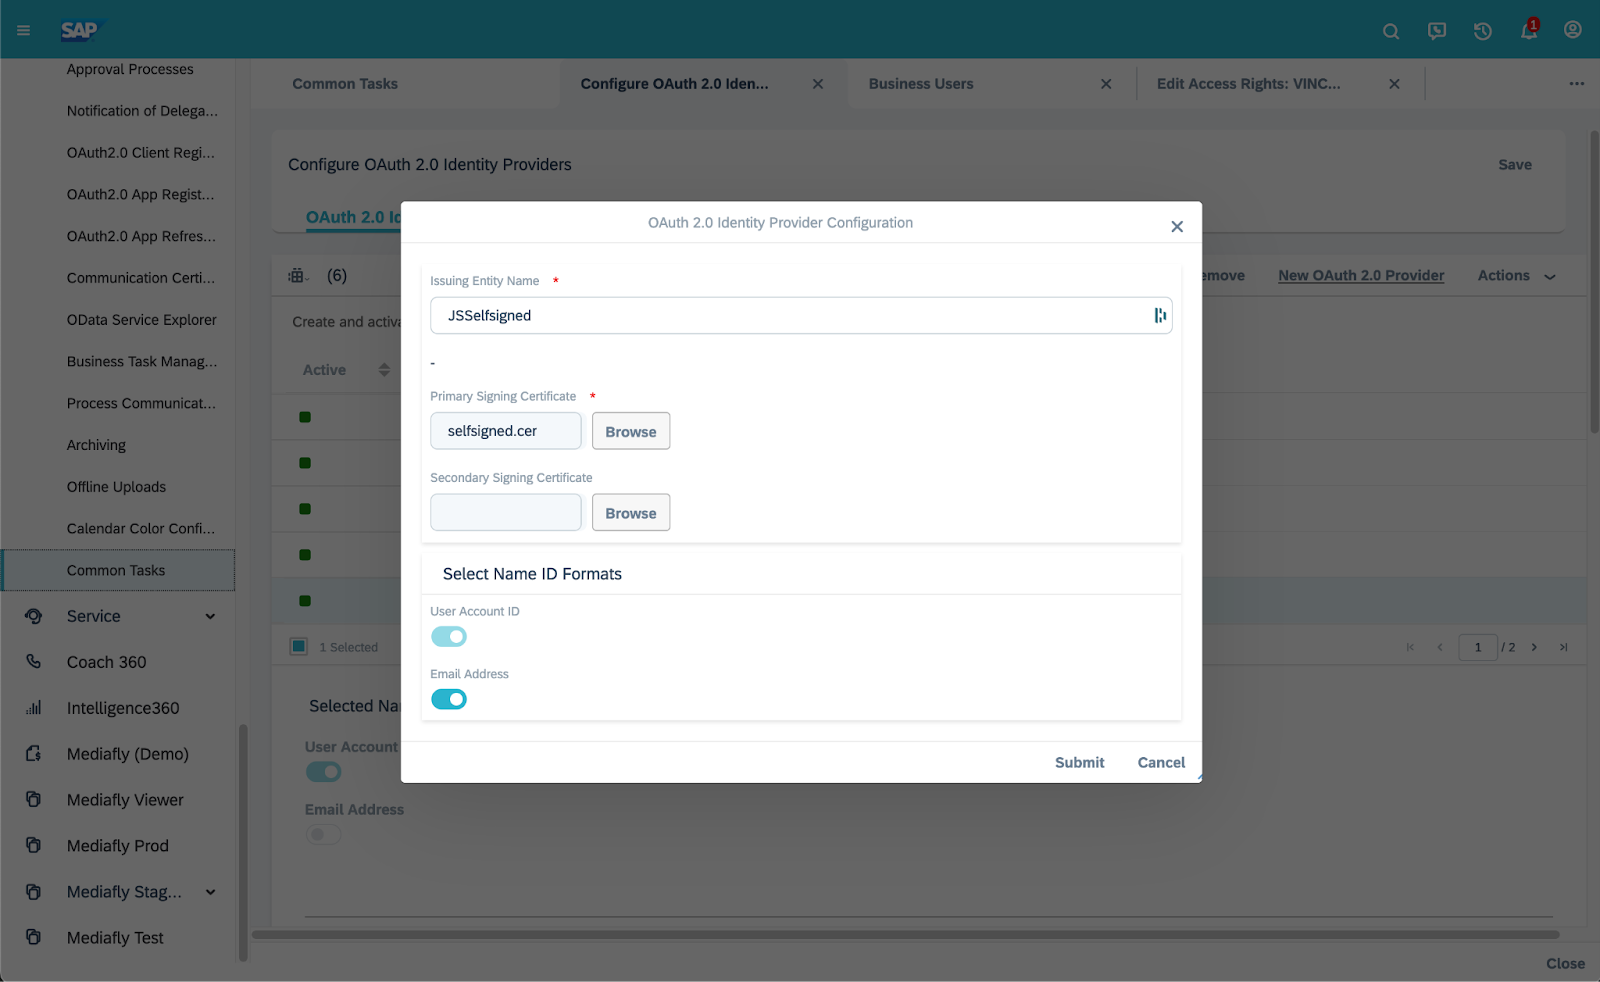
- Create the OAuth2.0 Identity Provider: go to Administrator > Common Tasks > Configure OAuth 2.0 Identity Provider, and set up a new Identity Provider.
- Click on the New OAuth 2.0 Provider button.
- You must upload the following .cer certificate as the Primary Signing Certificate:
-----BEGIN CERTIFICATE-----MIIDzTCCArWgAwIBAgIURfjR8BU7jkwZbegUTXLdGFF+YpcwDQYJKoZIhvcNAQEL
BQAwgY4xCzAJBgNVBAYTAlVTMQ4wDAYDVQQIDAVUZXhhczEPMA0GA1UEBwwGQXVz
dGluMREwDwYDVQQKDAhNZWRpYWZseTEYMBYGA1UECwwPSW50ZWxsaWdlbmNlMzYw
MQwwCgYDVQQDDAN1czIxIzAhBgkqhkiG9w0BCQEWFHN1cHBvcnRAbWVkaWFmbHku
Y29tMB4XDTIzMTIxNDIxMjI0MVoXDTMzMTIxMTIxMjI0MVowgY4xCzAJBgNVBAYT
AlVTMQ4wDAYDVQQIDAVUZXhhczEPMA0GA1UEBwwGQXVzdGluMREwDwYDVQQKDAhN
ZWRpYWZseTEYMBYGA1UECwwPSW50ZWxsaWdlbmNlMzYwMQwwCgYDVQQDDAN1czIx
IzAhBgkqhkiG9w0BCQEWFHN1cHBvcnRAbWVkaWFmbHkuY29tMIIBIjANBgkqhkiG
9w0BAQEFAAOCAQ8AMIIBCgKCAQEArig6E6fGg/ovZADW1eGBemq/Dbcm8VW+ffKl
qRMlYcCzNroddoah7iJT3na785v6uVebtT7CHFqL7tVJU08C8QAr3NYaqVk76OLh
TkLAOMn5gd6xSp83php8yRe1UchTLX4fijm0SHqZrDALCTQikp6AUg9hWPP5tfuG
qAt8rOJnNr67lGP+yTC0SWAmlBzF53bVMKpAw2BsNwDXVVg4YLwS2OiYIr3aW+0m
LOGIrqzBb3Np26+MbbFn3t03l548o0DHQAJTx3WQzWEvZ0zGAEjkf5kxhJpmPJSS
jVmjScpTrf2edcjeZchAh8lg+GhT3QWGQx87+SnJgrp7CHVncwIDAQABoyEwHzAd
BgNVHQ4EFgQUq42gVxEBJHBpQQQ2uGRirA7pIEcwDQYJKoZIhvcNAQELBQADggEB
AItR8PDnSdl0L+sEKRyRzSipcIqZbje7PGu1wdeEo26Re6TewvHQkhGkGAhxPdQ2
Kqpaue0DRz7ceeVQoFMa6eQqiT6QUwrMcahaSQHx17nXavwXLl0+V0CkxTW1GOLx
CrsFSijpd/qxYD3wc4PW2hvZW2pEjWmlLxrzFqrf+sPFyfhhjvZwM9wwI1IyytQH
CGDupT1xIAx6/XRP49pu8uILy+PpJC1eQmFW6dgPVILt3KiuKzM8CE6qylqVp32n
LdUG3mcxl51mpPhPUHQ8snNdT2f9x3vACb/tk26SU/Zp+J2sLxhABPKM8w41NNWN
wuzNQxpjFd8eqL0tkiQ+8jw=
-----END CERTIFICATE-----
- Set the Issuing Entity Name to “Intelligence360”.
- Click Submit.
- Click on the New OAuth 2.0 Provider button.
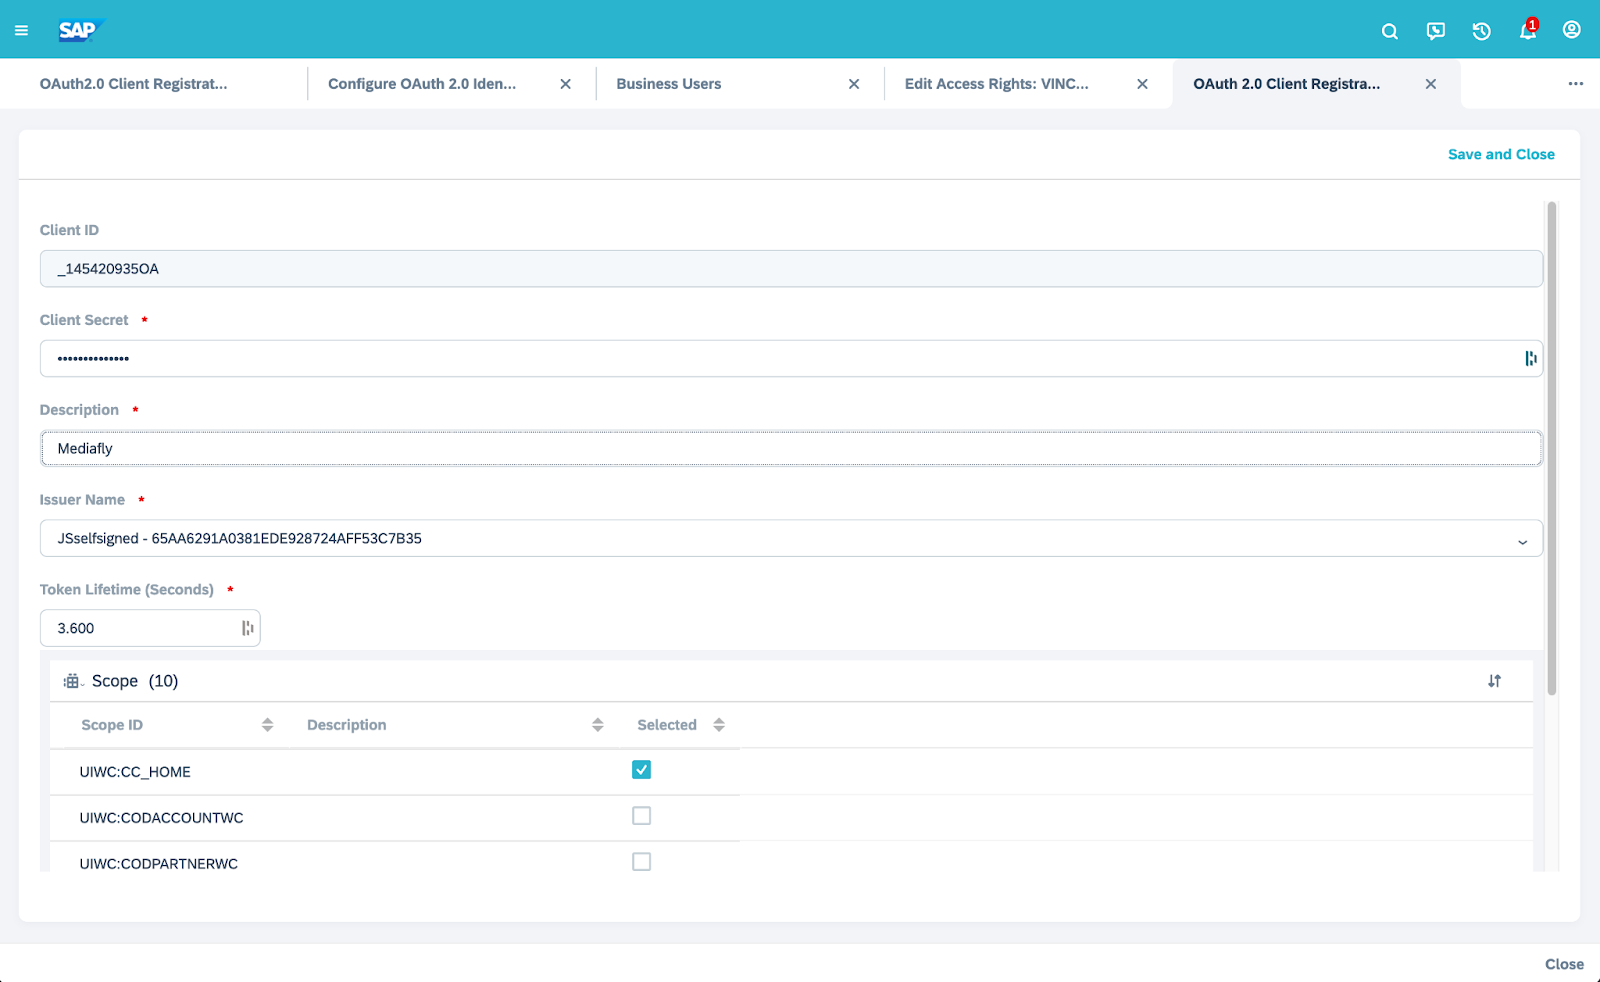
- Go to Administrator > OAuth2.0 Client Registration and click on New.
-
- Enter a Client Secret, Description, and pick the Issuer Name of Intelligence you entered in step 1.
- Choose the UIWC:CC_HOME scope here.
- Click on Save and Close. You now have the Client ID and the Client Secret.
- Enter a Client Secret, Description, and pick the Issuer Name of Intelligence you entered in step 1.
-
-
NOTE: If you cannot find Configure OAuth 2.0 Identity Provider and OAuth2.0 Client Registration, make sure you have the SEODADMINWCF > SECURITY_OAUTH_CLNT_REG access rights from General Settings > Users > Business Users > click on user > Edit > Access Rights > Work Center and View Assignment. You may need to add these to your “Business Role Assignment” of the current user. Try logging out and back in if you don’t see these appear on your menu immediately.
Setting up SAP C4C Integration
-
Login to Intelligence
-
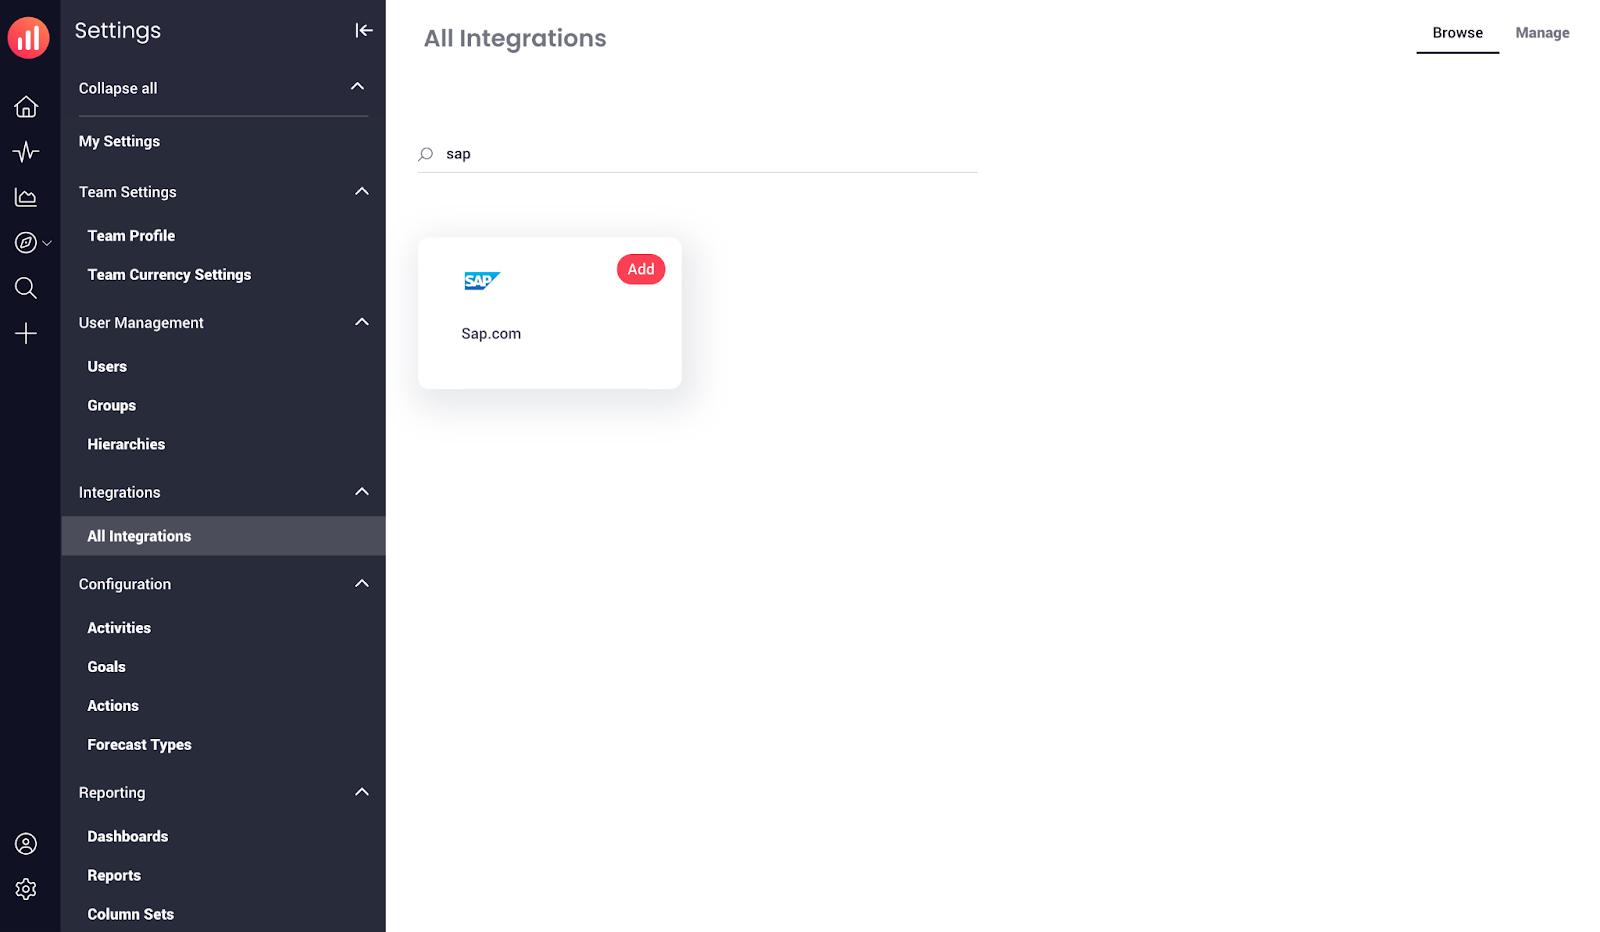
Click here or go to Settings > All Integrations, then click on the SAP.com integration to open its settings.
-
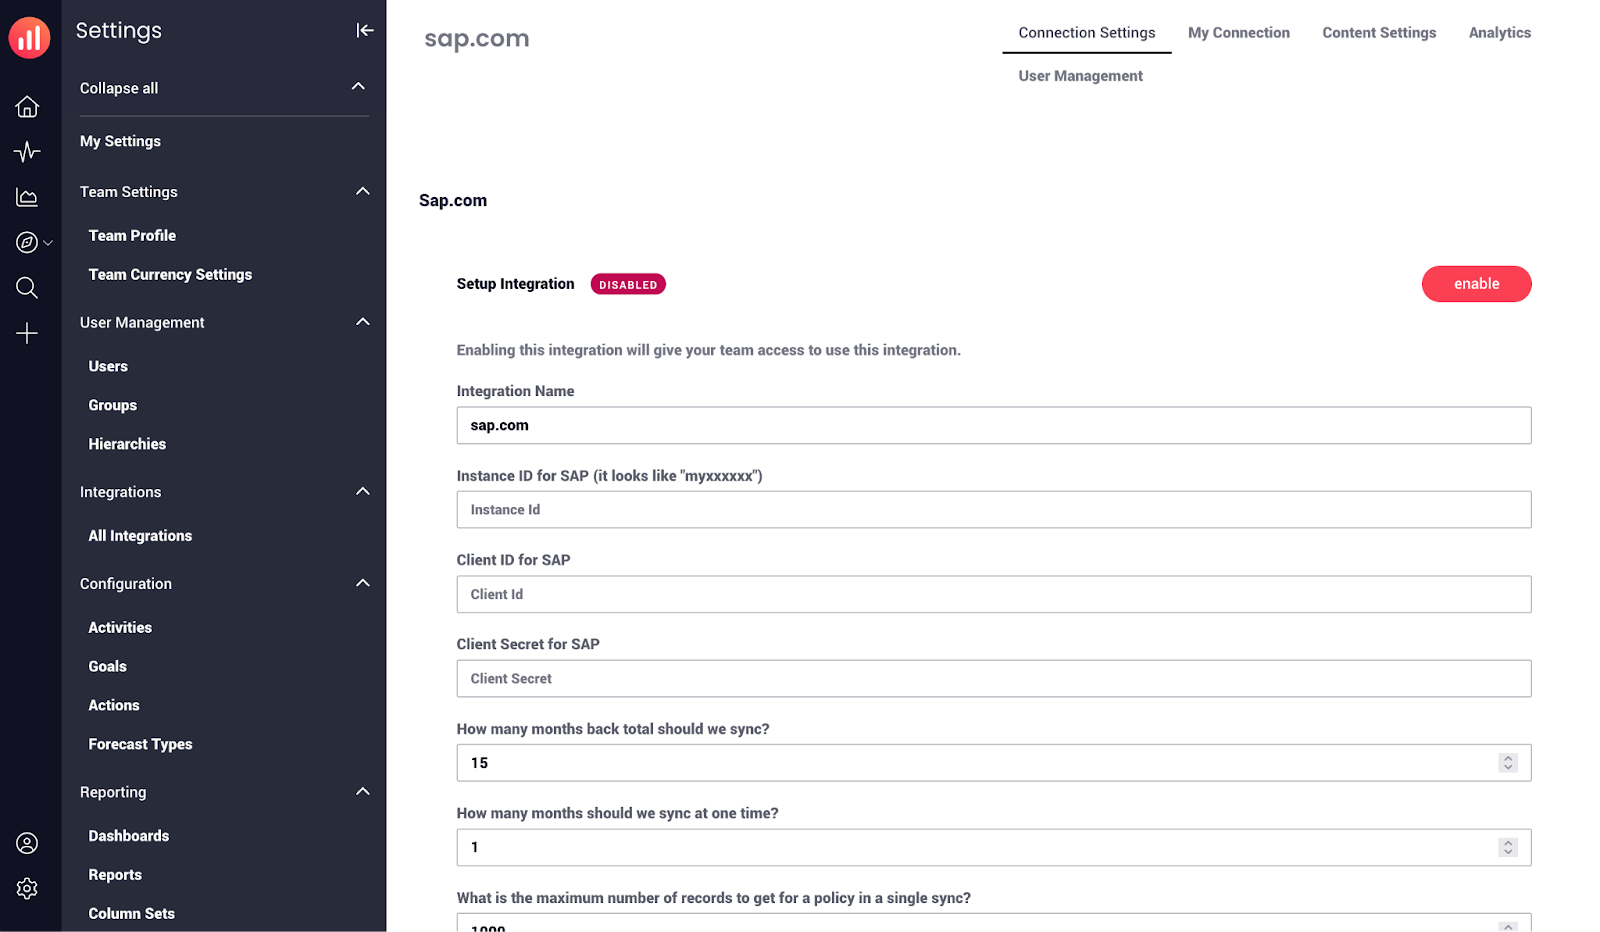
You’ll see multiple options. Here’s what they mean:
- Instance ID for SAP (it looks like "myxxxxxx"): This will be the instance ID at the beginning of your C4C instance URL.
- Client ID for SAP: The client ID from the Setting up SAP C4C Client section.
- Client Secret for SAP: The client secret from the Setting up SAP C4C Client section.
- The syncing Business User ID for SAP: The Business User ID to be authenticated for SAP. This user will be used for all connections to SAP. This is the userID field within the Business User settings in SAP.
- Poll primary integration only: Only read data from SAP using the primary user. For this integration, this setting should always be enabled.
-
Polling Interval in Seconds (Minimum 120): This field means how often we should read data from SAP.
-
Go to Connection Settings & click Enable.
-
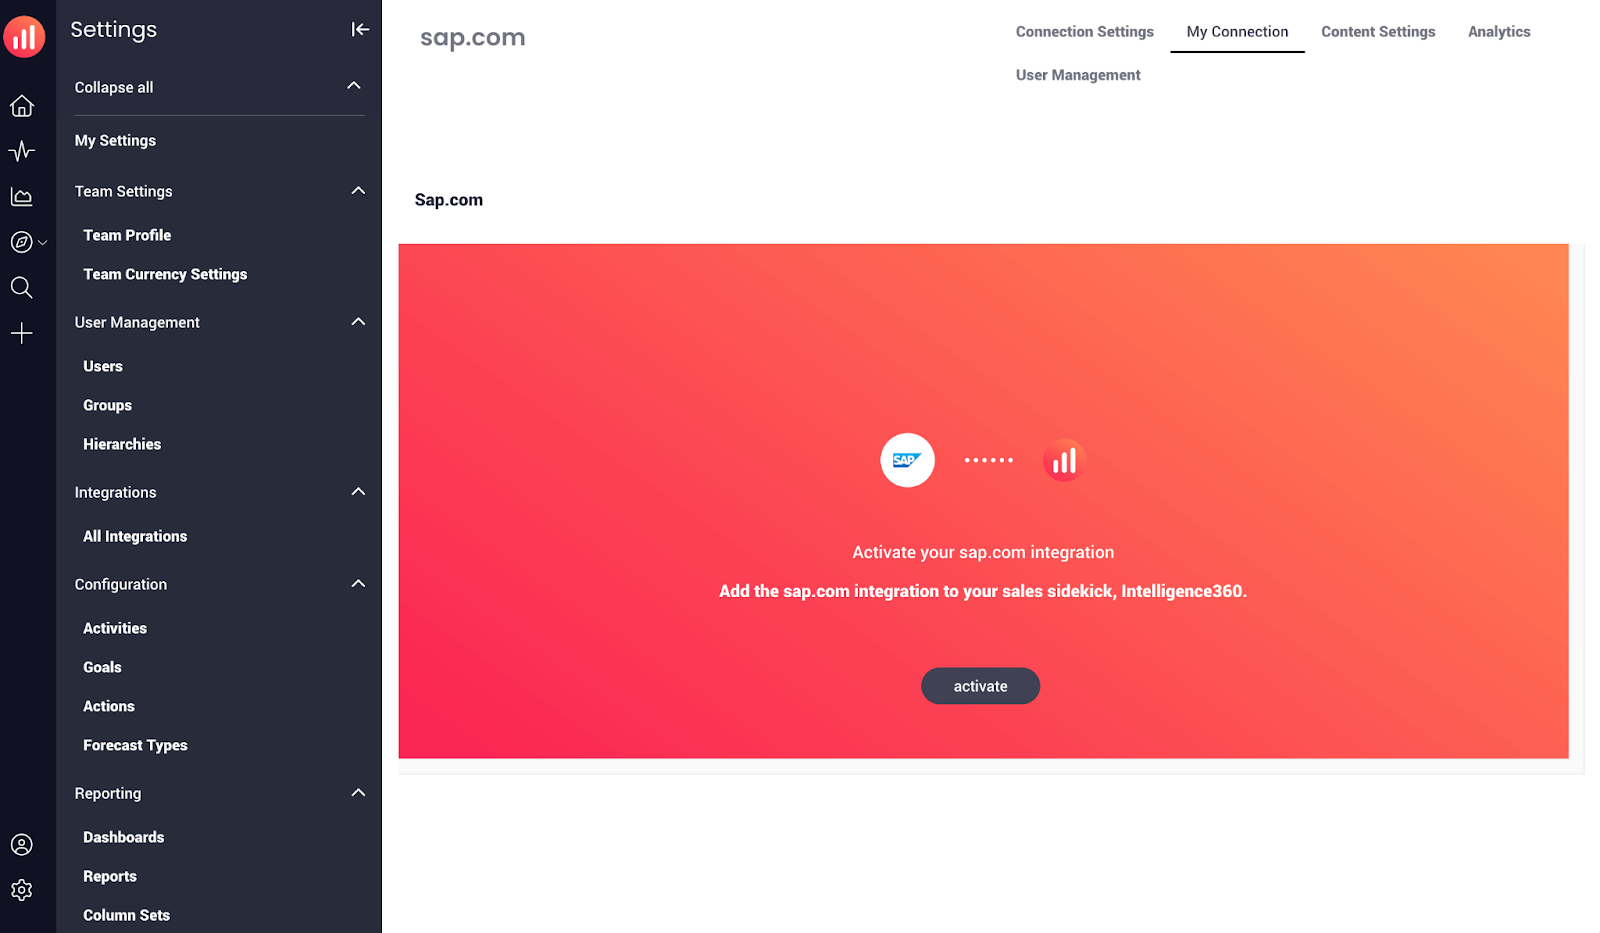
Activate your connection by clicking My Connection (or using this link). Then click activate.
- Congrats! Your connection is now working.
Note: If you get an “invalid_client” error, check that the client information matches. If it matches, go to Administrator > OAuth2.0 Client Registration, click on the client you made, and check if the Unlock button is enabled. Sometimes, clients can be locked down for security reasons. Simply unlock it again to get access again.
Replies have been locked on this page!