
Digital Sales Rooms provide a centralized, personalized platform to engage customers, streamline communication, and accelerate sales. By bringing all interactions and content into one place, they help you stand out, foster meaningful connections, and drive faster, more effective decision-making.
Jump to:
- Creating a Digital Sales Room
- Inside Digital Sales Rooms
- Room Permissions
- Domain Level Access Management
Creating a Digital Sales Room
- Create Digital Sales Room: this can be done several ways:
👉 In Viewer, click +Create in the top right of your screen, then select Digital Sales Room👉 In the left nav, click Digital Sales Rooms. If you have existing DSRs, click New Digital Sales Room above the list of existing rooms. If you don't, you'll see the Digital Sales Room welcome page, click Create a Digital Sales Room
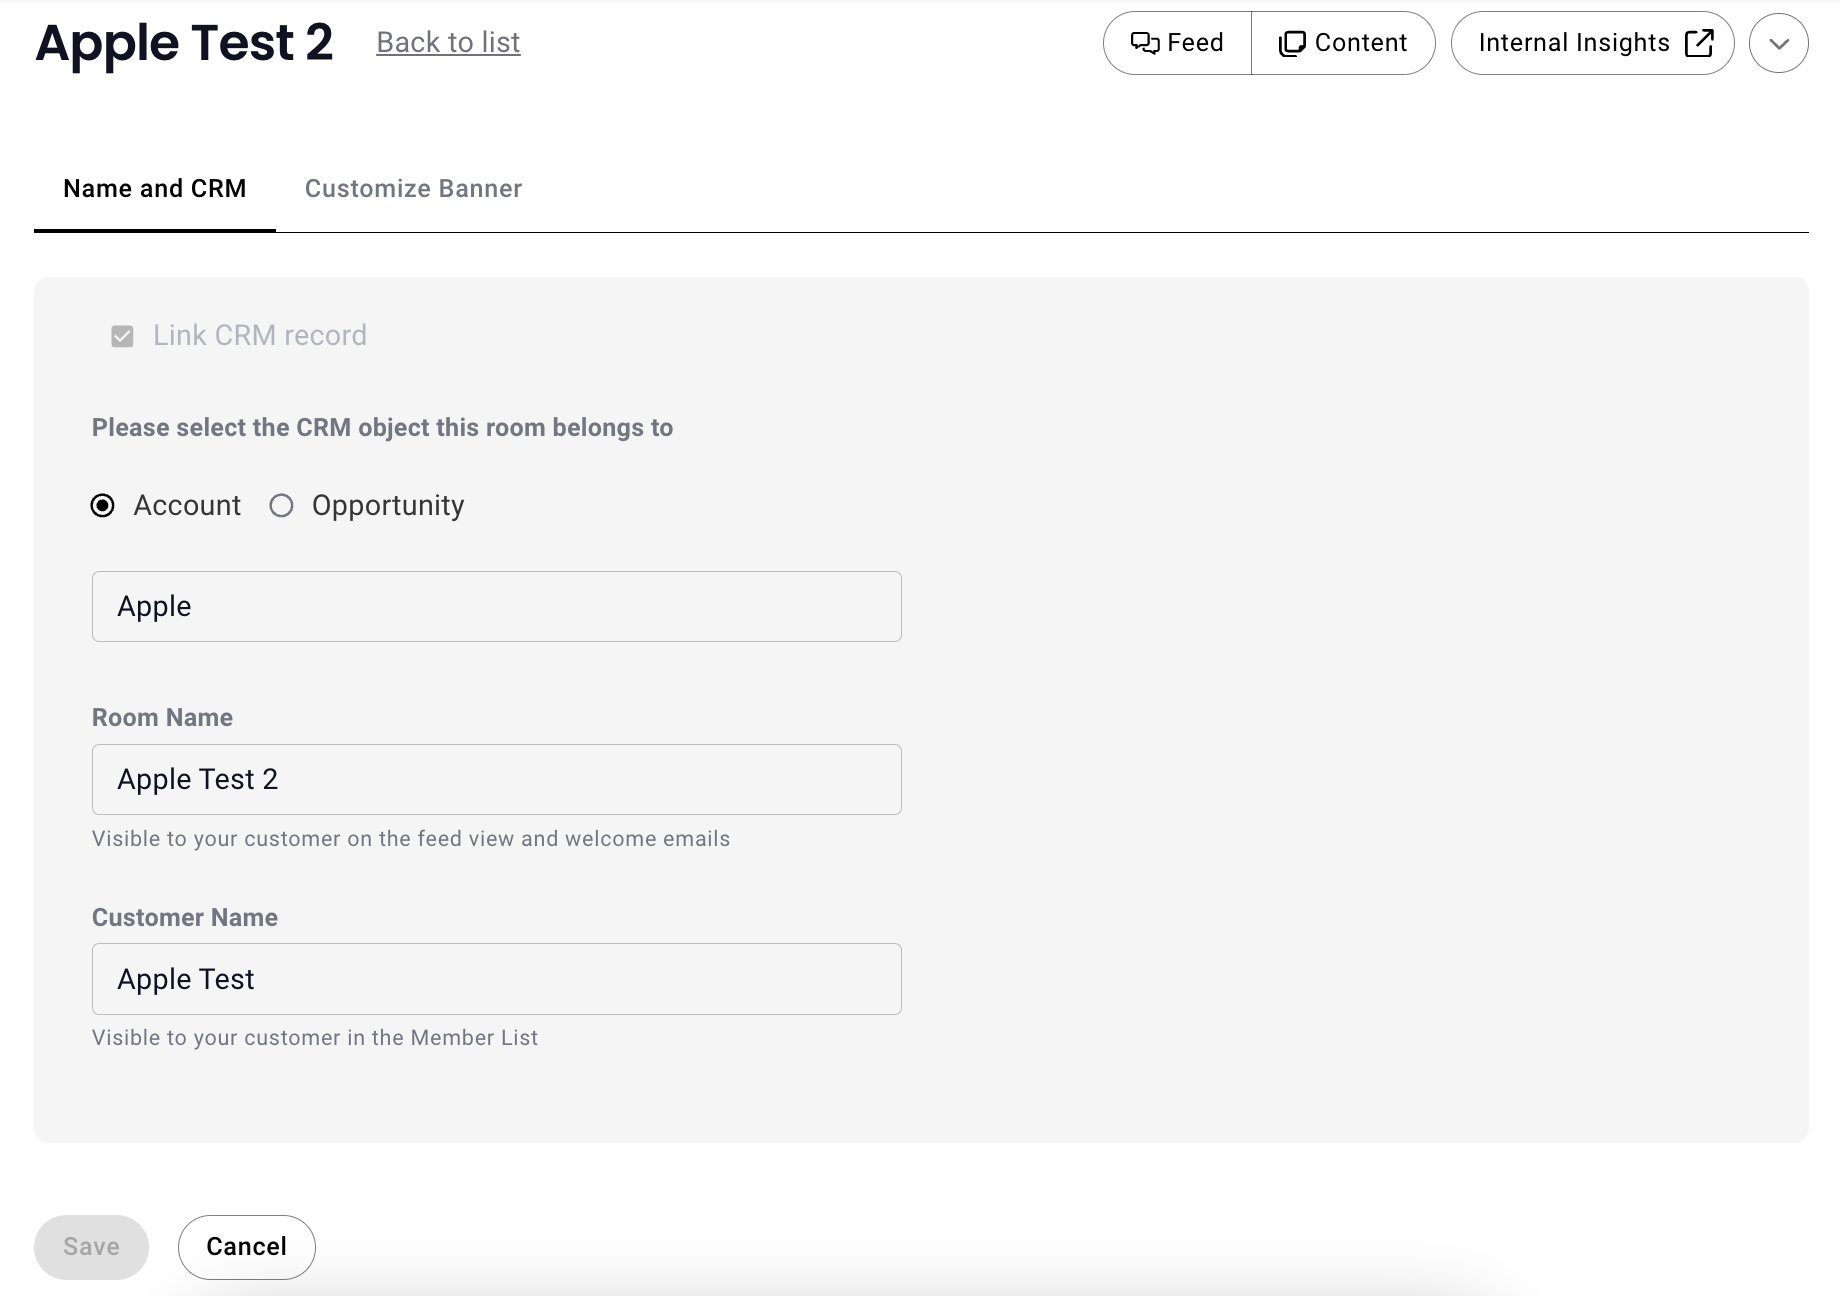
- Select CRM object: Select Account or Opportunity to link your DSR to an existing account or opportunity in your CRM, or select Create without CRM to create a DSR not linked to a CRM, in which case you will not have access to CRM data related to the item.
- Select Account or Opportunity: Begin typing the name of the account or opportunity then select desired account or opportunity.
- Enter a Room Name & Customer Name: This information will be automatically populated based on your selection, but you can choose to change it or manage it in room details later.
- Click Create
Inside Digital Sales Rooms
- Invite
- Use DSRs on iOS
- Feed
- Content Permission
- Downloading Content from a DSR
- Content Categorization
- Internal Insights
- Room Menu
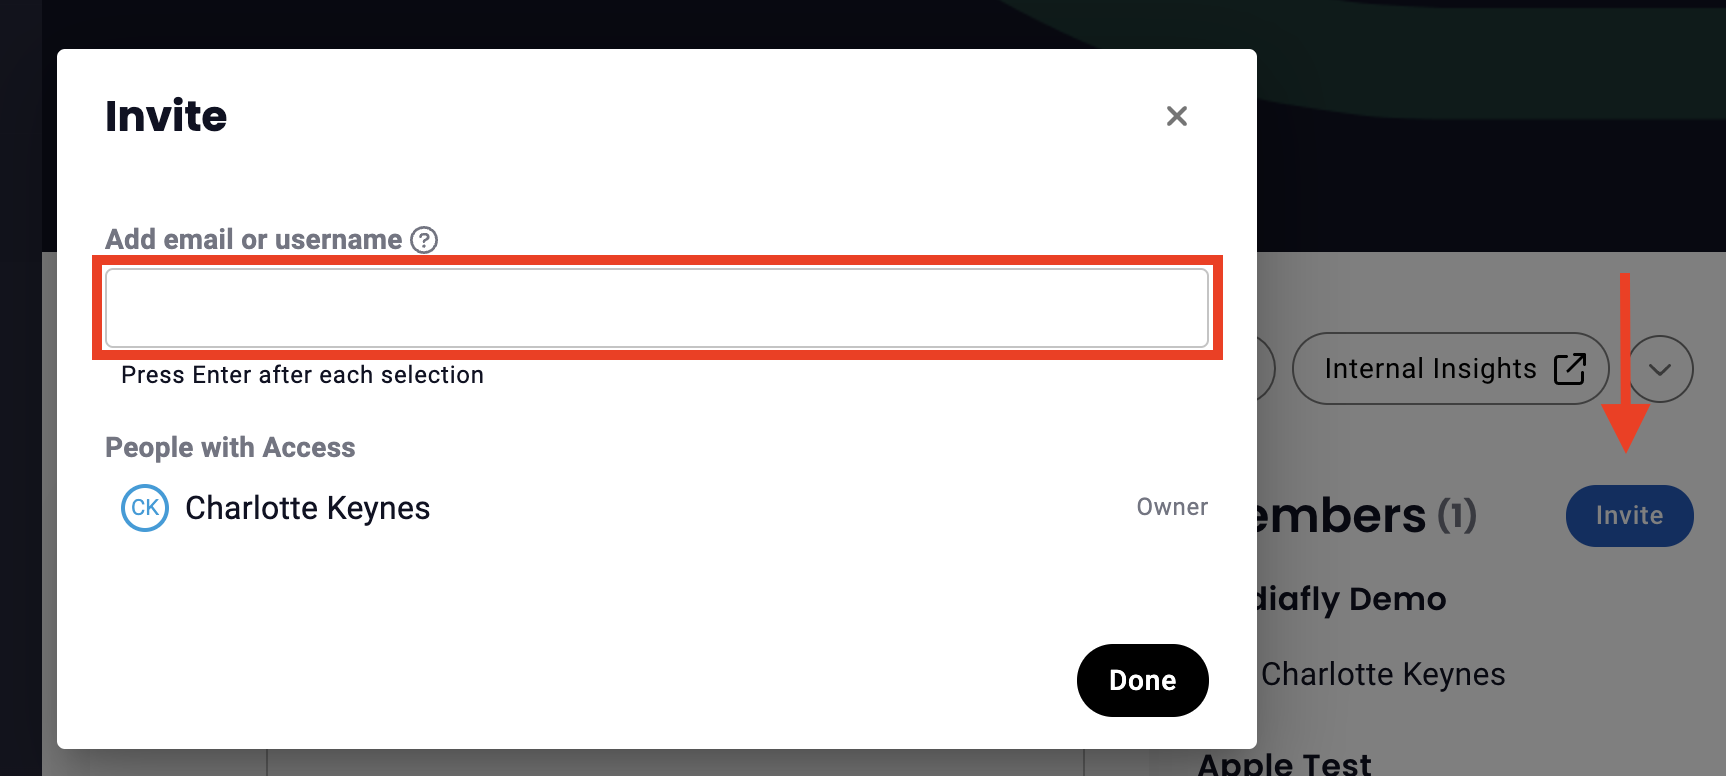
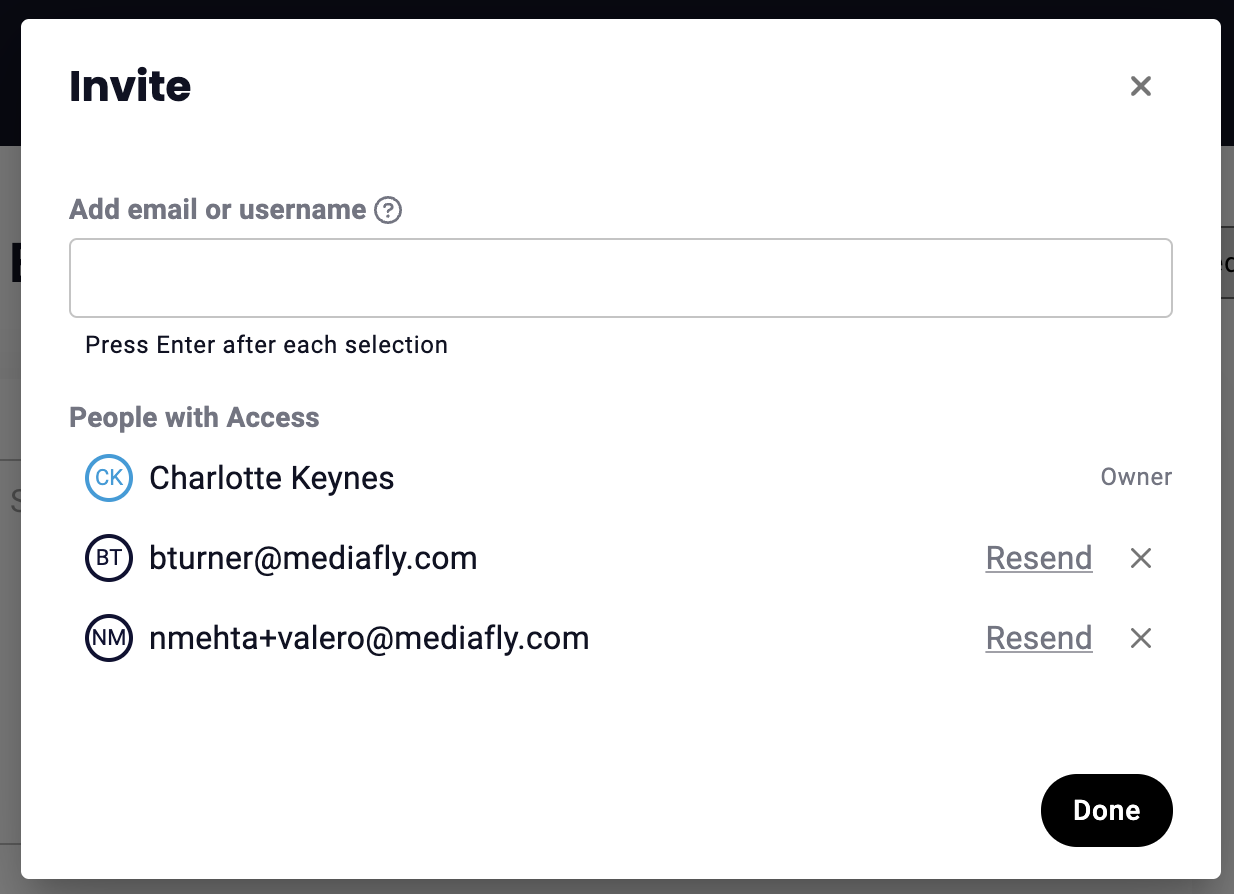
Invite
Internal users can invite and remove users to/from the room. Simply click Invite and enter the email address(es) of those you want to invite to the room, click done, and an email invitation will be sent.
Learn more about managing invites (invite, resend invitations, or remove a users's access to the DSR) jump to the Manage Invites in the Room Menu section.
Using DSRs on iOS
Sellers can access Digital Sales Rooms in the iOS app from the Digital Sales Rooms menu entry. From there, they can browse or search the list of rooms, open a room landing page that includes the room banner, and view a read-only list of room members.
Feed
The digital sales room feed enhances collaboration by allowing users to post updates, reply to threads, and add content from the Content Library, all while managing visibility based on existing permissions. This keeps communication organized and ensures relevant information is accessible to the right audience, streamlining the sales process and improving engagement.
- Post to Feed: Simply type in the post text box and click post to communicate with the room. Owners, Internal users & External Users can create posts.
- Reply to Post: Click Reply in the post to which you want to respond, then enter your reply & click Post to begin or continue a thread. Owners, Internal Users, and External Users can reply to posts.
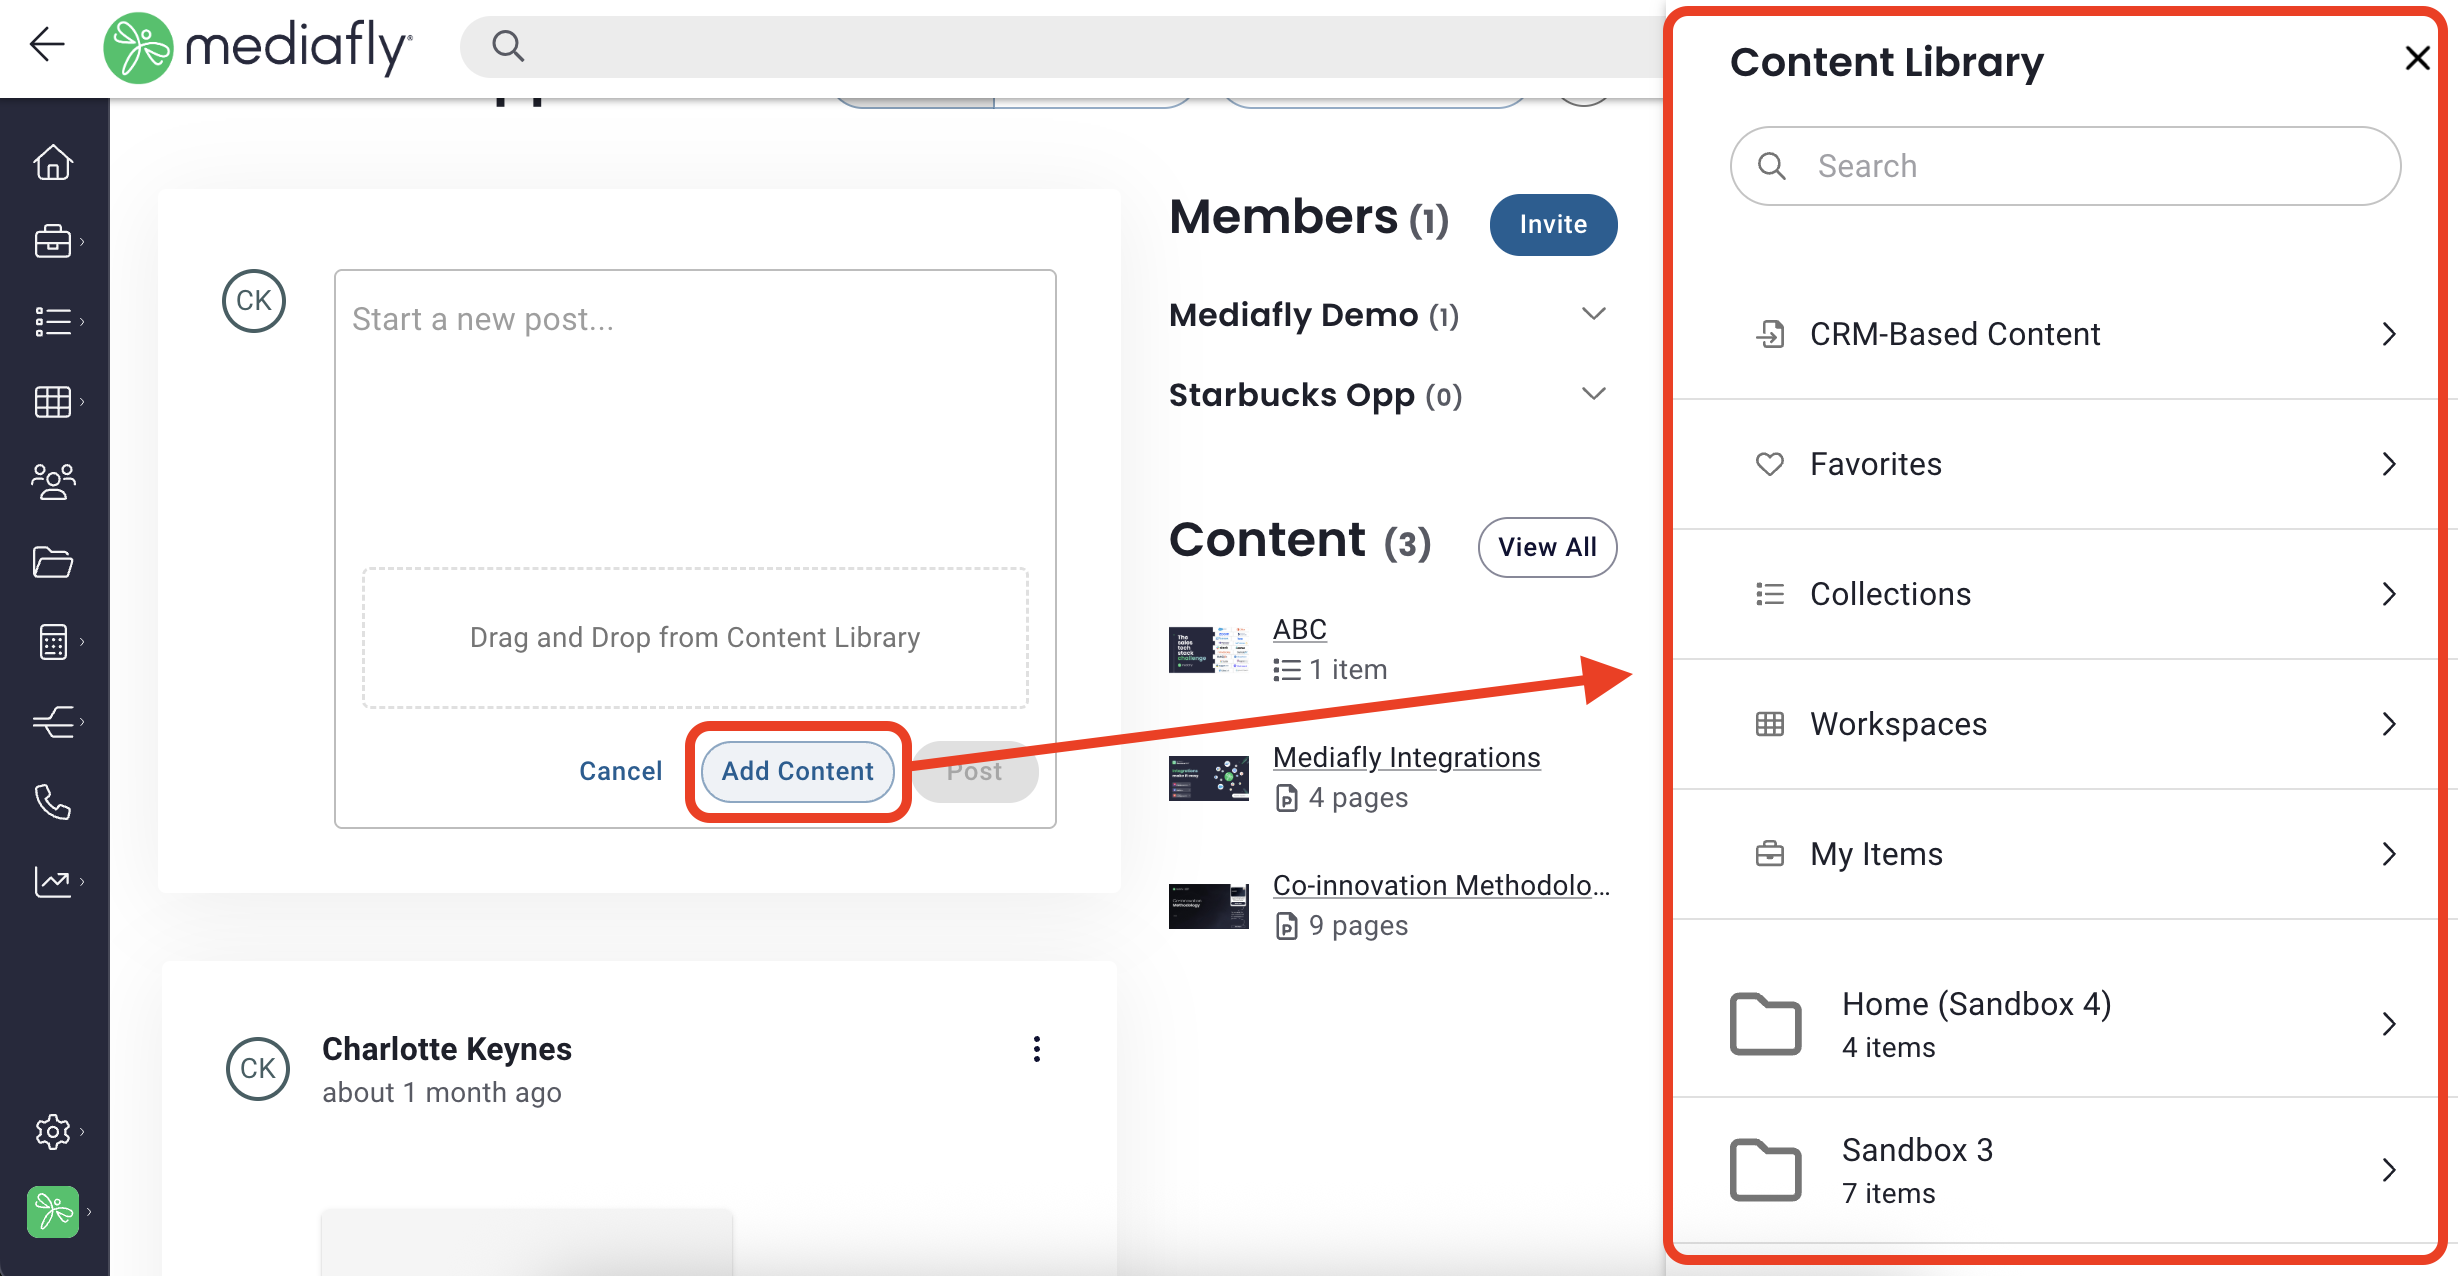
- Add Content to Feed: To include content in a post, click Add Content. Your Content Library will populate on the right so you can find the content you want, then click +Add. Once you've added the item(s) you want to include, click Post. Owners & Internal Users can add content to posts. You can also organize content using our Content Categorization feature.
- Delete posts/replies: Users can delete their own posts and replies; deleting a post will delete all of its replies.
Using the Feed on iOS
On iOS, the DSR feed supports full feed functionality online and offline; users can view the feed and create posts, reply to threads, tag, edit/update, and delete posts or replies. Internal content opens in-app while external content upload and download remain web-only.
Content Permission
User Types
- Owner: The owner is defaulted to the creator of the DSR but can be transferred in Airship.
- Internal User: Anyone in your org with access to the DSR.
- External User: Anyone outside of your org with access to the DSR.
Permissions
Content in DSR follows Mediafly's standard permission model with the following custom permission logic:
- Content viewed by external users uses the view permissions of the internal user who posted the content.
-
Content that has been added from a user's My Items folder would automatically collaborate as a viewer with other internal users, in the same way as Collections.
-
You can only add a collection for which you have Share and View permissions.
-
Content with CanShare set to false cannot be uploaded to a DSR.
- If an internal user does not have access to content in a post, they will see a permission error.
Uploading Content as an External User
External users can upload files directly to a Digital Sales Room. This is especially useful for scenarios where external participants need to share documents—such as redlines, signed contracts, or other internal materials—back with the team. Files uploaded by external users are only downloadable by other DSR members and will not appear inside Engagement. If an internal user wants to add this content to Engagement, they must first download the file from the DSR and then upload it as they would any other content.
Note: Content uploaded by external users does not generate a preview within the DSR. This is because these files have not been processed by the platform, and file types like JPG, GIF, and PNG do not include a built-in preview image that can be displayed. Content added by internal users, on the other hand, is processed and will display a thumbnail or preview image in the DSR.
Downloading Content from a DSR
- Click on the Content tab in the DSR, then click Download All
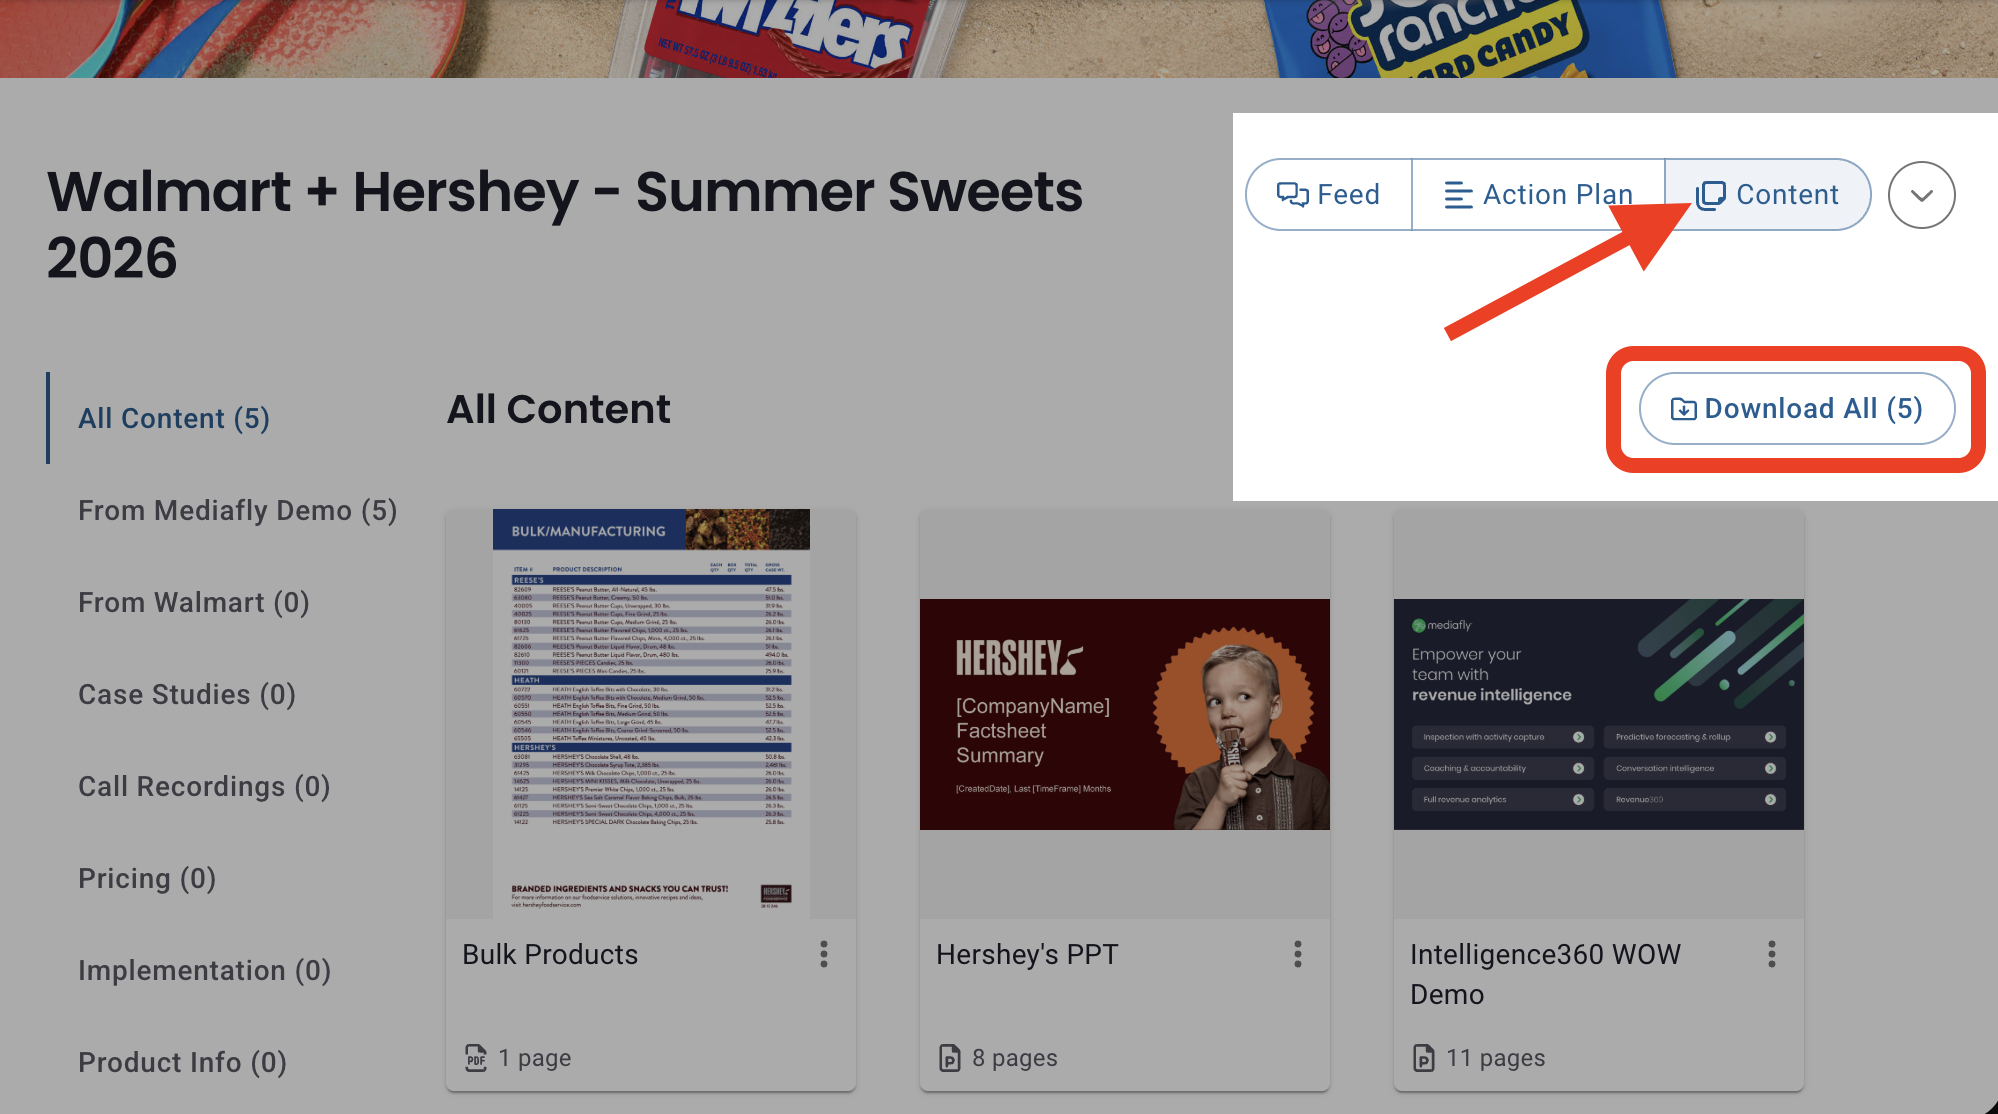
- By default, all items are selected, deselect any items you do not want to download, then click Send Download Link.
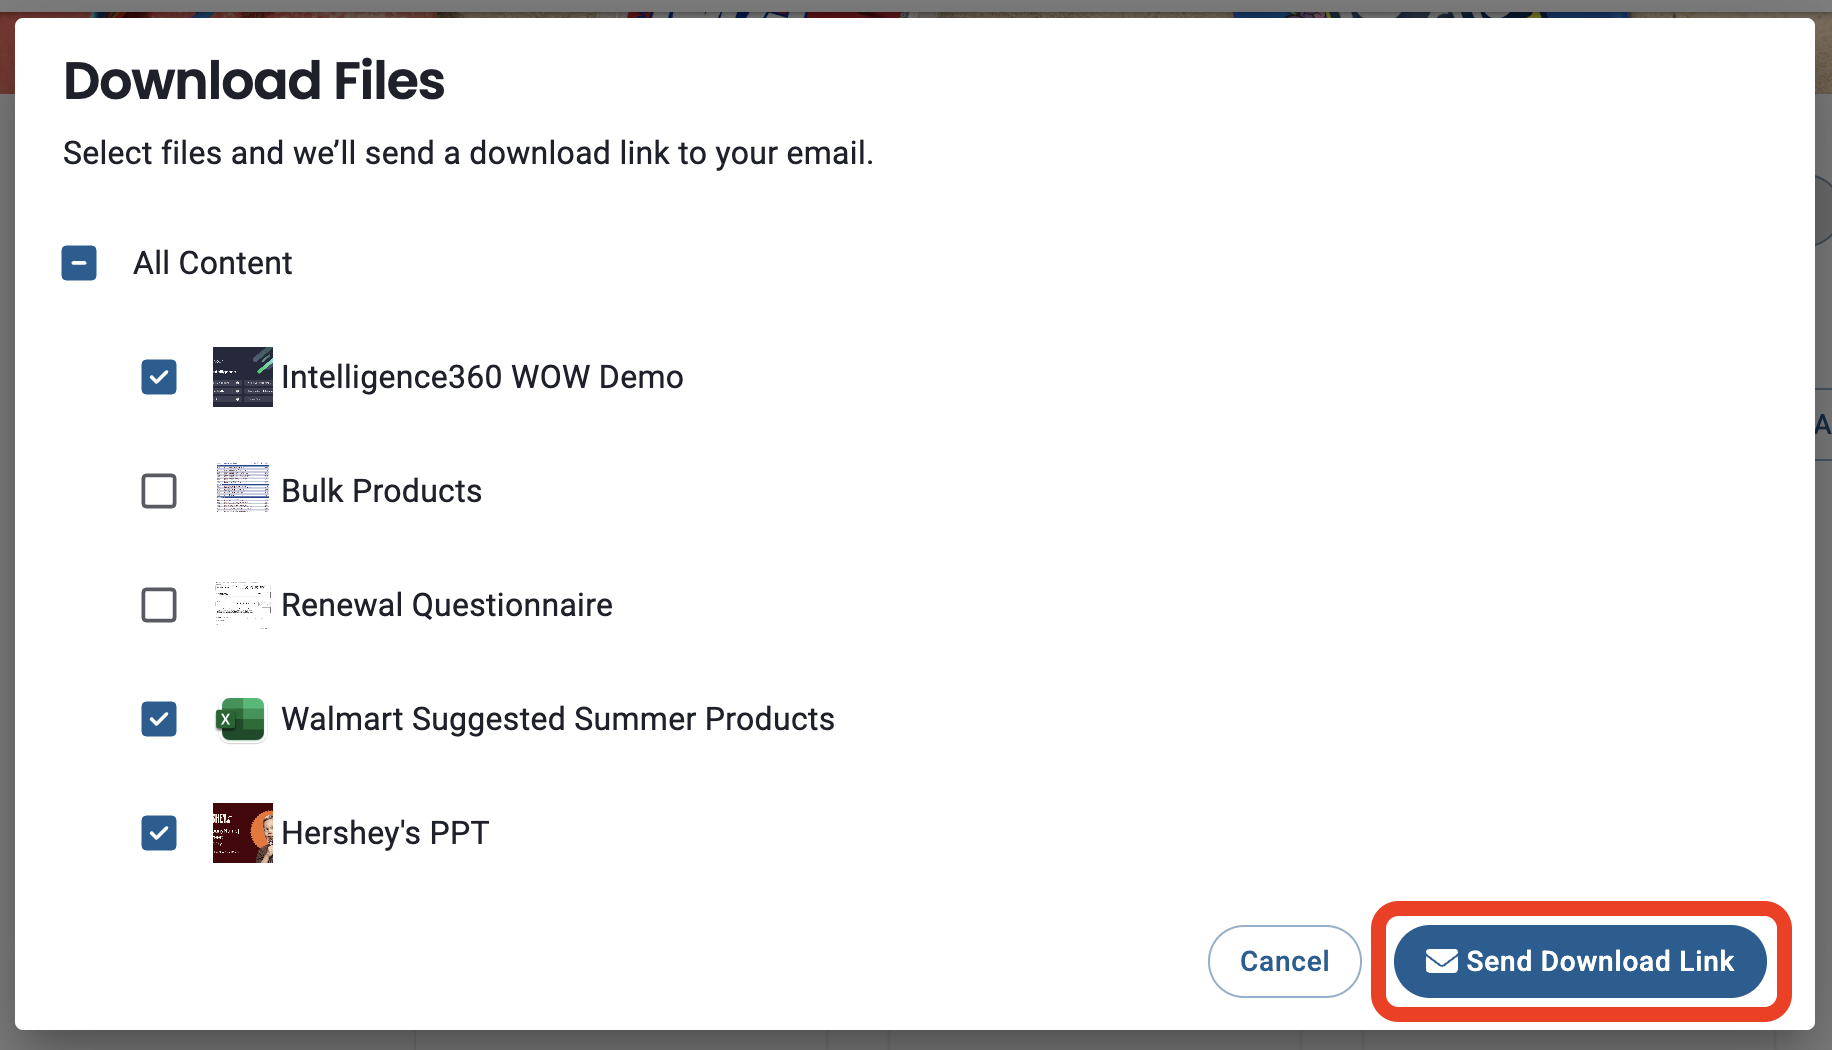
- The download link is sent by email using the lead-capture email when available; otherwise, you will be prompted to enter an email address.
Notes:
- Only downloadable items appear as selectable options. If no items are downloadable, the control does not appear.
- Bulk download respects the existing download permissions set on each individual content item.
Content Categorization
Content categorization helps you organize documents in a Digital Sales Room (DSR) so users can quickly find what they need. You can group items like pricing docs, implementation guides, technical requirements, and Mutual Action Plans into custom categories, keeping your DSR clear and easy to navigate.
Note: If you're an admin and want to create/manage default categories that will be available to all new DSRs, click here to learn how.
Admin can create default categories that will automatically be available in all DSRs in your environment.
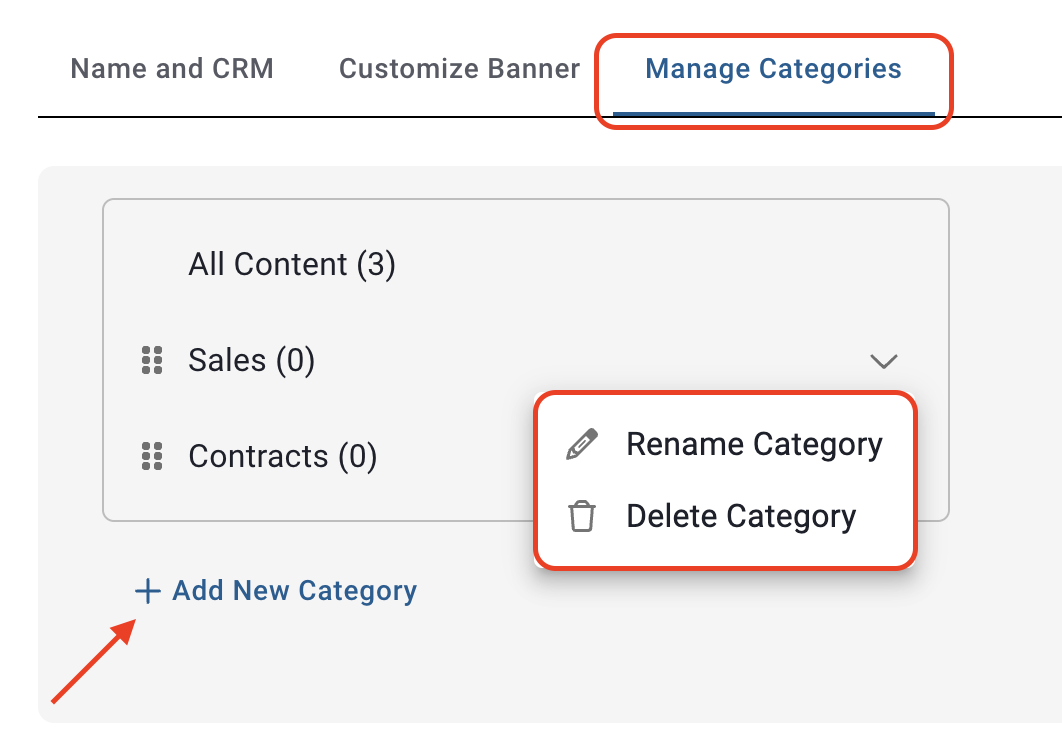
To create or manage categories:
- Go to Settings > Manage Categories.
- a. Click Add New Category > enter a name > click Save OR
b. Select the dropdown next to an existing category to rename or delete categories as needed. - Click Save.
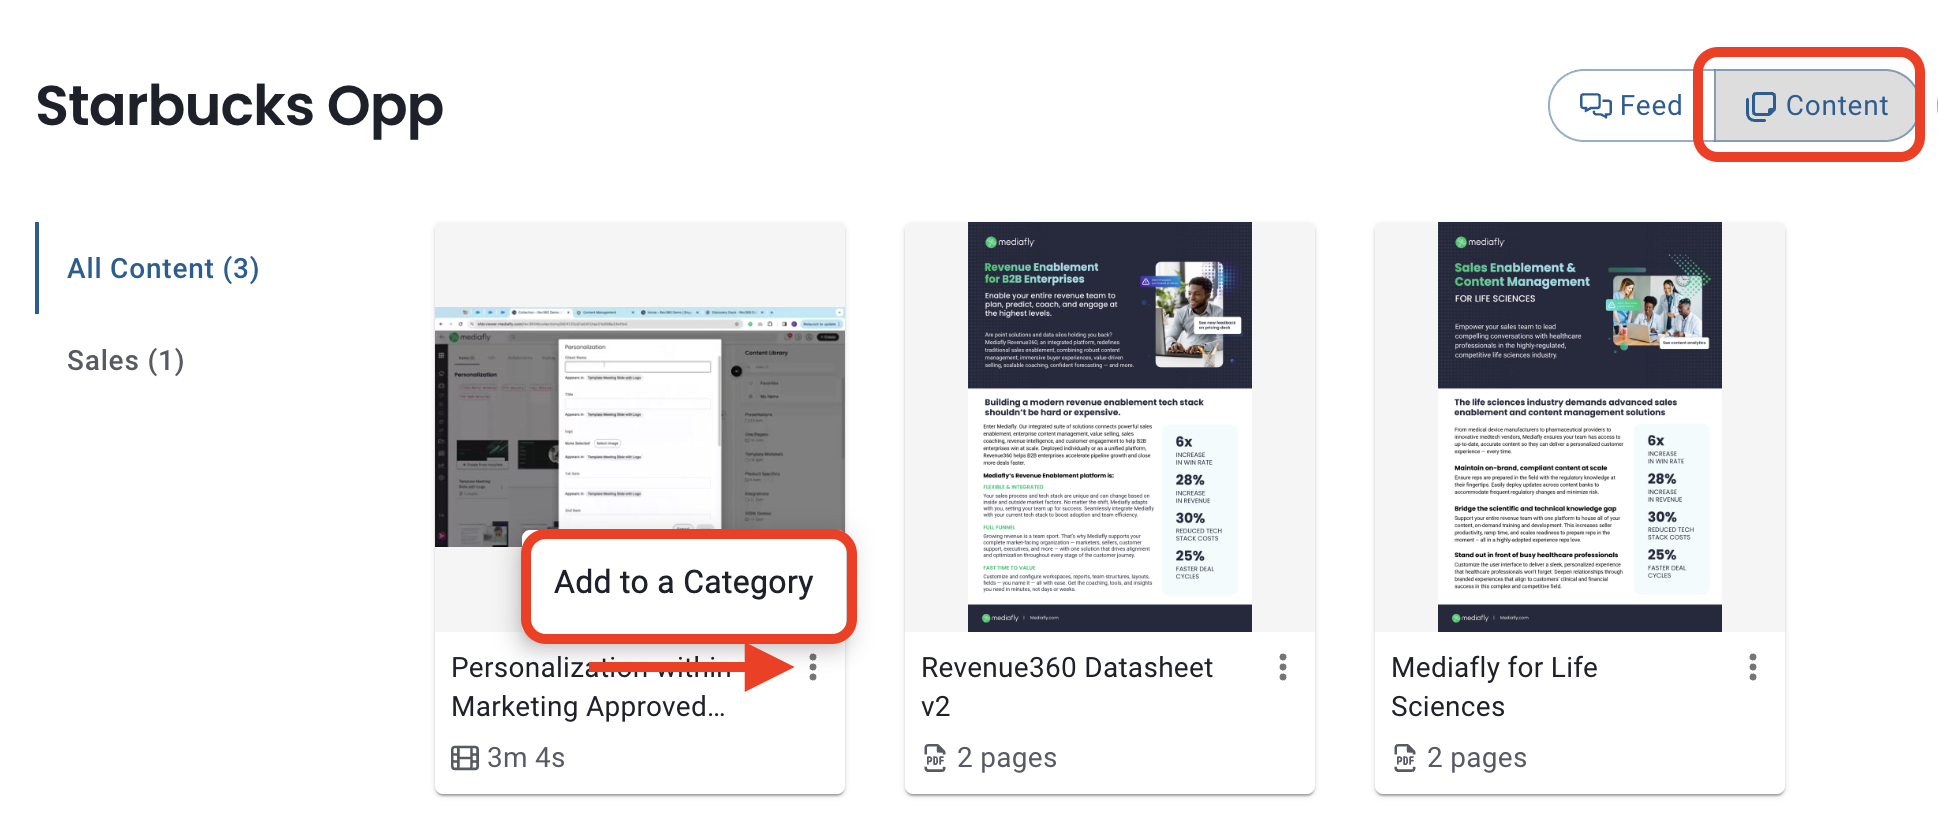
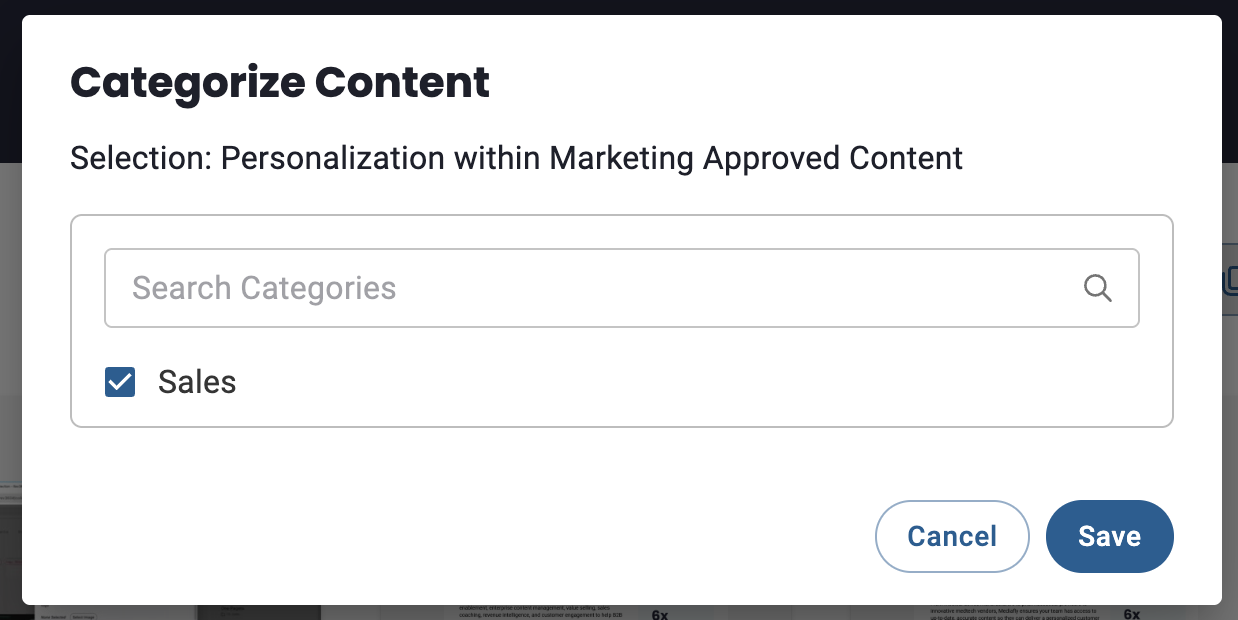
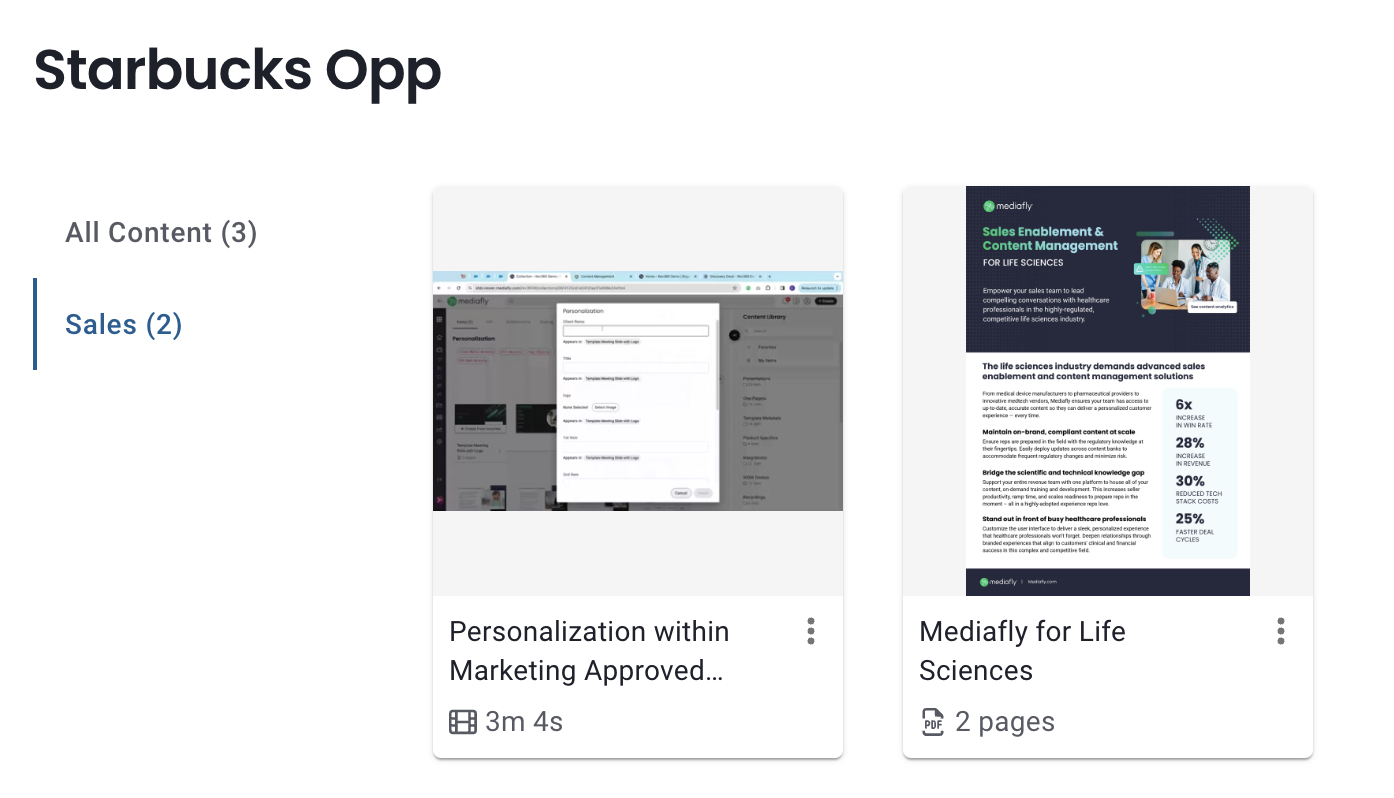
To add content to a category:
- Go to Content > click the three-dot menu on the item.
- Select Add to a Category, pick the category, and click Save.
- The Content section will now allow users to look at All Content or select a specific category.
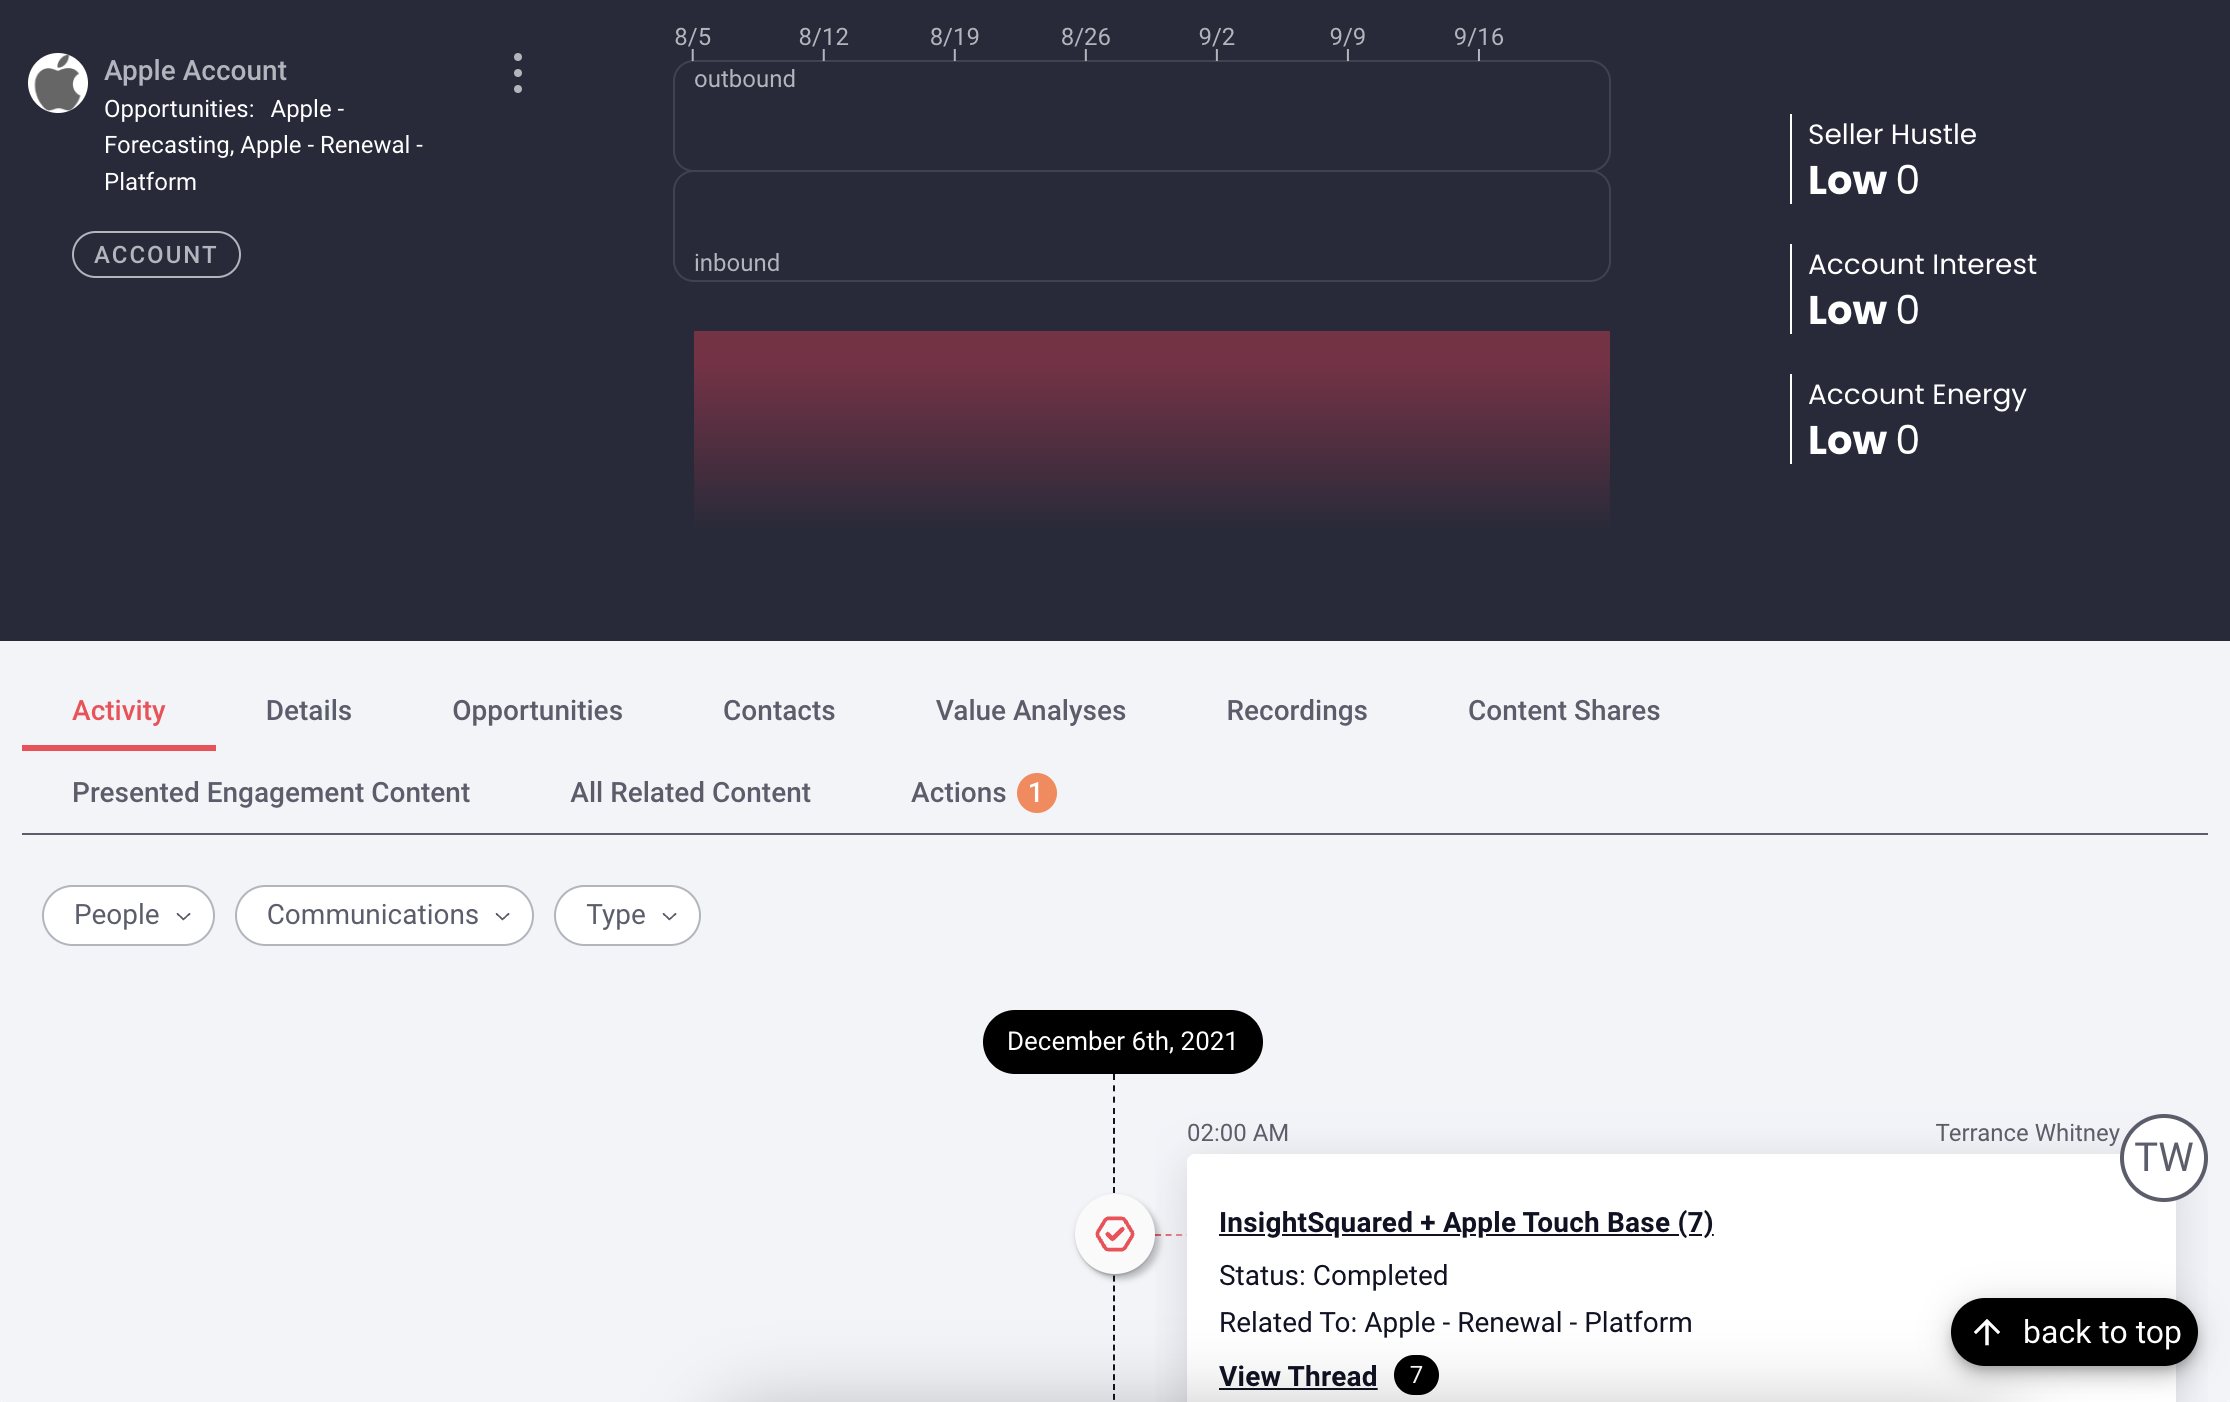
Internal Insights
Internal members can click Internal Insights to open a separate window showing the Intelligence detail pane for the linked account/opp (not available when DSR is created without CRM) to inspect the details of the associated record. Check out How can I inspect the details of a record? to learn more about what information is available.
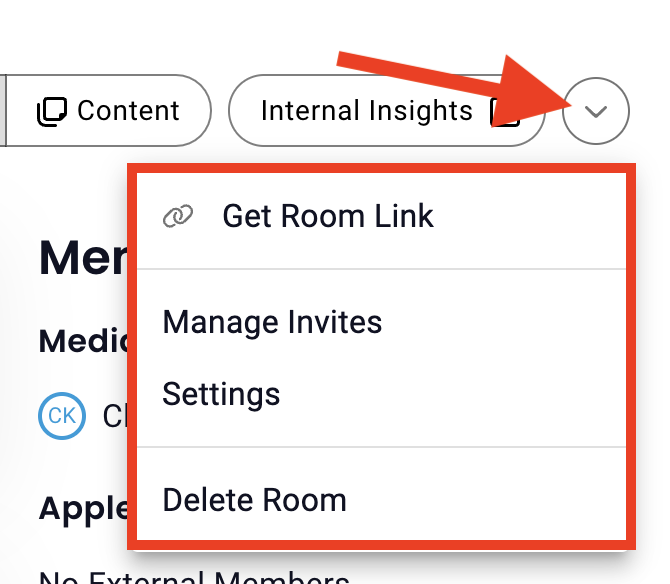
Room Menu
If and what you see in the room member will be based on your user type. If applicable, you'll see the room menu dropdown to show options available to you: Get Room Link, Manage Invites, Settings, and Delete Room, based on your permissions.
Get Room Link
Clicking "Get Room Link" will save copy the DSR link to your clipboard for easy sharing.
Notes:
- Clicking "Get Room Link" copies a shareable DSR link meant for external users only. Internal users, even if invited to the room, will see a “not in allowed list” error if they try to use it. This is expected behavior, designed to prevent internal views from affecting engagement metrics. Internal users should access the DSR through their authenticated internal view, which closely reflects the external experience but without editing capabilities.
- On iOS, the same shareable DSR link can be accessed by tapping on the ellipsis on the top right corner. As on web, it is intended for external use only.
Manage Invites
To invite, resend invitations, or remove a users's access to the DSR, click the menu dropdown button, then click Manage Invites.
Here you can:
- Invite users to the room by entering their email address(es) and clicking done.
- Resend existing invitations by click Resend next to the email address of a user that has already been invited.
- Remove user access to a room by clicking the X inline with a user's name or email.
Email Notifications
When a Member is Added:
- All existing members, including external members, will receive an email notification.
- The owner will not receive a notification (since they created the DSR).
When the Owner Adds a Comment:
- All members (including external members) will receive a notification.
- The owner will not receive a notification (since they added the comment/content).
When a Member Adds a Comment:
- All other members, including the owner, will receive a notification.
- The member who posted the comment will not receive a notification.
Note: If a DSR link from one of these email notifications is opened on iOS, it will route back to the browser/web app.
Settings
Available to Owners & Internal Users, the settings menu offers the ability to update Name & CRM information and to update the room banner.
Name and CRM
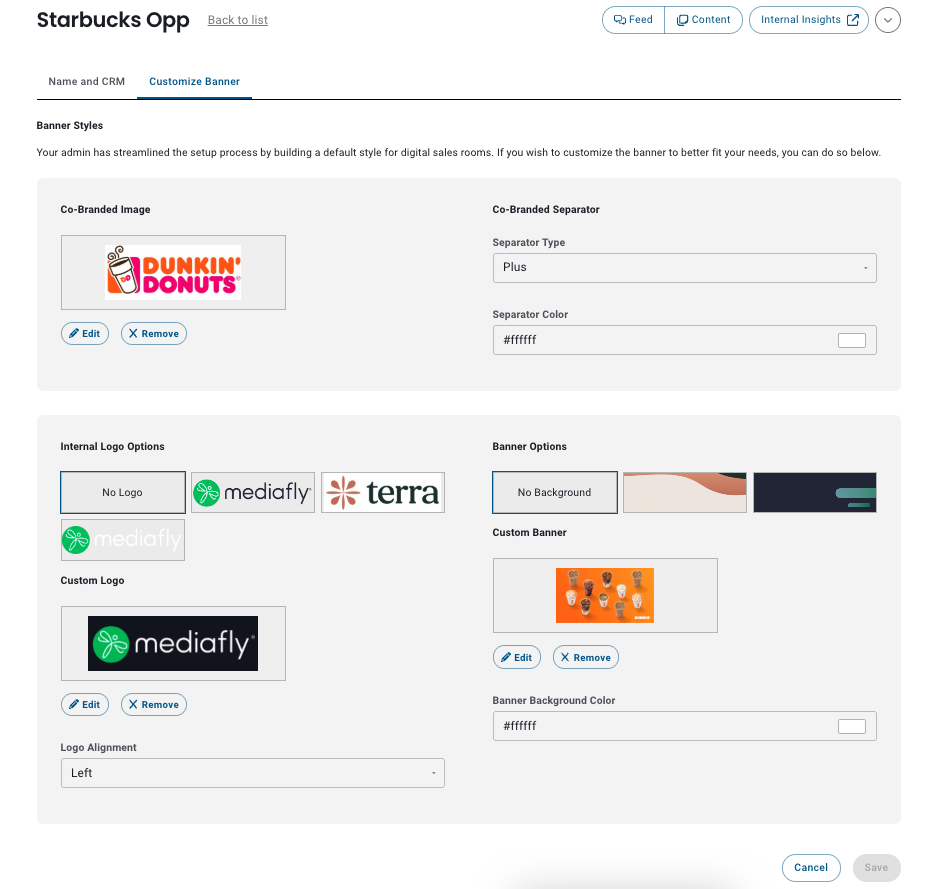
Customize Banner
The banner image is displayed at the top of the DSR and is customizable either using a Co-Branded or Custom banner style.
Co-Branded Image
Default banner options are created by your admin during setup that will be offer default options for DSR banners in every newly created room. You'll simply choose from the logo and banner options to utilize a default banner. However, internal users can edit the default banner's co-branded image and co-branded separator here in the DSR settings to better fit the needs of the room where changes saved will only apply to this room's banner. Remember to click save when you're satisfied with your changes.
Note: If you're an admin and want to change the default banner that's applied to all new DSRs, click here to learn how.
Custom Banner Style
To create a net new custom banner:
- Enable to the "Build a Custom Banner Style" toggle.
- Update your logo by clicking Edit, then selecting an image from your library or uploading a new image.
- Select your desired alignment (left, center, right).
- Update your background image by clicking Edit, then selecting an image from your library or uploading a new image.
- Update your background color by entering a hex code or clicking the color block and selecting a color.
- Click Save.
Notes:
- Recommended banner size + resolution for DSRs is 1400x350px exported at 2.5x.
- Disabling the "Build a Custom Banner Style" toggle will revert to the existing co-branded banner style.

Delete Room
Only owners can delete a DSR by clicking on the room menu dropdown > delete room. You'll then be prompted Are you sure you want to permanently delete this room? allowing you to confirm by clicking Delete or go back to your room by clicking Cancel.
Room Permissions
|
Permission
|
Owner
|
Internal User
|
External User
|
|---|---|---|---|
|
Create Posts |
✅ |
✅ |
✅ |
|
Add Content to Posts |
✅ |
✅ |
✅ |
|
Reply to Posts |
✅ |
✅ |
✅ |
|
Invite & Remove Users |
✅ |
✅ |
❌ |
|
Manage Room Settings |
✅ |
✅ |
❌ |
|
Delete DSR |
✅ |
❌ |
❌ |
Domain Level Access Management
DSRs support domain-level sharing using email verification to control access.
- Inviting External Participants: When inviting external participants, you can specify which company domains are approved to access the room. Anyone from an allowed domain can be added, and email verification is still required.
- Visibility: After external users enter the room, they’re clearly marked as external participants so all stakeholders know who has access.
- Managing Access:
- If a domain is removed from the allowlist, existing participants from that domain keep their access. New participants will need to be added directly using their email address.
- To completely remove a user from the room, the admin must remove both their domain from the allowlist and the user from the participant list.
These access controls ensure that collaboration remains secure and visible for everyone working in the DSR.
Replies have been locked on this page!