
The content in your dashboard is displayed by cards. Cards are adjustable versions of base reports that live exclusively on a dashboard and allow you to make real-time changes without modifying the base report. There are common reports available to you right out of the box and Admin can create custom reports that can then be added as cards to a dashboard. Adding cards to a dashboard gives you the power to determine what data you're looking at, group data as you'd like it, and adjust the specifics to fit your needs.
You can add cards to the dashboard either from the dashboard itself, or in the dashboard editor:
Adding Cards from the Dashboard
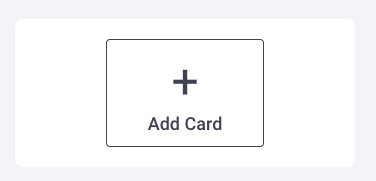
- Click the Add Card button that appears in the next available card space on the dashboard.
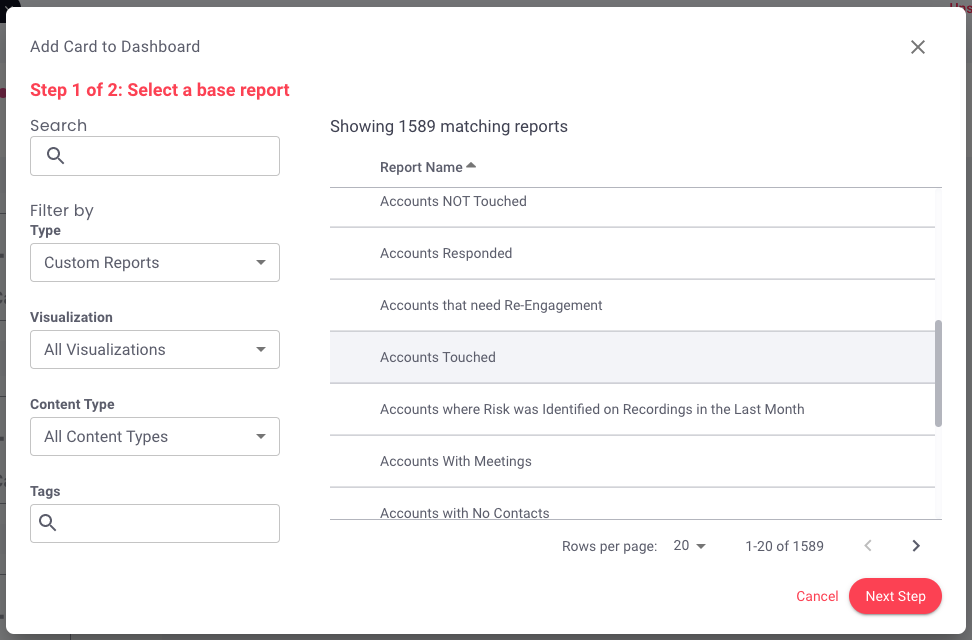
- A menu similar to the All Reports page will appear, this allows you to easily find the base report you want this card to reflect.
-
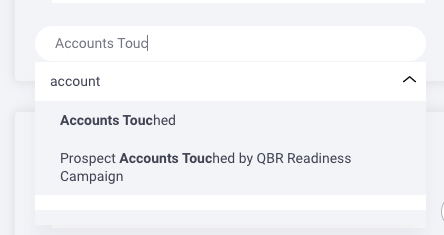
Select the report you want to use, then click Next Step.
- Define Card
▪ Card Title: Rename the card if you plan on further specifying the data. For example, if you're adding "Accounts Touched" to the dashboard but plan on further filtering the data to reflect this week's data, rename the card "Accounts Touched this Week". This way, if you plan to compare accounts touched this week next to accounts touched this month, you'll know what you're looking at.▪ Visualization: If the selected report offers multiple views, you can select the view you want displayed on this card (example, bar chart or table). This option will not appear if it's not available for the selected report.
- Click Add to Dashboard.
- Your card is now on your dashboard! You can use the interactive card menu to make changes that will exist only on this card, on this dashboard, changes will not affect the base report.
- Optional: You can resize the card by hovering between cards & dragging the resize line left or right, and drag & drop the card to your desired position in the row.
- When you're happy, click Save Dashboard.

Adding Cards in the Board Editor
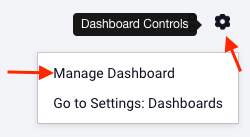
- Click Dashboard Controls (gearshift icon in the top right), then select Manage Dashboard.
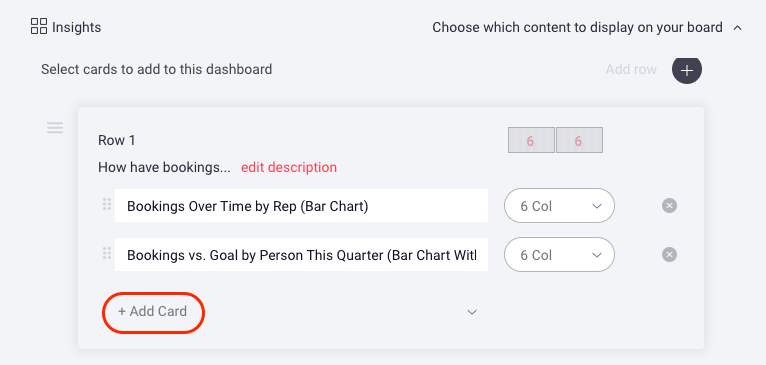
- Click Insights.
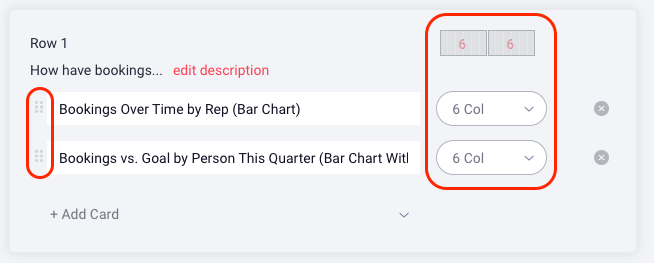
- Click Add Card under the row to which you want to add a card.
-
Search for and select the report you want to use from the dropdown menu.
- Optional: You can resize the card by changing the column width; there are 12 available widths per row and you can customize how many are applied to each card. For example, if you want three cards of even width across a row, each card would have a width of four. (4 + 4 + 4 = 12) You can also reposition the card by using the 6 dot icon to the left of the card name to drag & drop the card to your desired position in the row.
- Click Save.
Replies have been locked on this page!