
Overview
Users can now build value tools and publish them as marketing tools to address customers at the top of the funnel. Here's how it works.
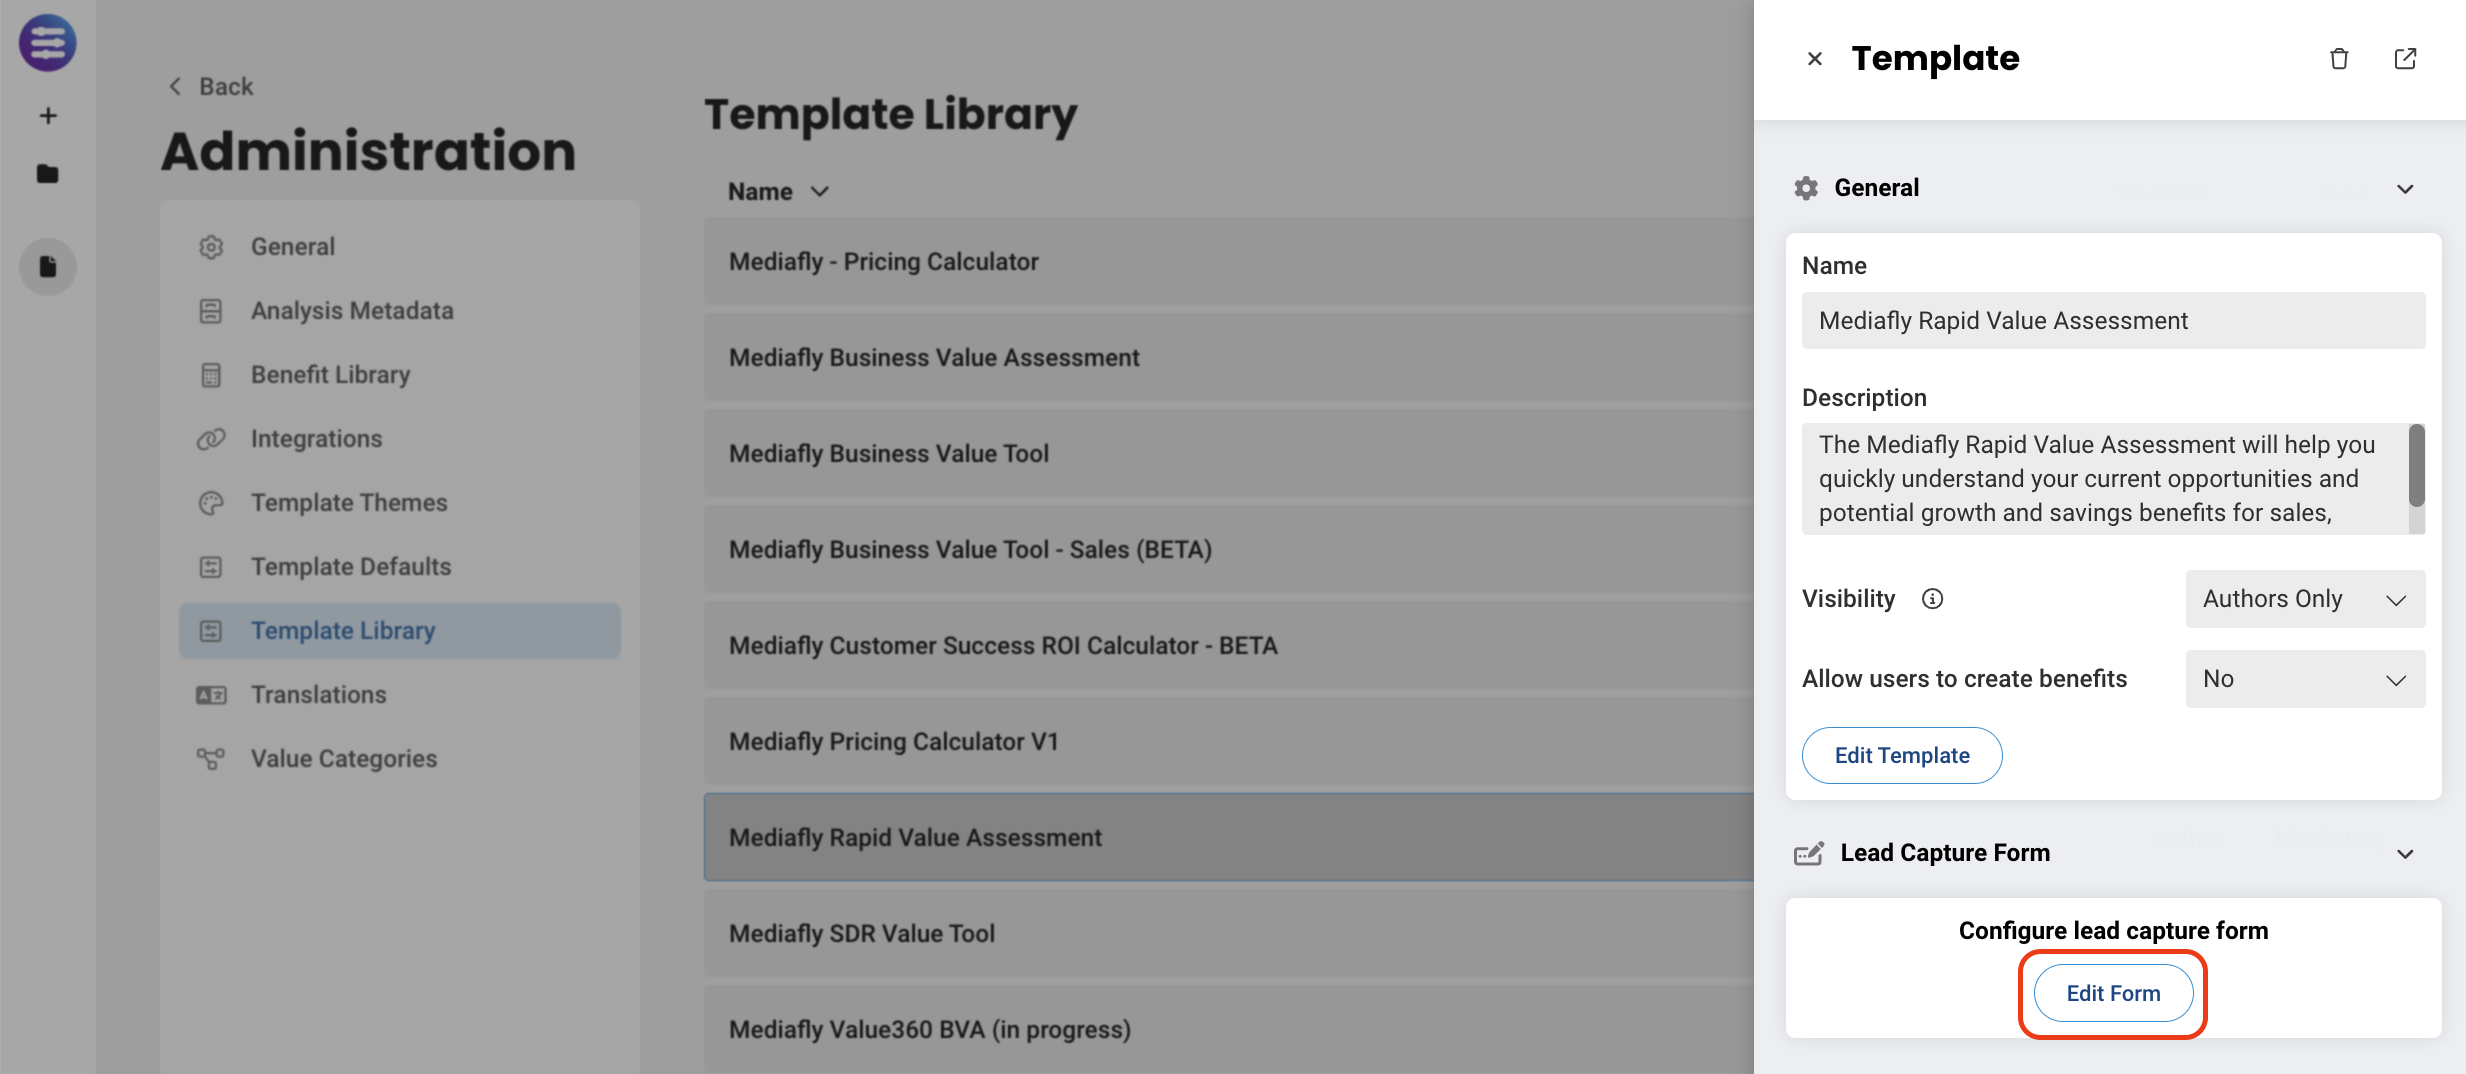
- After creating and publishing a Template, and selecting it from the library, you have the option to edit the Lead Capture Form from the side tray.
- You can then set up your lead capture form by defining what the user will see and what page the form will be displayed.
- This is done using a mnemonic that can be tied to any page in the tool
- Next, you can connect it to your marketing automation platform by entering the tool you use, the Portal ID, and the Form ID.
- Please refer to the steps below depending on your platform of choice.
- Lastly, you can create the fields you want the user to complete in order to capture key pieces of information such as email or phone number.
Publish your template as a Marketing Tool
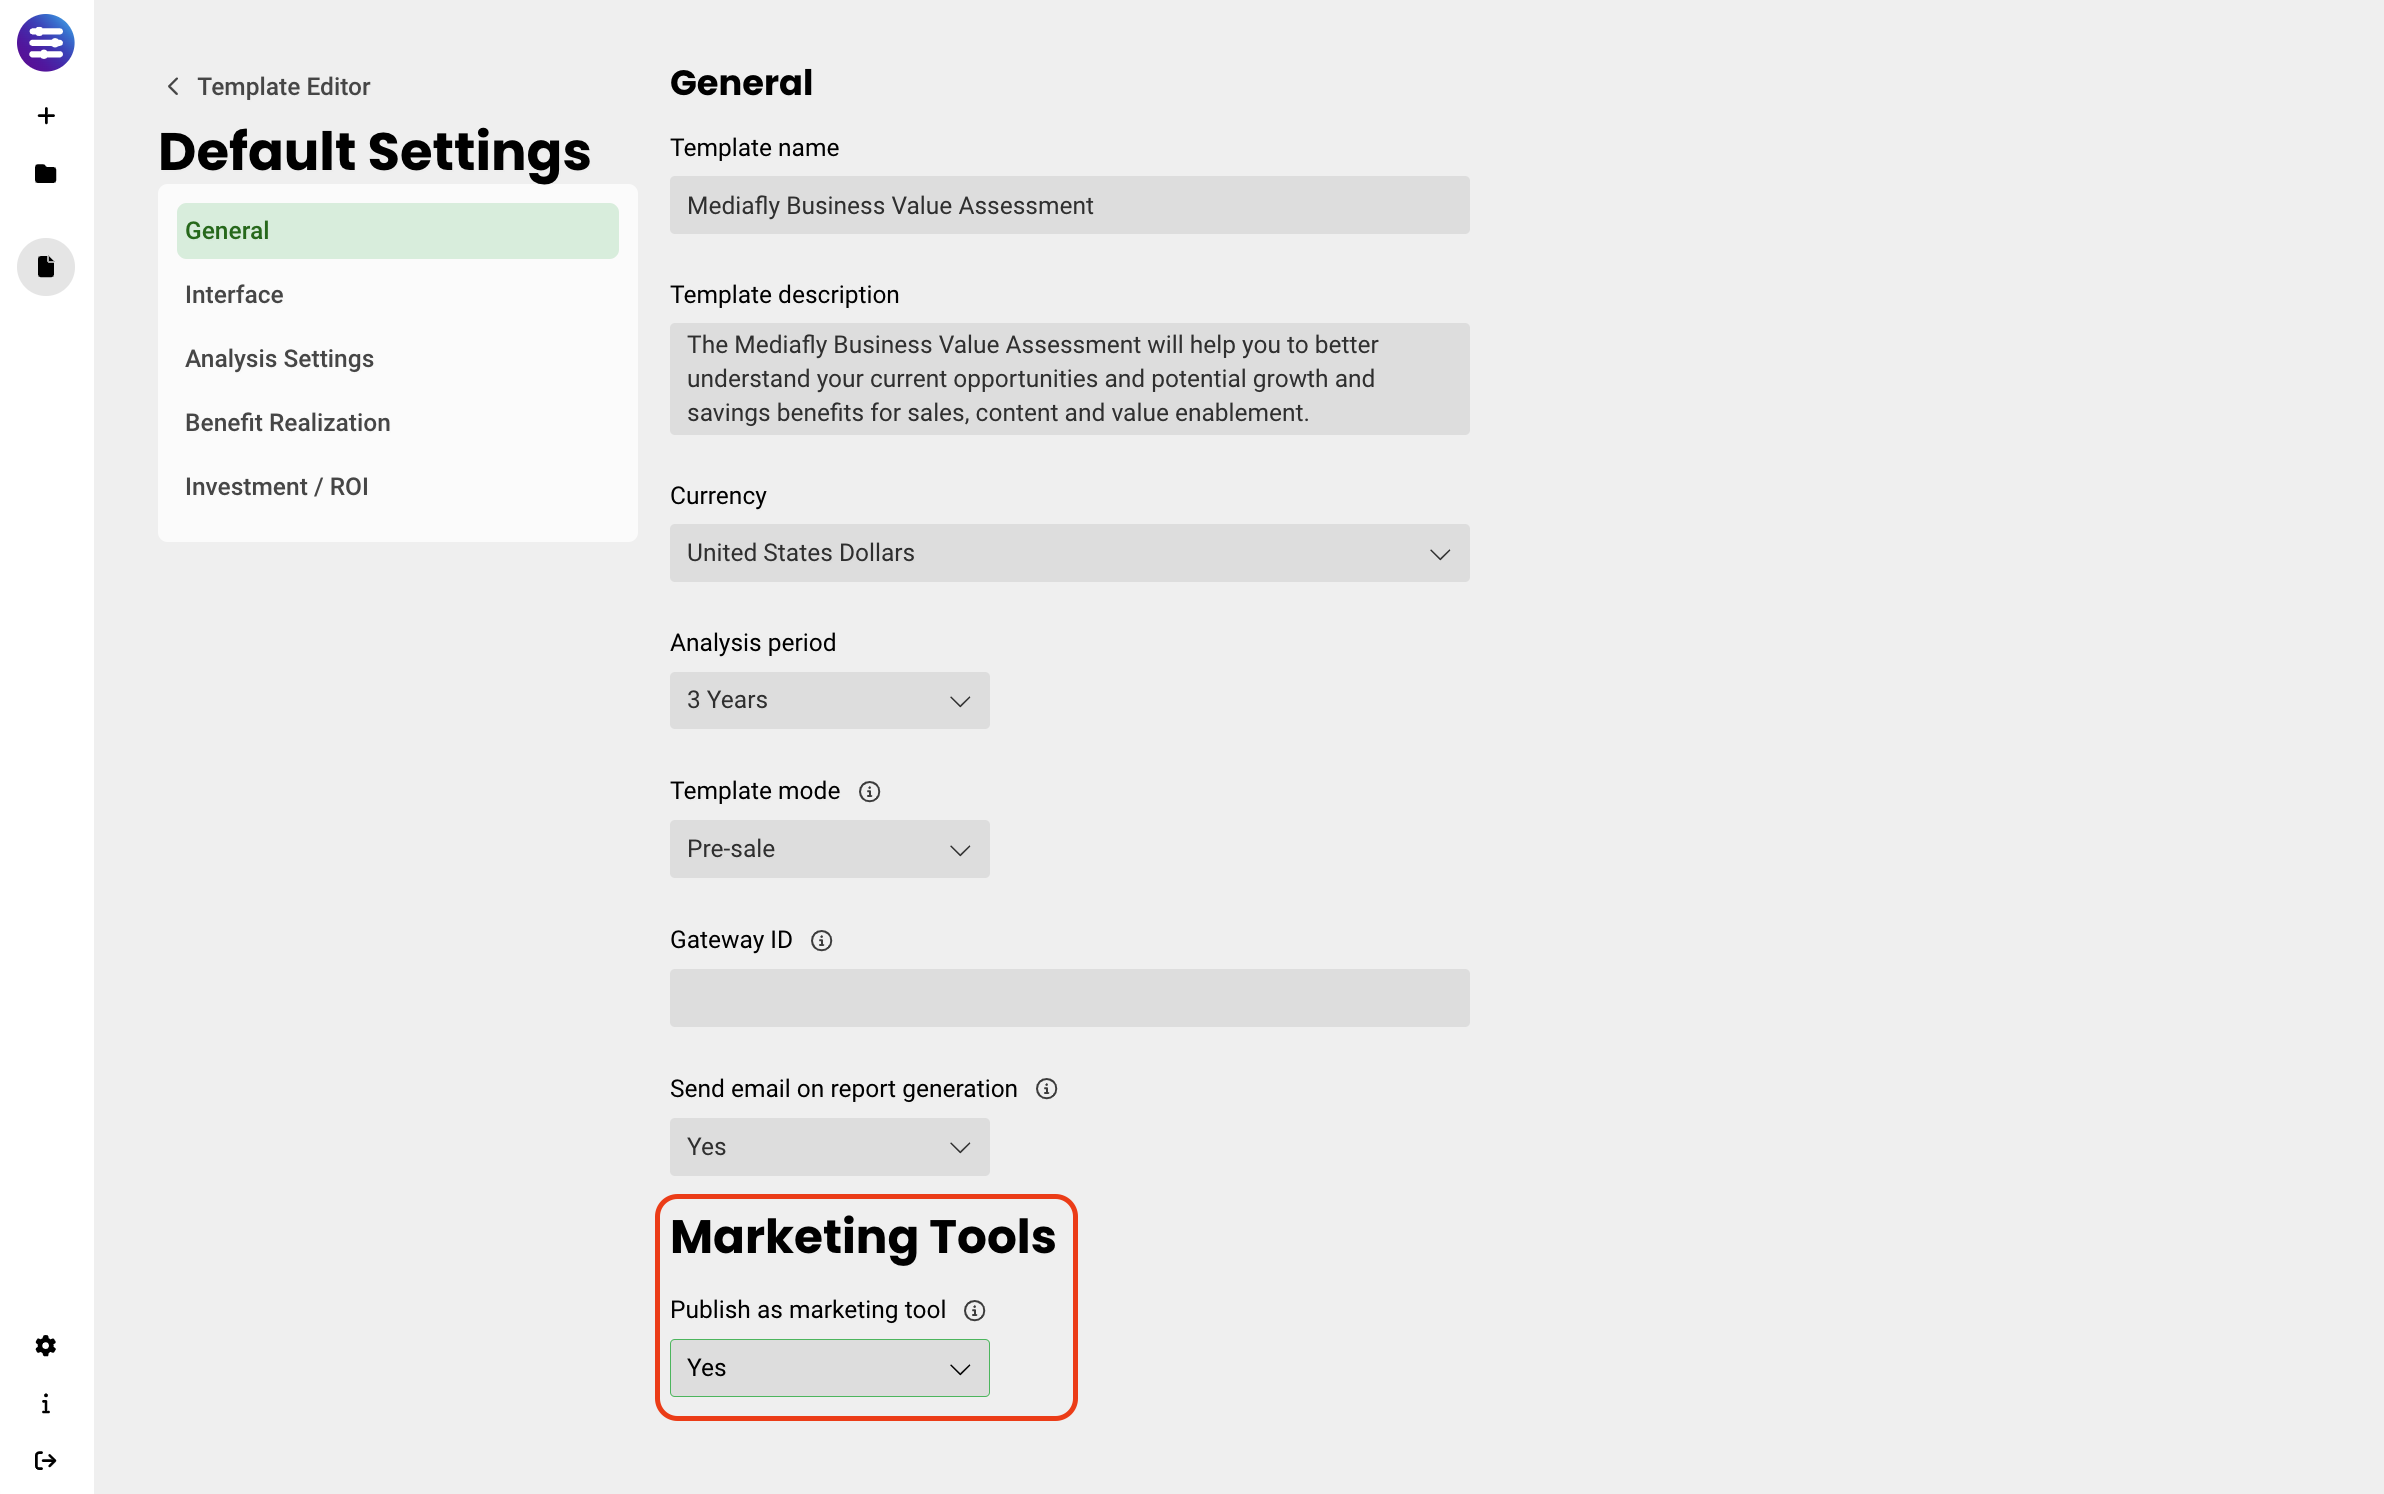
- In Tool Builder > Default Settings > General, under Publish as a Marketing Tool, change the value to Yes. Under Public URL path, set the URL path that you would like for this tool
- Tap on the Publish Template to Library button in the upper right. This makes your tool publicly available
- To obtain the link to your completed tool, tap on the Public Link button at the top once you select your marketing template in the library. Copy this for use later
Marketing Automation Platform Setup
Prerequisites
- You must be an Administrator to be able to edit the Lead Capture form.
- Your MAP form must not use dependent form fields.
- Your tool is built with Value, not as a custom tool.
Create the Report URL field in HubspotGo to Settings > Properties
- Create a field to capture the report URL, perhaps named Report URL or something similar. Make this be a Single-line text field. Be sure to note the Internal Name, as you will need this when creating the form in Value
Create the form in Hubspot
- Go to Marketing > Lead Capture > Forms
- Tap on Create Form
- Choose Regular Form
- Continue through the form builder
- We suggest building off of a Registration Form
- Choose the fields that are relevant for you. Note that the fields you choose here will need to be matched when you create the connection in Tool Builder
- Be sure to add the Report URL field you created in the section above
- You can choose to send a Follow-Up Email if you wish
- Under Options, check the “Always create contact for new email address” box to ensure that newly entered email addresses result in a new form submission
-
You will need your HubSpot portal ID and the form’s form ID. To find these, open your form and look at the URL. It will look something like this:
https://app.hubspot.com/forms/AAAAAA/BBBBBBBB-BBBB-BBBB-a6e0-8ece8762890e/performance, where AAAAAA is the portal ID, and the second value is the form ID.
Configure the HubSpot form within your template
- Open your template and navigate to the hamburger (3-line) menu, and tap on Administration
- Within the Administration dialog, tap on Template Library. Find the template against which you want to connect to your lead generation form. Tap on it, and choose the Lead Capture Form action > Create Form (or, if the form already exists, Edit Form)
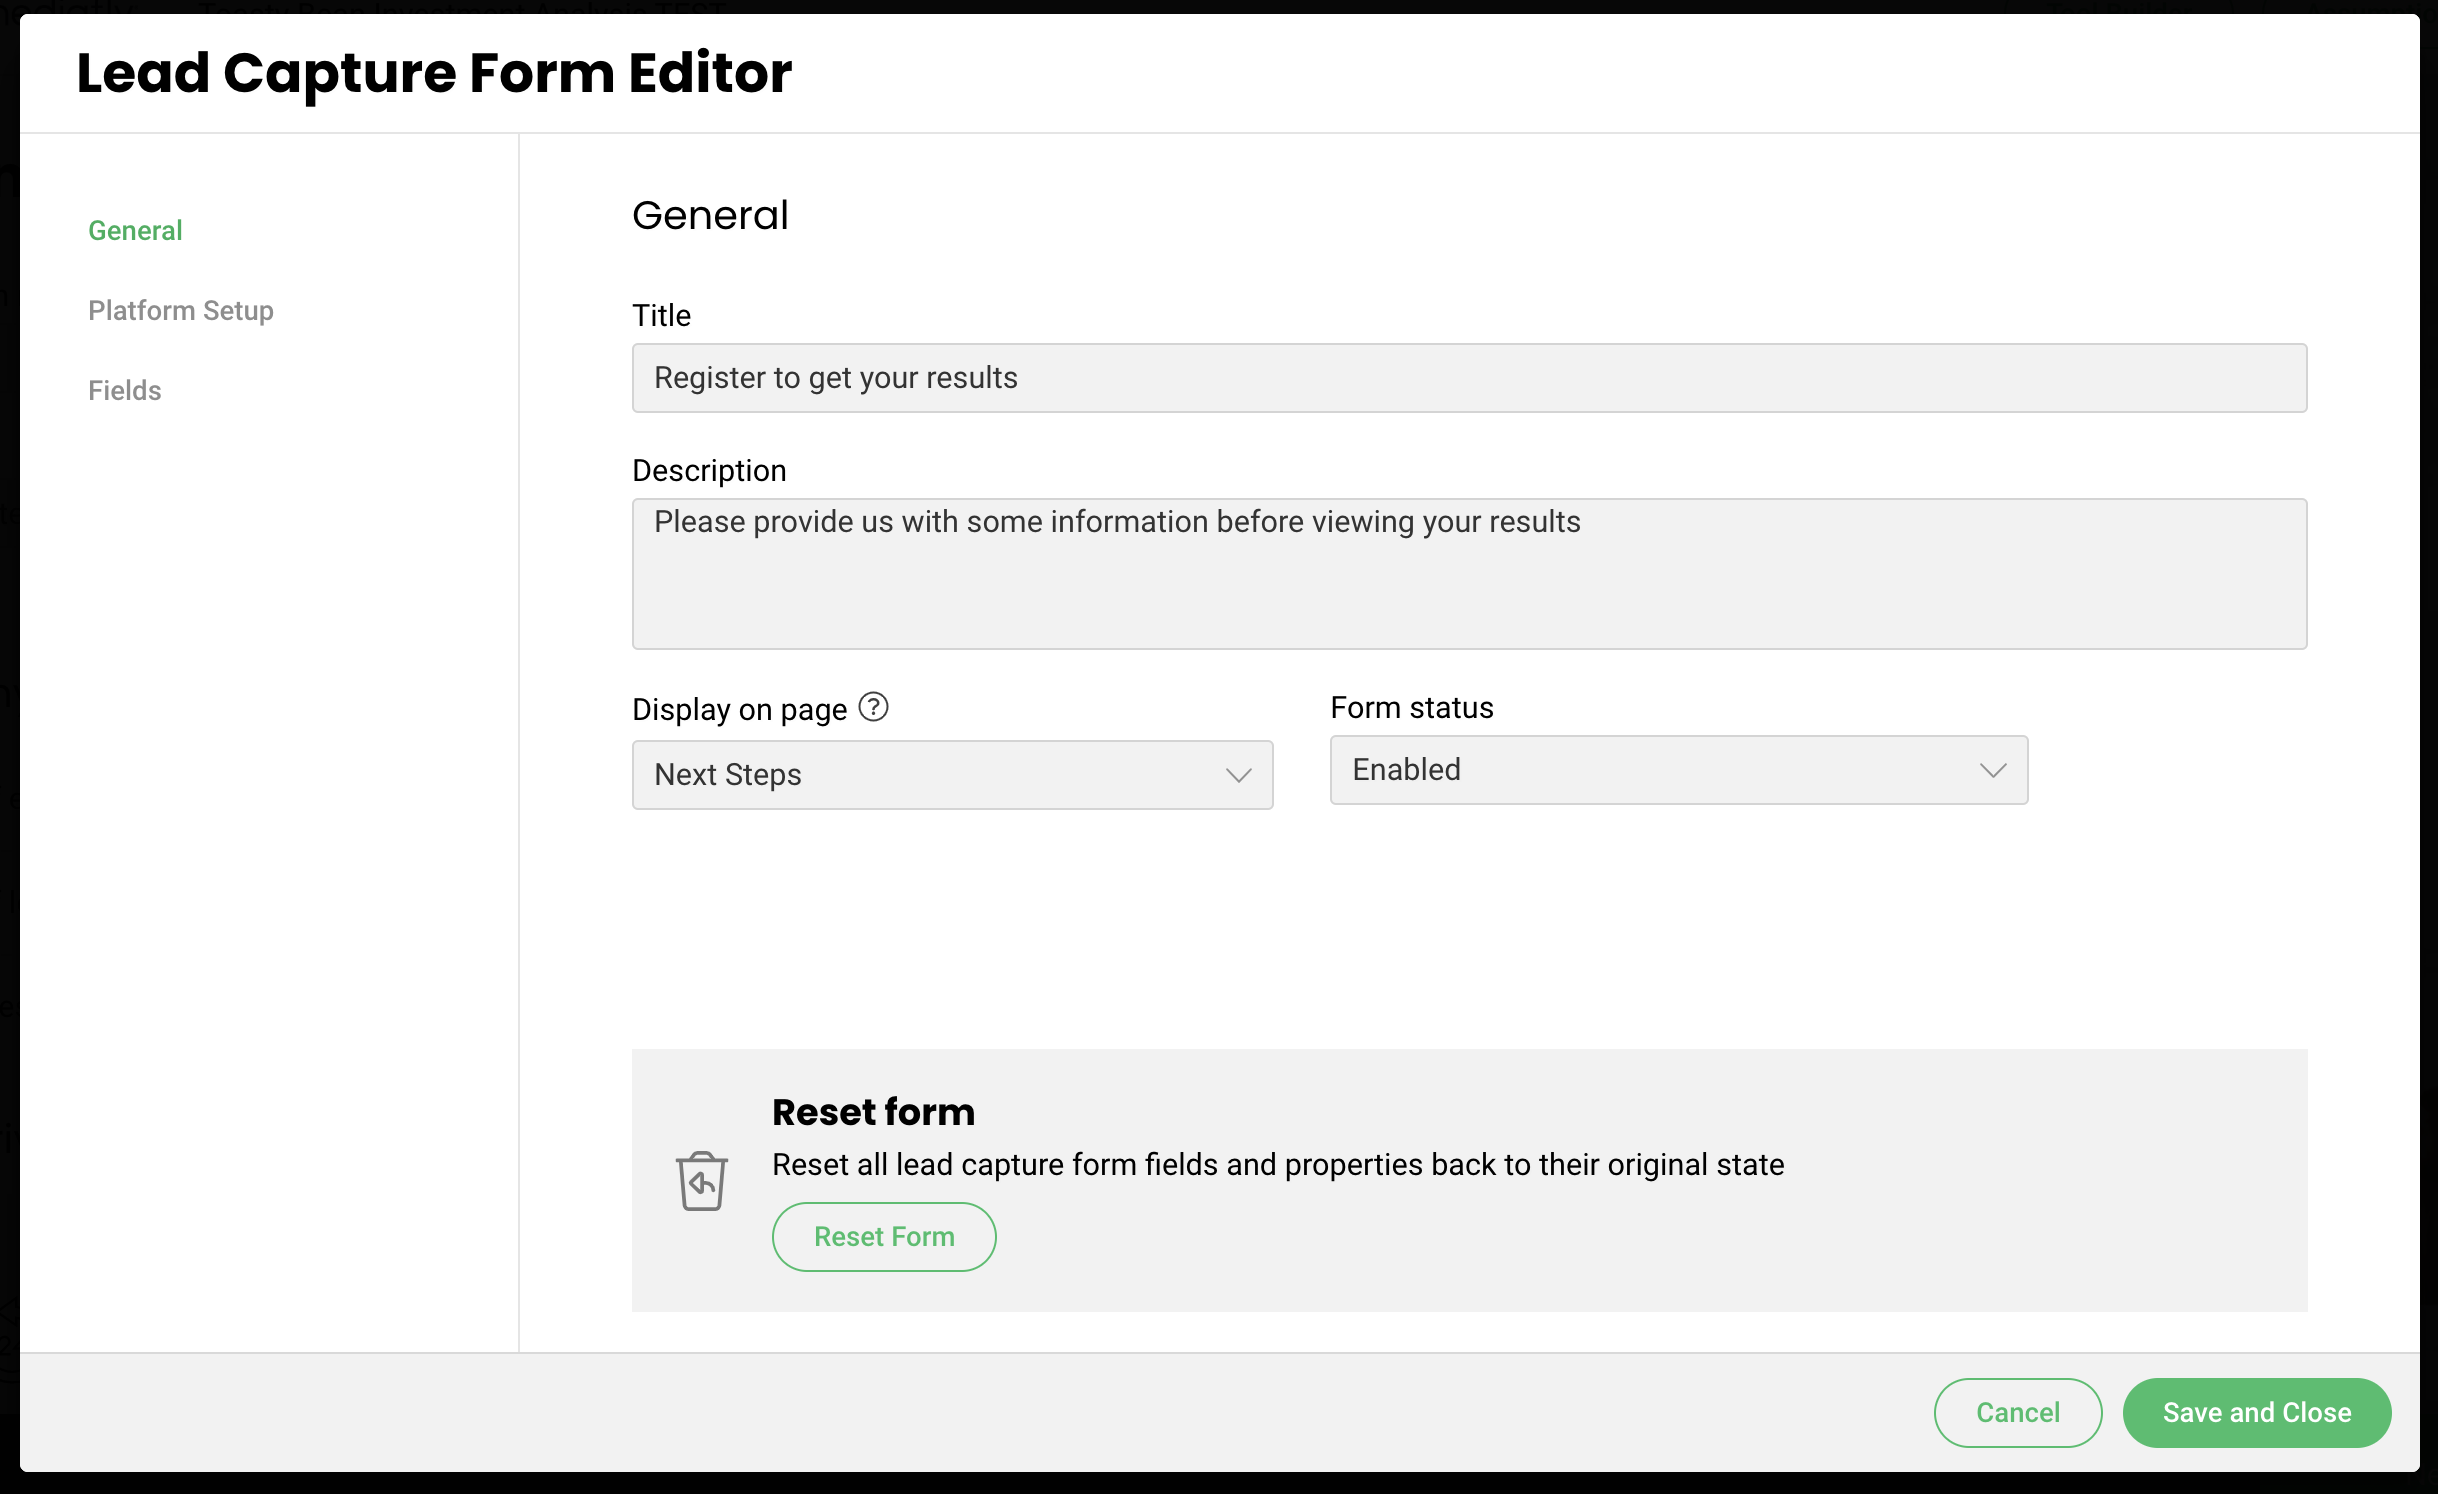
- Set the Title and Description of the form. On Display on page, pick where in the flow the lead capture form should appear
- Under Form Status, choose either Enabled or Disabled
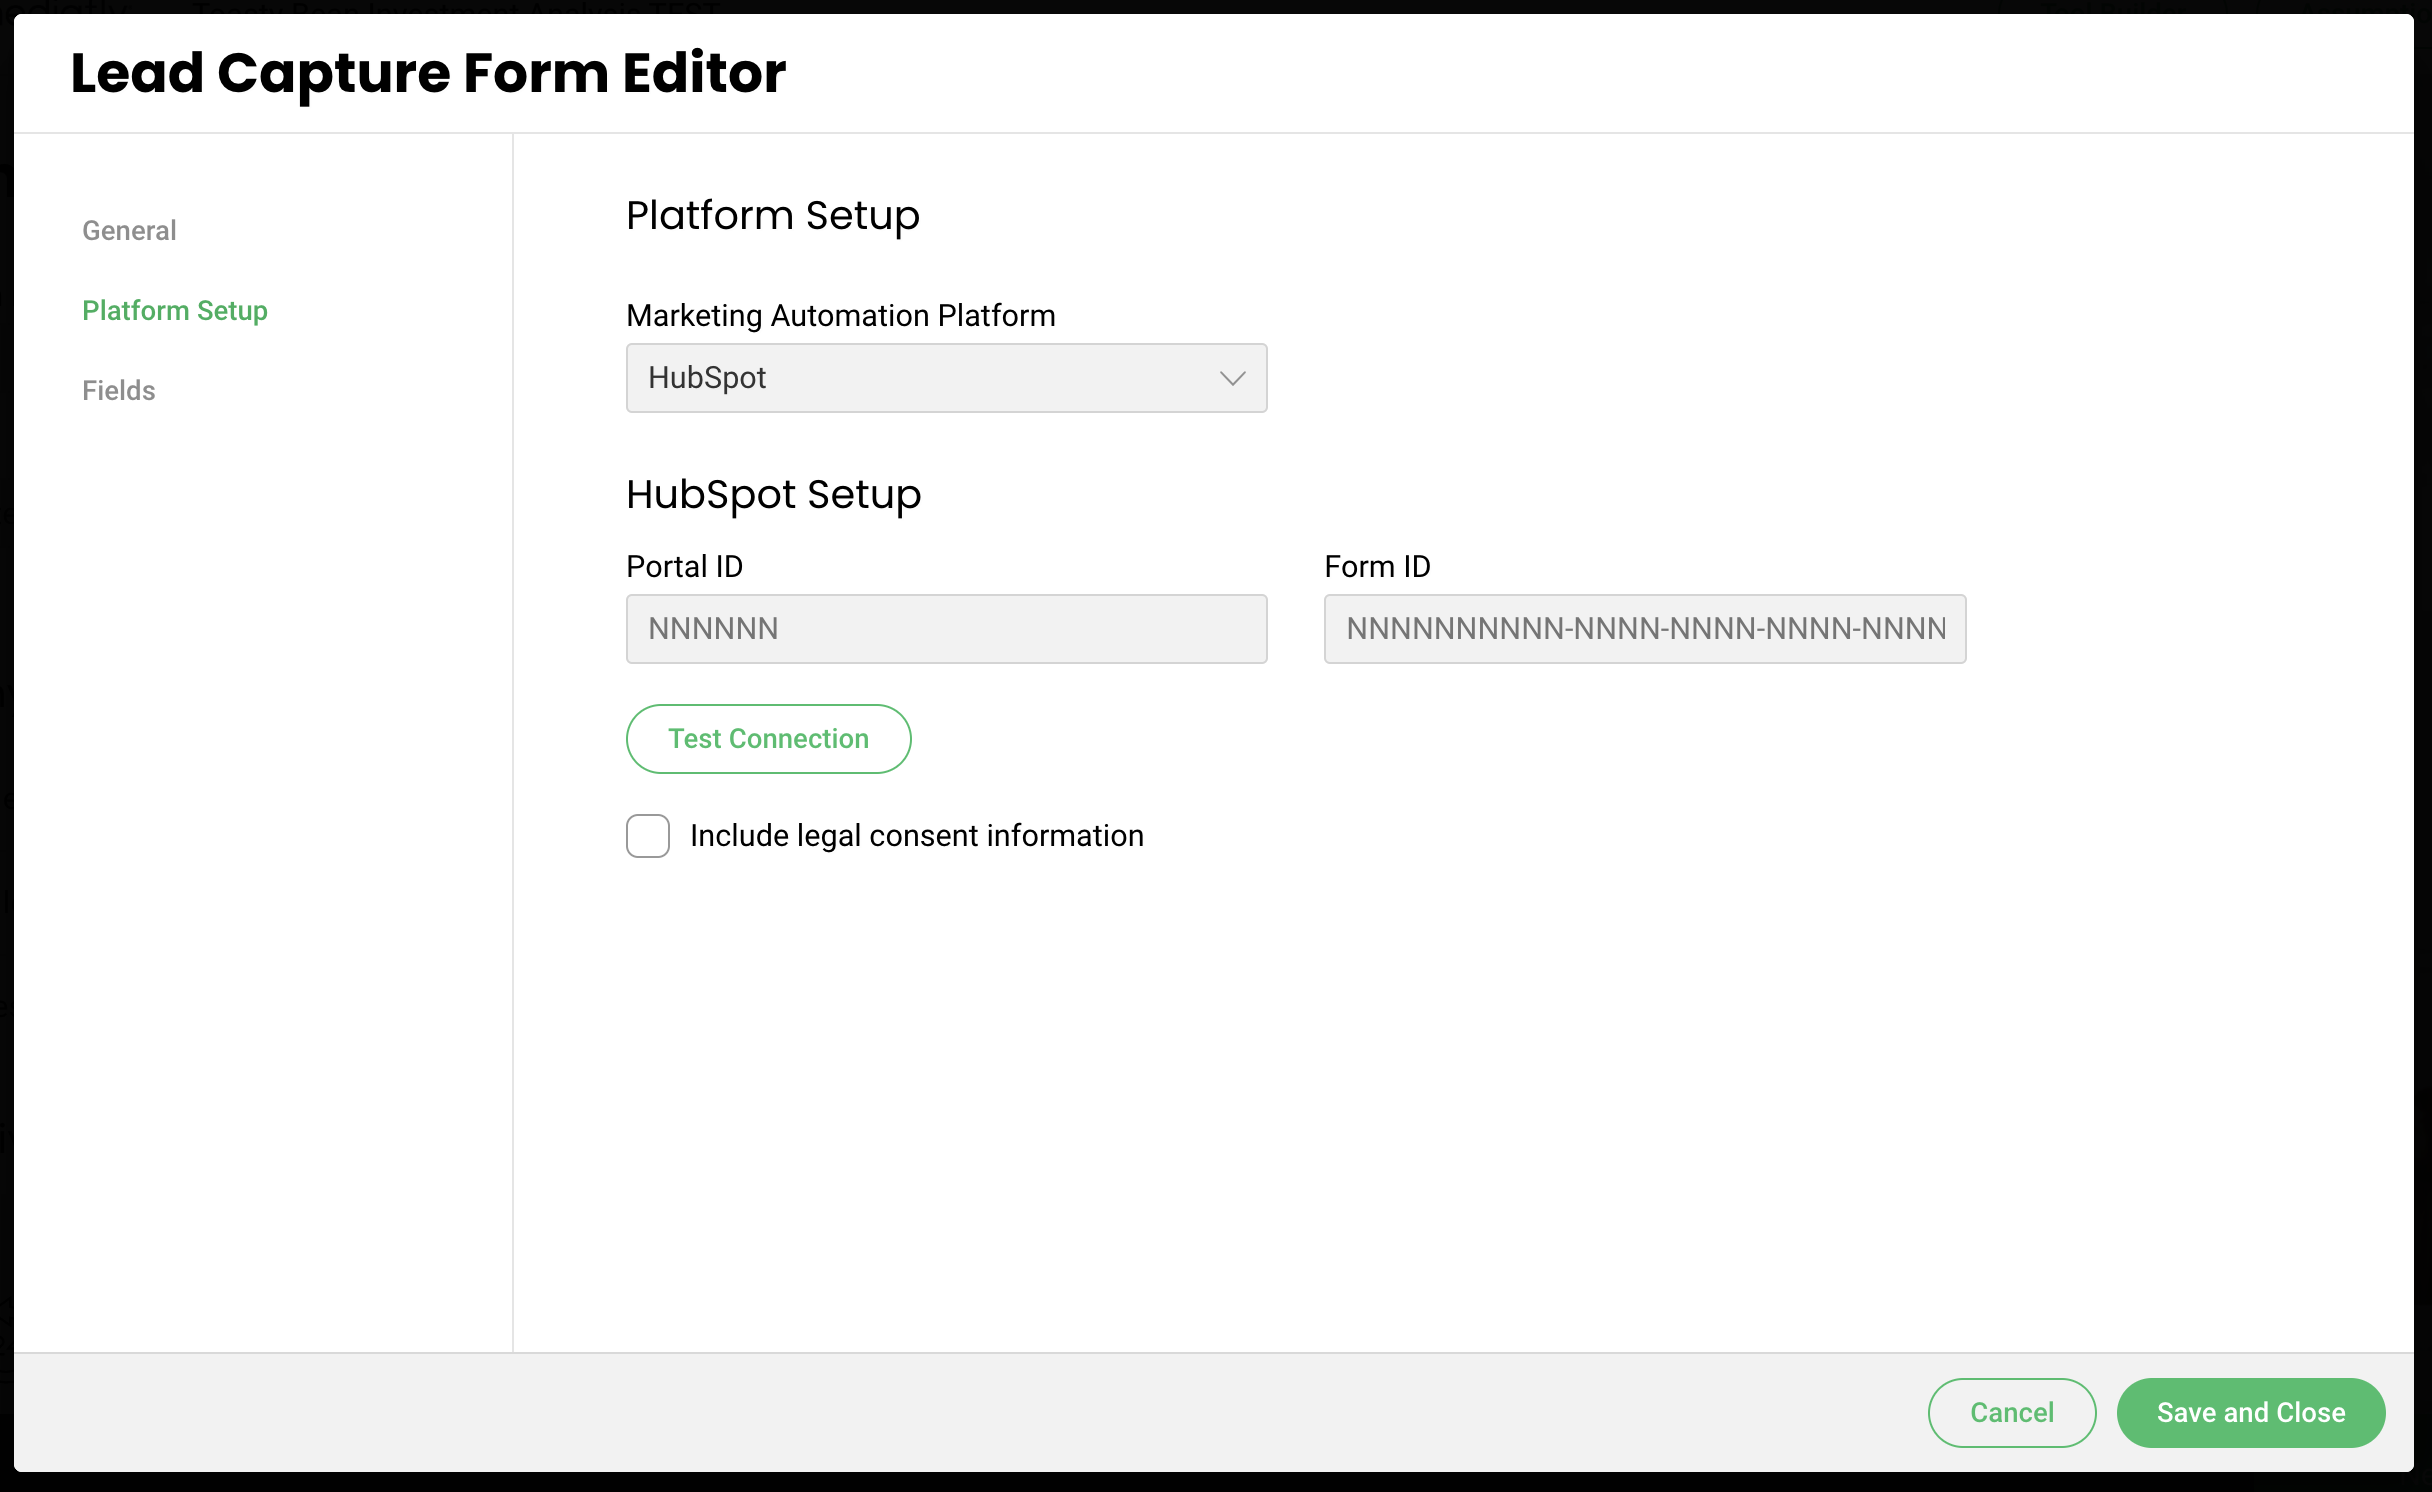
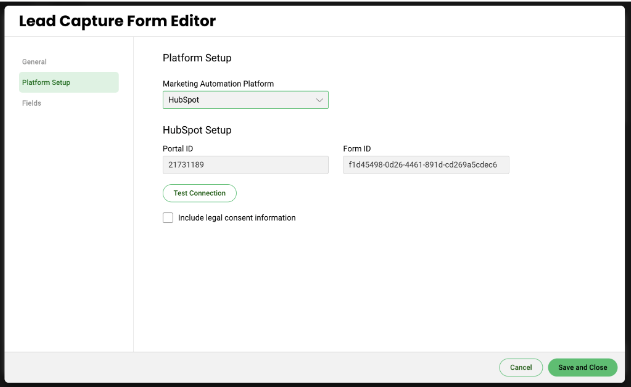
- Switch to the Platform Setup page and choose HubSpot
- Enter the Portal ID and Form ID
- If your HubSpot form has the GDPR Consent Checkbox(es) or Legitimate Interest checked, check the Mediafly Include legal consent information checkbox
- If your HubSpot form has Consent Checkbox or Consent Checkboxes checked, choose Consent to Process in Mediafly
- If your HubSpot form has Legitimate Interest checked, choose Legitimate Interest in Mediafly
Consent Communication: you will need to open/preview the HubSpot form that you created into a separate window or browser tab, and use Web Developer Tools to inspect the checkbox element, since HubSpot does not list these values anywhere in their user interface. When you do so, you will see that the label or input box looks like this:
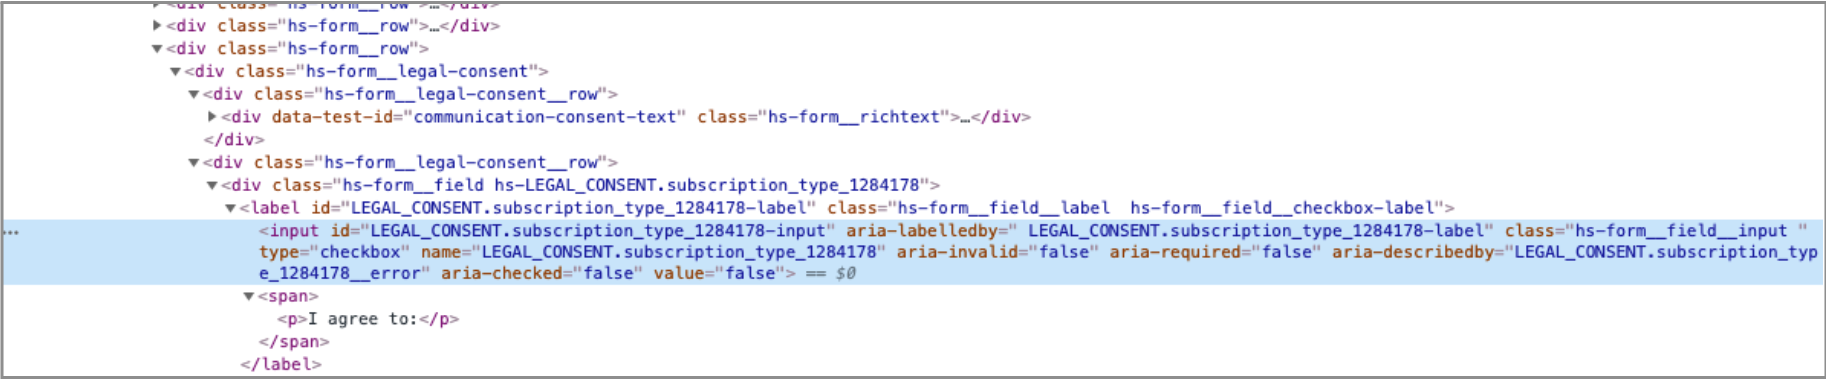
You’ll notice that (in this case) the field has this as an ID: LEGAL_CONSENT.subscription_type_1284178-input . In this case, the subscription ID you need to use is 1284178. So, back in the Lead Capture Form Editor, under Consent Communication, tap on Add Communication. Enter Text that you want to see (e.g. I agree to the Terms of Use, Privacy Policy, and GDPR Policy), and enter Subscription Type ID of 1284178.
-
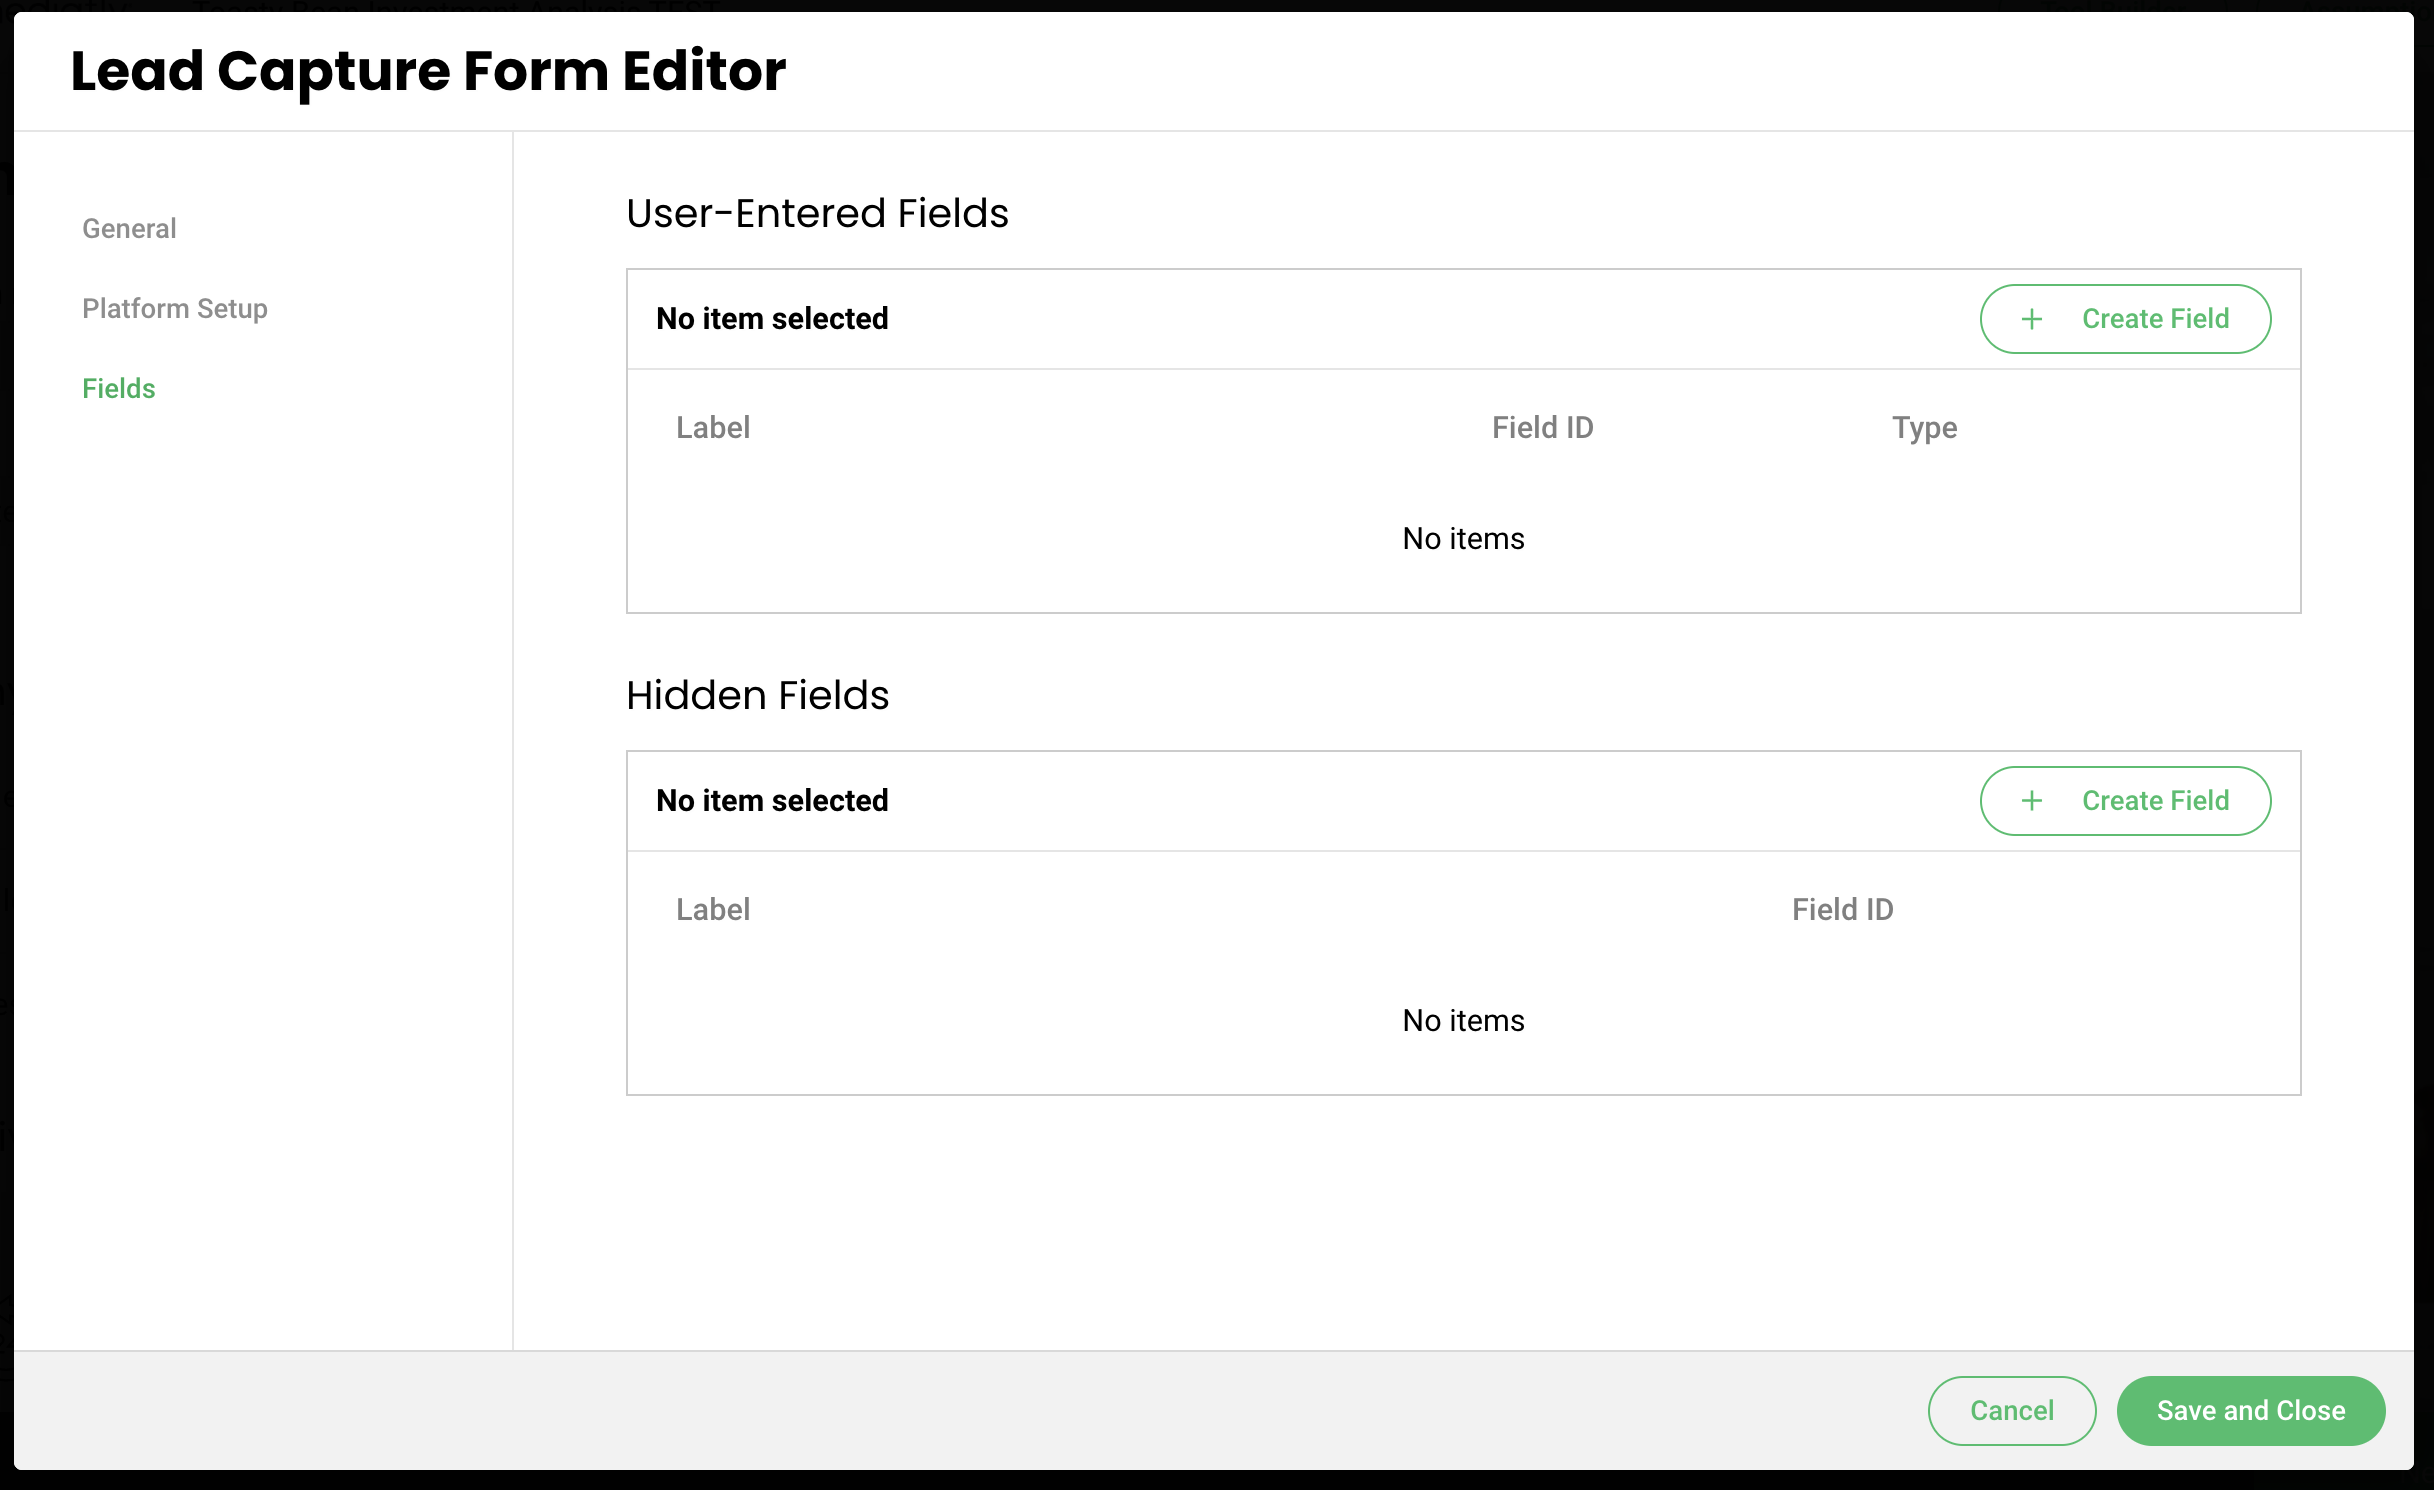
Next, you will need to switch to the Fields page and enter each User Field (e.g. email address, name)
- Label: what you want the field to say in your ValueStory tool
- Create the field, and tap on the Field Type. Fill out the Field Properties, as follows:
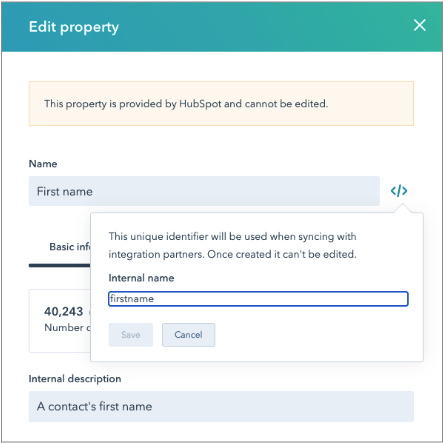
MAP Field ID: the “internal name” of the field as found in HubSpot. You can find this by looking up the property in HubSpot, then clicking on the </> action to show the internal name. For example, this is what First Name looks like in HubSpot:
Be sure to create the Report URL field you created in HubSpot and added to your form above as well.
Prerequisites
- Your Mediafly tool is built with Value, not as a custom tool.
- You must be an Administrator to be able to edit the Lead Capture form.
- You must have sufficient rights within Marketo.
- Your Marketo form must not have Progressive Profiling.
Create the form in Marketo
- Go to Design Studio > Forms, and create your form
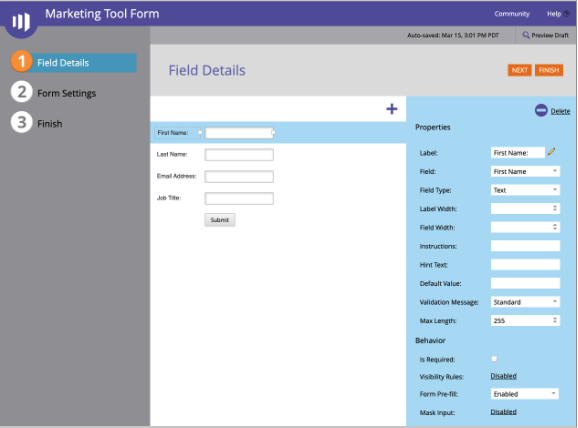
- Be sure to add in the fields that are relevant for your use case. A sample form may look like this:
Finish and Approve the form
-
You will need to collect several pieces of data to connect your ValueStory Marketing Tool to this form.
- First, you will need information about your Marketo instance and your form. When viewing the details of your form, go to Form Actions > Embed Code. This will show you a dialog like this:
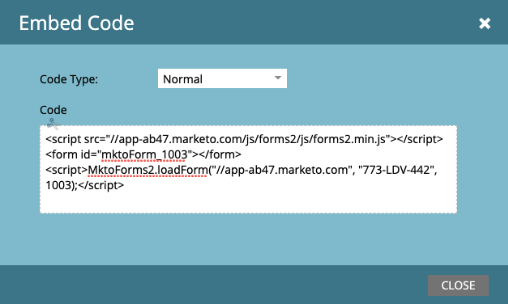
The values you need are:
- Base URL. This is the main part of the URL of your Marketo instance, including the //. In the example, it is //app-ab47.marketo.com
- Munchkin ID (or, Munchkin Account ID): In the example, it is 773-LDV-442. You can also find this in Admin > Integration > Munchkin
- Form ID: The ID for this form. In the example, it is 1003
- Next, you will need the IDs of the specific fields themselves. Go to Admin > Database Management > Field Management. Then, for each of the fields in your form:
- Search for the field name in the right hand side list, and select it
In the center panel, look for API Name. An example might be FirstName or Email. You will use API Name later, when connecting your Tool Builder form fields to Marketo fields
Configure the Marketo form within your template
- Open your template and navigate to the hamburger (3-line) menu, and tap on Administration
- Within the Administration dialog, tap on Template Library. Find the template against which you want to connect to your lead generation form. Tap on it, and choose the Lead Capture Form action > Create Form (or, if it has already been created, Edit Form)
- Set the Title and Description of the form. On Display on page, pick where in the flow the lead capture form should appear
- Under Form Status, choose either Enabled or Disabled
- Switch to Platform Setup and choose Marketo
- Enter the Base URL, Munchkin ID, and Form ID. It may look something like this:
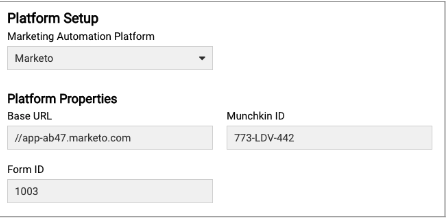
-
Switch to the Fields page and enter each User Field (e.g. email address, name)
- Label: what you want the field to say in your ValueStory tool
- MAP Field ID: the API Name of the field that you pulled from Database > Field Management in Marketo above. E.g. FirstName or Email
- Create the field, and tap on the Field Type. Fill out the Field Properties, as follows:
- Tap Save and Close, and your form is ready
Configure the Pardot form within your template
- Open your template and navigate to the hamburger (3-line) menu, and tap on Administration
- Within the Administration dialog, tap on Template Library. Find the template against which you want to connect to your lead generation form. Tap on it, and choose the Lead Capture Form action > Create Form (or, if it has already been created, Edit Form)
- Set the Title and Description of the form. On Display on page, pick where in the flow the lead capture form should appear
- Under Form Status, choose either Enabled or Disabled
- Switch to Platform Setup and choose Pardot
- Enter the Portal ID and Form ID. It may look something like this:
-
Switch to the Fields page and enter each User Field (e.g. email address, name)
- Label: what you want the field to say in your ValueStory tool
- MAP Field ID: the API Name of the field that you pulled from Database > Field Management in Pardot above. E.g. FirstName or Email
- Create the field, and tap on the Field Type. Fill out the Field Properties, as follows:
- Tap Save and Close, and your form is ready
- Please reach out to the Mediafly team for details
Replies have been locked on this page!